
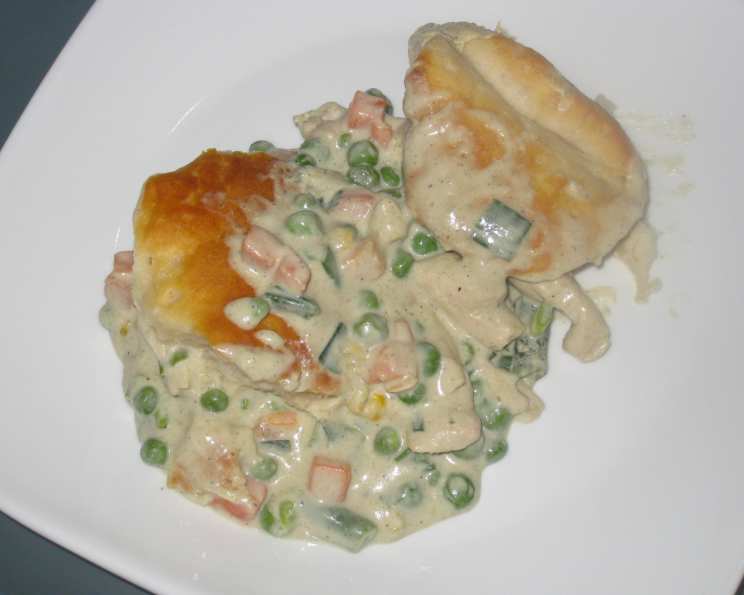
Low-Fat Chicken Pot Pie: Comfort Food, Reimagined
Chicken pot pie. Just the words conjure up images of cozy evenings, the warmth of the oven radiating through the kitchen, and that first, satisfying bite of flaky crust giving way to a creamy, savory filling. I remember my grandmother making individual pot pies for us grandkids, each one a perfect little sphere of comfort. She always let us help crimp the edges, our little fingers leaving their own unique marks on each pie. Though her version was undoubtedly rich, decadent, and full of butter, I’ve always cherished the memory, and that feeling of home is what I try to recreate with this lighter, healthier version.
Recipe Overview
- Prep Time: 15 minutes
- Cook Time: 20 minutes
- Total Time: 35 minutes
- Servings: 5
- Yield: 5 ramekins
- Dietary Type: Low-Fat
Ingredients
- 1 cup fat-free half-and-half
- 1 cup fat-free chicken broth
- 3 tablespoons all-purpose flour
- 1 teaspoon poultry seasoning
- 2 cups skinless chicken breasts, roasted, cut into bite-size pieces
- 1 (10 ounce) package frozen mixed vegetables, thawed
- 4 scallions, cut into 1/4-inch-thick rounds
- 1 teaspoon kosher salt
- 1⁄4 teaspoon fresh ground pepper
- Cooking spray
- 1 (7 1/2 ounce) can refrigerated biscuits
Equipment Needed
- Medium saucepan
- Whisk
- Measuring cups and spoons
- Cutting board
- Knife
- 5 (6 oz) ramekins or one pie dish
- Oven
- Lightly floured surface
Instructions
-
Preheat your oven to 425°F (220°C). Make sure the oven rack is in the center position for even baking.
-
In a medium saucepan, whisk together the fat-free half-and-half, fat-free chicken broth, all-purpose flour, and poultry seasoning. Ensure there are no lumps of flour remaining for a smooth sauce.
-
Bring the mixture to a boil over medium heat, then reduce the heat to low and simmer, whisking frequently, for 4 minutes, or until the sauce has thickened. Whisking constantly prevents the sauce from sticking to the bottom of the pan and burning.
-
Stir in the cooked chicken, thawed mixed vegetables, scallions, kosher salt, and fresh ground pepper. Make sure everything is well combined so each bite is packed with flavor.
-
Cover the saucepan and keep the chicken mixture warm while preparing the biscuit topping. This will prevent the filling from cooling down too much before baking.
-
Lightly coat 5 (6 oz) ramekins or one pie dish with cooking spray. This will prevent the pot pies from sticking and make them easier to serve. If using a pie dish, choose one that’s approximately 9 inches in diameter.
-
On a lightly floured surface, overlap 2 biscuits (if using the whole dish, use all the biscuits) and press the edges together to form a larger circle. This step is crucial for creating a sufficient topping. Roll the combined biscuits into a 4-inch round (they don’t have to be perfect).
-
Repeat the process with the remaining biscuits until you have enough rounds to cover the ramekins or the entire pie dish. Don’t worry too much about perfect circles; a rustic look is perfectly fine.
-
Fill the prepared ramekins or pie dish with the warm chicken mixture. Divide the filling evenly among the ramekins.
-
Top each ramekin or the pie dish with a biscuit dough round, pressing the dough onto the side of the ramekin to adhere. This will help create a seal and prevent the filling from bubbling over too much.
-
Cut a 1/2-inch-round vent hole in the middle of each biscuit dough topping. This allows steam to escape during baking, preventing the crust from becoming soggy.
-
Bake for 12 minutes, or until the biscuits are golden brown and the filling is bubbly. Keep a close eye on the pot pies during baking to prevent the crust from burning. Baking times may vary slightly depending on your oven.
-
Let the pot pies stand for 5 minutes before serving. This allows the filling to set slightly and prevents burning your mouth.
Expert Tips & Tricks
- Boosting Flavor: For a deeper flavor, use homemade chicken broth instead of store-bought. You can also add a splash of dry sherry to the sauce for extra richness.
- Crust Enhancement: Brush the biscuit tops with a little melted butter (or a butter substitute for a truly low-fat version) before baking for a richer color and flavor. A light egg wash also works well.
- Make-Ahead Tip: Prepare the chicken filling up to 2 days in advance and store it in the refrigerator. Assemble the pot pies just before baking.
- Vegetable Variations: Feel free to substitute the mixed vegetables with your favorites. Diced carrots, celery, peas, and green beans are all excellent choices.
- Thickening Troubles: If your sauce isn’t thickening sufficiently, whisk a teaspoon of cornstarch with a tablespoon of cold water and add it to the simmering sauce. Stir until thickened.
Serving & Storage Suggestions
Serve the low-fat chicken pot pies warm, straight from the oven. A sprinkle of fresh herbs, such as parsley or thyme, adds a lovely touch of color and flavor. For a complete meal, pair the pot pies with a simple green salad or a side of steamed vegetables.
Leftovers can be stored in the refrigerator for up to 3 days. To reheat, cover the pot pies with foil and bake in a preheated oven at 350°F (175°C) until heated through, about 15-20 minutes. You can also reheat them in the microwave, but the crust may become slightly softer. Freezing is not recommended as the biscuit topping may become soggy upon thawing.
Nutritional Information
| Nutrient | Amount per Serving | % Daily Value |
|---|---|---|
| Calories | 241.9 kcal | N/A |
| Calories from Fat | 68 g | 28% |
| Total Fat | 7.6 g | 11% |
| Saturated Fat | 2.1 g | 10% |
| Cholesterol | 2.9 mg | 0% |
| Sodium | 1096.2 mg | 45% |
| Total Carbohydrate | 37.3 g | 12% |
| Dietary Fiber | 3.4 g | 13% |
| Sugars | 6.2 g | 24% |
| Protein | 7.5 g | 14% |
Note: Nutritional information is an estimate and may vary based on specific ingredients and preparation methods.
Variations & Substitutions
- Gluten-Free: Use gluten-free all-purpose flour and gluten-free biscuits for a gluten-free version.
- Dairy-Free: Substitute the fat-free half-and-half with unsweetened almond milk or cashew cream. Ensure the biscuits are also dairy-free.
- Vegetarian: Replace the chicken with diced mushrooms or firm tofu for a vegetarian option.
- Spicy Kick: Add a pinch of red pepper flakes or a dash of hot sauce to the filling for a spicy kick.
FAQs (Frequently Asked Questions)
Q: Can I use a different type of chicken?
A: Yes, you can use leftover rotisserie chicken, shredded chicken thighs, or even canned chicken in a pinch. Just be sure to remove the skin and bones from rotisserie or chicken thighs and cut them into bite-sized pieces.
Q: My biscuits are browning too quickly. What can I do?
A: If the biscuits are browning too quickly, tent the pot pies with aluminum foil during the last few minutes of baking. This will prevent them from burning.
Q: Can I add potatoes to the filling?
A: Absolutely! Diced potatoes add a hearty touch to the filling. Just be sure to cook them until tender before adding them to the saucepan.
Q: How can I make the filling even creamier?
A: For an even creamier filling, add a tablespoon of cream cheese or Greek yogurt to the sauce at the end of cooking. Stir until smooth.
Q: What can I serve with these pot pies?
A: These pot pies are delicious served with a simple green salad, steamed vegetables, or a side of cranberry sauce.
Final Thoughts
This low-fat chicken pot pie is a wonderful way to enjoy a classic comfort food without the guilt. It’s perfect for a weeknight dinner, a cozy weekend meal, or even a potluck gathering. Feel free to customize the recipe to your liking and experiment with different vegetables, herbs, and spices. I encourage you to try this recipe and share your feedback – cooking is all about experimentation and making a dish your own. So, gather your ingredients, preheat your oven, and get ready to experience the warmth and comfort of a homemade chicken pot pie!