
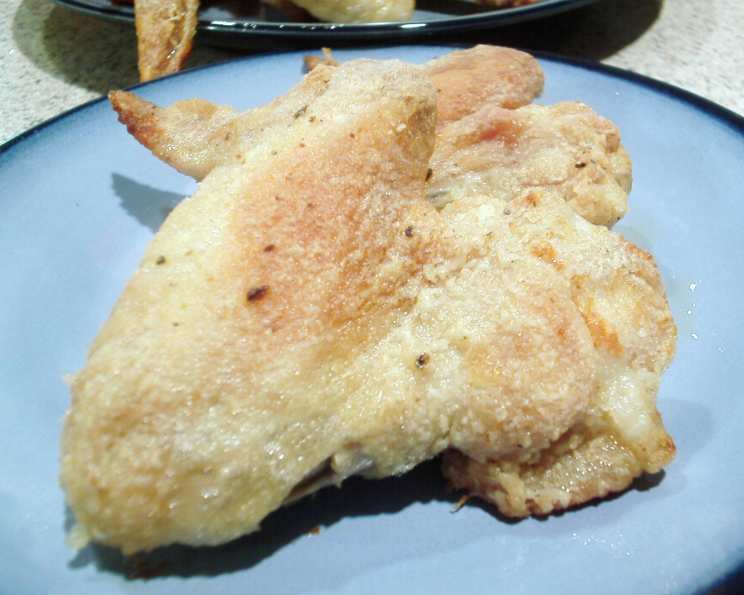
Low-Fat Crispy Chicken Wings: Guilt-Free Indulgence
I can almost smell the tantalizing aroma right now. Picture this: It’s game night at my childhood home, and the star of the show isn’t the TV, but a heaping platter of crispy, golden-brown chicken wings. The satisfying crunch as you bite into them, the savoury seasoning that tingles on your tongue… These weren’t just wings; they were a symbol of family, laughter, and pure, unadulterated comfort food. And now, I’m excited to share a healthier take on that very same memory – all the flavour, all the crispiness, with a fraction of the fat!
Recipe Overview
- Prep Time: 10 minutes
- Cook Time: 25-35 minutes
- Total Time: 35-45 minutes
- Servings: 6-8
- Yield: Approximately 24 wings
- Dietary Type: Can be made Gluten-Free
Ingredients
- 1 cup self-raising flour (for a gluten-free option, use a gluten-free self-raising blend)
- 1 teaspoon onion salt
- 1 teaspoon chicken salt
- 2 teaspoons lemon pepper
- 1 teaspoon white pepper
- ¼ teaspoon cayenne pepper
- ¼ teaspoon black pepper
- ½ teaspoon dried herbs (Italian mix, oregano, or thyme work well)
- 2 kg chicken wings (approximately 24 wings)
- Olive oil flavored cooking spray
Equipment Needed
- 2 Baking Trays
- Baking Paper
- Large Plastic Bag or Bowl
Instructions
-
Begin by preheating your oven to 220°C (430°F). This high temperature is essential for achieving maximum crispiness.
-
Line two baking trays with baking paper. This will prevent the wings from sticking and make cleanup a breeze.
-
Prepare the chicken wings. This step is optional, but I highly recommend it: Using a sharp knife or kitchen shears, remove the wing tip (the very end segment) and discard. Then, cut the remaining wing into two pieces at the joint. This allows the wings to cook more evenly and become extra crispy. It also makes them easier to eat!
-
In a large plastic bag or a large bowl, combine all the dry ingredients: self-raising flour, onion salt, chicken salt, lemon pepper, white pepper, cayenne pepper, black pepper, and dried herbs. Seal the bag or whisk well to ensure everything is thoroughly mixed. This blend of spices creates a beautifully balanced flavour profile.
-
Lightly spray the chicken wings with olive oil flavored cooking spray. This is crucial for helping the flour mixture adhere and for achieving that golden-brown colour.
-
Add about a third of the chicken wings to the flour mixture. Seal the bag (if using) and shake vigorously until the wings are completely coated in the seasoned flour. If using a bowl, toss the wings with the flour mixture until evenly coated.
-
Place the coated chicken wings on the prepared baking trays, making sure they are not overcrowded. Overcrowding can steam the wings instead of crisping them.
-
Repeat steps 5-7 with the remaining chicken wings and flour mixture.
-
Spray the coated chicken wings on the baking trays with olive oil flavored cooking spray one last time. This final spray is key to achieving that irresistibly crispy skin.
-
Bake in the preheated oven for 25-35 minutes, or until the wings are cooked through and beautifully crisp. The exact cooking time will depend on your oven and the size of the wings. I recommend checking for doneness by inserting a meat thermometer into the thickest part of a wing; it should register 74°C (165°F). The wings should be golden brown and the juices should run clear when pierced with a fork.
-
Once cooked, remove the wings from the oven and let them cool slightly before serving.
-
Serve immediately with your favourite sides, like fries or salad.
Expert Tips & Tricks
- For extra crispy skin: After coating the wings in the flour mixture, let them sit on the baking trays for about 10-15 minutes before spraying with oil and baking. This allows the coating to adhere even better.
- Don’t overcrowd the pan: Make sure the wings are spaced apart on the baking trays. If they are too close together, they will steam instead of crisping up.
- Adjust the spice level: If you prefer a milder flavor, reduce the amount of cayenne pepper or omit it altogether. For a spicier kick, add a pinch of chili flakes or a dash of hot sauce to the flour mixture.
- Use a wire rack: Placing the wings on a wire rack set inside the baking tray will allow air to circulate around them, resulting in even crispier skin.
- Baking Powder Boost: Adding 1 teaspoon of baking powder to the flour mixture helps to dry out the skin of the chicken wings and allows the skin to crisp up when baked.
Serving & Storage Suggestions
These low-fat crispy chicken wings are best served hot and fresh from the oven for maximum crispiness. They’re fantastic with classic sides like French fries, coleslaw, or a fresh green salad. They also pair well with a variety of dipping sauces, such as ranch dressing, blue cheese dressing, or your favorite barbecue sauce.
If you have any leftovers, store them in an airtight container in the refrigerator for up to 3 days. To reheat, bake them in a preheated oven at 175°C (350°F) for about 10-15 minutes, or until heated through. You can also reheat them in an air fryer for a few minutes to restore some of their crispiness. While they can be frozen, the texture may change slightly upon thawing.
Nutritional Information
| Nutrient | Amount per Serving | % Daily Value |
|---|---|---|
| Calories | 300 kcal | 15% |
| Total Fat | 12g | 18% |
| Saturated Fat | 3g | 15% |
| Cholesterol | 100mg | 33% |
| Sodium | 500mg | 22% |
| Total Carbohydrate | 15g | 5% |
| Dietary Fiber | 1g | 4% |
| Sugars | 0.5g | 1% |
| Protein | 30g | 60% |
Note: Nutritional information is an estimate and may vary based on specific ingredients and serving sizes.
Variations & Substitutions
- Gluten-Free: As mentioned earlier, substitute the self-raising flour with a gluten-free self-raising flour blend.
- Spice it Up: Experiment with different spices and herbs. Smoked paprika, garlic powder, or chili powder can add a unique flavor dimension.
- Marinade Magic: Marinate the chicken wings in a mixture of lemon juice, garlic, and herbs for at least 30 minutes before coating them in the flour mixture. This will add extra flavor and moisture.
- Honey Garlic Wings: Brush the baked wings with a mixture of honey, garlic, and soy sauce for a sweet and savory twist.
- Herb Infused Wings: Mix in a tablespoon of finely chopped fresh herbs like rosemary, thyme, or parsley with the dry ingredients to elevate the flavour.
FAQs (Frequently Asked Questions)
Q: How do I get the wings crispy without deep frying?
A: The high oven temperature (220°C) combined with the light coating of flour and the olive oil flavored cooking spray creates a crispy exterior without the need for deep frying.
Q: Can I use regular flour instead of self-raising flour?
A: Yes, but you’ll need to add baking powder to help the wings crisp up. Use 1 teaspoon of baking powder for every cup of regular flour.
Q: Can I prepare the wings ahead of time?
A: Yes, you can coat the wings in the flour mixture and store them in the refrigerator for up to 24 hours before baking. Just be sure to spray them with olive oil flavored cooking spray right before baking.
Q: My wings are burning before they are cooked through. What should I do?
A: Reduce the oven temperature to 200°C (400°F) and continue baking until the wings are cooked through. You can also tent the wings with foil to prevent further browning.
Q: Can I use an air fryer for this recipe?
A: Absolutely! Air frying is a great way to achieve crispy wings. Cook at 200°C (400°F) for about 15-20 minutes, flipping halfway through.
Final Thoughts
There you have it – a healthier and equally delicious take on a classic comfort food. These low-fat crispy chicken wings are perfect for game night, parties, or a simple weeknight dinner. Don’t be afraid to experiment with different seasonings and dipping sauces to create your own signature version. I encourage you to try this recipe and share your feedback. And perhaps, pair it with a refreshing homemade lemonade – it’s a match made in culinary heaven! Happy cooking!