
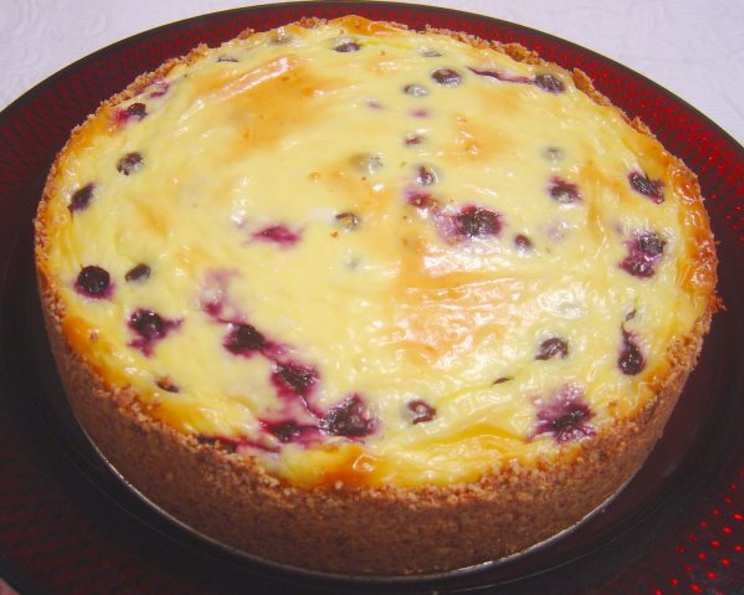
Low-Sugar Blueberry Cheesecake: A Guilt-Free Indulgence
The scent of blueberries baking always transports me back to my grandmother’s kitchen. She wasn’t one for overly sweet desserts, but she always managed to create magic with simple ingredients. I remember sneaking slices of her blueberry pie while it was still warm, the tartness of the berries perfectly balanced by a buttery crust. This low-sugar blueberry cheesecake is my attempt to capture that same feeling of wholesome indulgence, but with a modern, health-conscious twist. It’s a dessert you can feel good about sharing.
Recipe Overview
- Prep Time: 15 minutes
- Cook Time: 40 minutes
- Total Time: 55 minutes + 1 hour cooling
- Servings: 8
- Yield: 1 Cheesecake
- Dietary Type: Low-Sugar
Ingredients
- For the Crust:
- 2 cups finely ground almonds
- 1/4 cup oil (I prefer coconut or avocado oil)
- 1/2 teaspoon salt
- 4 tablespoons flour (almond or coconut flour work well for a gluten-free option)
- For the Filling:
- 3 (8 ounce) packages cream cheese, softened
- 3 eggs
- 2 cups blueberries (fresh or frozen, if frozen do not thaw)
- 1/2 cup sour cream (Greek yogurt is a great substitute)
- 16 packets stevia (or equivalent amount of your preferred low-sugar sweetener)
Equipment Needed
- Springform pan (9-inch is ideal)
- Mixing bowls
- Electric mixer (handheld or stand mixer)
- Measuring cups and spoons
- Spatula
Instructions
- Preheat your oven to 400 degrees Fahrenheit (200 degrees Celsius).
- Prepare the crust: In a medium mixing bowl, combine the finely ground almonds, oil, salt, and flour. Mix thoroughly until the ingredients are well incorporated and form a slightly crumbly mixture.
- Press the almond mixture into the bottom of a springform pan, creating an even layer for the crust. Use the back of a spoon or your fingers to firmly press the mixture to ensure it holds its shape during baking.
- Prepare the filling: In a large mixing bowl, beat the softened cream cheese with an electric mixer until it’s smooth and creamy. This is crucial to avoid lumps in your cheesecake.
- Add the eggs one at a time, mixing well after each addition. Ensure each egg is fully incorporated before adding the next.
- Stir in the blueberries, sour cream, and stevia. Mix gently until all ingredients are evenly distributed throughout the cream cheese mixture. Be careful not to overmix at this stage, as it can affect the texture of the cheesecake.
- Pour the blueberry cream cheese mixture over the prepared almond crust in the springform pan. Spread evenly with a spatula.
- Bake at 400 degrees Fahrenheit (200 degrees Celsius) for 15 minutes. This initial high heat helps to set the crust and prevent a soggy bottom.
- Reduce the oven temperature to 350 degrees Fahrenheit (175 degrees Celsius) and continue baking for another 25 minutes, or until the top of the cheesecake is lightly golden and the center is almost set. The center should still have a slight jiggle to it.
- Turn off the oven and leave the cheesecake inside with the door slightly ajar for one hour to cool gradually. This helps prevent cracking.
- Remove the cheesecake from the oven and let it cool completely at room temperature before refrigerating for at least 4 hours, or preferably overnight.
- Once chilled, carefully remove the sides of the springform pan to reveal your beautiful low-sugar blueberry cheesecake.
Expert Tips & Tricks
- Prevent Cracking: The key to avoiding cracks is gradual cooling. Don’t rush the cooling process. Leaving the cheesecake in the oven as described is essential.
- Water Bath (Optional): For an even creamier texture and to further prevent cracking, consider using a water bath. Wrap the bottom of the springform pan tightly in aluminum foil, then place the pan in a larger baking dish. Fill the outer dish with hot water, reaching about halfway up the sides of the springform pan.
- Sweetener Adjustment: Adjust the amount of stevia (or your preferred low-sugar sweetener) to your taste. Start with the recommended amount and add more gradually until you reach your desired level of sweetness. Remember that the sweetness will be more pronounced once the cheesecake is chilled.
- Berry Burst: For an extra burst of blueberry flavor, reserve some of the fresh blueberries and gently press them into the top of the cheesecake before baking.
Serving & Storage Suggestions
Serve your low-sugar blueberry cheesecake chilled, straight from the refrigerator. Garnish with a few fresh blueberries and a sprig of mint for an elegant presentation. This cheesecake is best enjoyed within 3-4 days. Store it in an airtight container in the refrigerator. While freezing is possible, it can slightly alter the texture of the cheesecake, making it a bit more icy. If freezing, wrap the cheesecake tightly in plastic wrap and then in aluminum foil. Thaw overnight in the refrigerator before serving.
Nutritional Information
Here’s an approximate breakdown of the nutritional information per serving:
| Nutrient | Amount per Serving | % Daily Value |
|---|---|---|
| Calories | 320 kcal | 16% |
| Total Fat | 25g | 38% |
| Saturated Fat | 15g | 75% |
| Cholesterol | 120mg | 40% |
| Sodium | 250mg | 11% |
| Total Carbohydrate | 10g | 4% |
| Dietary Fiber | 2g | 8% |
| Sugars | 4g | – |
| Protein | 10g | 20% |
Disclaimer: Nutritional information is an estimate and can vary based on specific ingredients and portion sizes.
Variations & Substitutions
- Gluten-Free Crust: Ensure your flour is gluten-free (almond or coconut flour works perfectly).
- Dairy-Free Option: Substitute the cream cheese with a plant-based cream cheese alternative and the sour cream with a plant-based yogurt. Be aware that the taste and texture may differ slightly.
- Different Berries: Feel free to experiment with other berries like raspberries, strawberries, or a mixed berry combination.
- Lemon Zest: Add a teaspoon of lemon zest to the filling for a brighter, more vibrant flavor.
- Vanilla Extract: A teaspoon of vanilla extract enhances the overall flavor profile.
FAQs (Frequently Asked Questions)
Q: Can I use frozen blueberries instead of fresh?
A: Yes, you can use frozen blueberries. Do not thaw them before adding them to the filling. Adding them frozen helps to prevent the cheesecake from becoming too watery.
Q: My cheesecake cracked! What did I do wrong?
A: Cracking is often caused by rapid temperature changes. Ensure you cool the cheesecake gradually in the oven as directed. Using a water bath can also help prevent cracking.
Q: Can I use a different sweetener besides stevia?
A: Absolutely. You can substitute with erythritol, monk fruit sweetener, or any other low-sugar sweetener you prefer. Adjust the quantity to match the sweetness level of stevia.
Q: How do I know when the cheesecake is done?
A: The cheesecake is done when the edges are set and the center still has a slight jiggle. It will continue to set as it cools.
Q: Can I make this cheesecake ahead of time?
A: Yes, this cheesecake is perfect for making ahead. In fact, it tastes even better after it has been refrigerated overnight, allowing the flavors to meld together.
Final Thoughts
This low-sugar blueberry cheesecake is more than just a dessert; it’s an invitation to savor the simple pleasures of life without compromising on your health goals. It’s a testament to the fact that you can enjoy delicious, indulgent treats without the guilt. I encourage you to try this recipe and share your creations with loved ones. Experiment with variations, adapt it to your own taste preferences, and most importantly, enjoy the process. Pair a slice with a cup of herbal tea for a perfect ending to any meal. Bon appétit!