
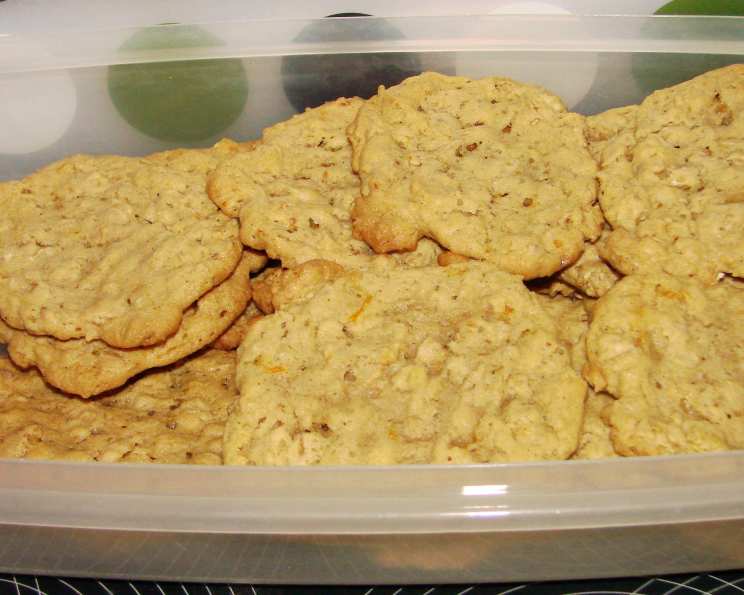
Lunchbox Cookies: A Taste of Childhood Nostalgia
The scent of toasted oats always transports me back to my grandmother’s kitchen. She had a way of making the simplest things feel extraordinary, and these Lunchbox Cookies were no exception. I remember sneaking them warm from the cooling rack, the slightly crisp edges giving way to a soft, chewy center. They were more than just cookies; they were edible tokens of love, perfect for tucking into a school lunch or enjoying with a glass of cold milk after a long day.
Recipe Overview
- Prep Time: 20 minutes
- Cook Time: 22 minutes
- Total Time: 42 minutes
- Yields: 3-4 dozen cookies
- Dietary Type: Vegetarian
Ingredients
- 2 2⁄3 cups oatmeal
- 1 1⁄2 cups flour
- 2 teaspoons orange zest
- 1 teaspoon baking soda
- 1 teaspoon baking powder
- 3⁄4 teaspoon salt
- 10 tablespoons (1/2 cup + 2 tablespoons) butter or margarine, room temperature
- 1⁄2 cup peanut butter (I prefer chunky)
- 2⁄3 cup brown sugar, packed
- 1 1⁄3 cups white sugar
- 2 eggs, room temperature
- 1 teaspoon vanilla
- 1 1⁄3 cups peanuts, chopped (optional)
Equipment Needed
- Baking sheets
- Large mixing bowl
- Electric mixer
- Measuring cups and spoons
- Cooling rack
Instructions
-
Preheat your oven to 325°F (160°C). Spread the oatmeal on a baking sheet and toast in the preheated oven for 10 minutes, or until the oats are golden brown. Be sure to stir occasionally to prevent burning. Once toasted, set aside to cool slightly.
-
Increase the oven temperature to 350°F (175°C).
-
In a large bowl, whisk together the flour, orange zest, baking soda, baking powder, and salt. This ensures even distribution of the leavening agents and spices.
-
In a separate bowl, cream together the butter or margarine and peanut butter until light and fluffy. An electric mixer makes this much easier, but you can also do it by hand with a little elbow grease.
-
Gradually add the brown sugar and white sugar to the butter mixture, beating until the mixture is light and fluffy. This step is crucial for creating a tender cookie.
-
Add the eggs one at a time, beating well after each addition. Then, stir in the vanilla. Make sure your eggs are at room temperature; this helps them emulsify properly into the batter.
-
Gradually fold in the flour mixture into the wet ingredients until just combined. Be careful not to overmix, as this can result in tough cookies.
-
Gently fold in the toasted oatmeal and chopped peanuts (if using).
-
Drop the cookie batter onto ungreased baking sheets by tablespoons, spacing them about 3 inches apart.
-
Flatten the cookies slightly with a fork, making criss-cross lines on the tops. This helps them bake evenly.
-
Bake for 10-12 minutes, or until the cookies are golden brown around the edges. Keep a close eye on them, as baking times may vary depending on your oven.
-
Let the cookies cool on the baking sheets for 5 minutes before transferring them to a wire rack to cool completely.
Expert Tips & Tricks
- Toast the oats: Don’t skip the toasting step! It brings out a nutty flavor and improves the texture of the cookies.
- Room temperature ingredients: Using room temperature butter and eggs is key for creating a smooth and even batter.
- Don’t overmix: Overmixing the dough develops the gluten in the flour, resulting in tough cookies. Mix just until the ingredients are combined.
- Prevent spreading: If your cookies spread too much, try chilling the dough for 30 minutes before baking.
- Flavor Boost: Add a sprinkle of sea salt on top of the cookies before baking for a salty-sweet flavor contrast.
Serving & Storage Suggestions
These Lunchbox Cookies are perfect on their own, with a glass of milk, or as part of a packed lunch. Store them in an airtight container at room temperature for up to 5 days. For longer storage, you can freeze them for up to 2 months. To freeze, place the cooled cookies in a single layer on a baking sheet and freeze until solid. Then, transfer them to a freezer-safe bag or container. Thaw at room temperature before serving.
Nutritional Information
| Nutrient | Amount per Serving | % Daily Value |
|---|---|---|
| Calories | 1676.2 kcal | N/A |
| Calories from Fat | 616 g | 37% |
| Total Fat | 68.5 g | 105% |
| Saturated Fat | 30.8 g | 153% |
| Cholesterol | 225.8 mg | 75% |
| Sodium | 1724.9 mg | 71% |
| Total Carbohydrate | 242.8 g | 80% |
| Dietary Fiber | 11.7 g | 46% |
| Sugars | 141.3 g | 565% |
| Protein | 31.4 g | 62% |
Note: Nutritional information is an estimate and may vary based on specific ingredients and portion sizes.
Variations & Substitutions
- Gluten-Free: Use a gluten-free all-purpose flour blend in place of regular flour.
- Nut-Free: Substitute sunflower seed butter or tahini for the peanut butter. Omit the peanuts or replace them with sunflower seeds or pepitas.
- Vegan: Use a vegan butter substitute, flax eggs (1 tablespoon flaxseed meal mixed with 3 tablespoons water per egg), and ensure your sugar is vegan-friendly.
- Chocolate Chip: Replace some of the oatmeal with chocolate chips for a chocolatey twist.
- Spice it Up: Add a pinch of cinnamon, nutmeg, or cardamom to the flour mixture for a warm, spiced flavor.
FAQs (Frequently Asked Questions)
Q: Can I use quick-cooking oats instead of rolled oats?
A: While you can use quick-cooking oats, the texture of the cookies will be slightly different. Rolled oats provide a chewier texture, while quick-cooking oats will result in a softer cookie.
Q: My cookies spread too thin. What did I do wrong?
A: This could be due to several factors, including using butter that was too soft, not measuring the flour correctly, or the oven temperature being too low. Try chilling the dough for 30 minutes before baking and make sure your oven is properly calibrated.
Q: Can I make the dough ahead of time?
A: Yes! The dough can be made ahead of time and stored in the refrigerator for up to 2 days. Let it come to room temperature slightly before scooping and baking.
Q: How do I prevent the cookies from burning on the bottom?
A: Use a light-colored baking sheet and consider lining it with parchment paper. This will help to distribute the heat more evenly and prevent the bottoms from burning.
Q: Are these cookies suitable for people with peanut allergies if I omit the peanuts?
A: No. Because the recipe contains peanut butter, it is not safe for individuals with peanut allergies, even if the additional peanuts are omitted.
Final Thoughts
These Lunchbox Cookies are more than just a sweet treat; they’re a reminder of simpler times, of the comfort of home-baked goods, and of the love that goes into sharing food with others. Whether you’re packing a lunch for your kids, treating yourself to an afternoon snack, or simply craving a taste of nostalgia, I encourage you to give this recipe a try. I hope these cookies bring you as much joy as they have brought me over the years. Don’t be afraid to experiment with variations and make them your own. Happy baking!