
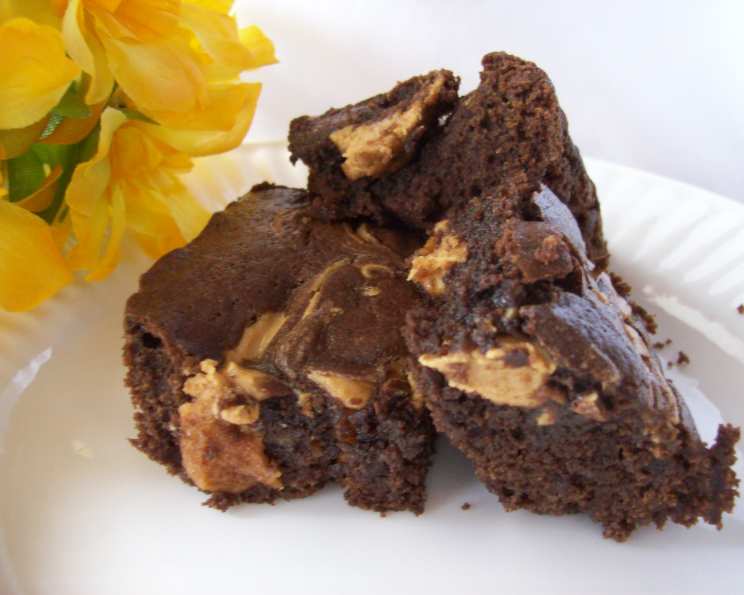
Lunchbox Peanut Butter Brownies: A Chocolatey Nostalgia Trip
There’s something profoundly comforting about the smell of brownies baking – a scent that instantly transports me back to childhood afternoons spent in my grandmother’s kitchen. But add the aroma of peanut butter to the mix, and suddenly I’m not just a kid again, I’m a kid with a lunchbox, eagerly anticipating that midday treat. These Lunchbox Peanut Butter Brownies perfectly capture that feeling: dense, fudgy, and swirled with the irresistible tang of peanut butter, they’re a delicious dose of nostalgia in every bite.
Recipe Overview
- Prep Time: 15 minutes
- Cook Time: 22-27 minutes
- Total Time: 42-47 minutes
- Servings: 16
- Yield: 16 brownies
- Dietary Type: Vegetarian
Ingredients
- 8 tablespoons unsalted butter
- 3 ounces unsweetened chocolate, chopped
- 2/3 cup all-purpose flour
- 1/2 teaspoon baking powder
- 1/4 teaspoon salt
- 1 cup sugar
- 2 large eggs
- 1 teaspoon vanilla extract
- 1/3 cup creamy peanut butter
Equipment Needed
- 8-inch square baking pan
- Aluminum foil
- Microwave-safe bowl
- Medium bowl
- Large bowl
- Whisk
- Knife
- Wire rack
Instructions
- Begin by preheating your oven to 350 degrees Fahrenheit (175 degrees Celsius).
- Prepare your 8-inch square baking pan. Line the pan with aluminum foil, allowing the foil to hang over the sides for easy removal later. Grease the foil-lined pan. This step is crucial – the overhang makes removing the brownies a breeze, and the greasing ensures they don’t stick.
- In a microwave-safe bowl, combine the butter and chopped unsweetened chocolate. Melt them together in the microwave in 30-second intervals, stirring well after each interval, until the mixture is smooth and completely melted. This usually takes 1-3 minutes. Be careful not to overheat the chocolate, as it can seize up and become grainy. Let the melted chocolate mixture cool slightly.
- While the chocolate is cooling, prepare the dry ingredients. In a medium bowl, whisk together the flour, baking powder, and salt. This ensures the baking powder and salt are evenly distributed throughout the flour, contributing to a uniform texture in the final brownies.
- In a large bowl, whisk together the sugar, eggs, and vanilla extract until well combined. The whisking incorporates air, which helps create a slightly lighter texture in the brownies.
- Pour the slightly cooled melted chocolate mixture into the large bowl with the egg mixture. Whisk everything together until fully combined and smooth.
- Gradually add the flour mixture to the wet ingredients, stirring until just incorporated. Be careful not to overmix the batter, as this can develop the gluten in the flour and result in tough brownies. A few streaks of flour are fine at this stage.
- Scrape the brownie batter into the prepared baking pan and smooth the top with a spatula. Ensure the batter is evenly distributed for consistent baking.
- Now for the peanut butter swirl! Drop the peanut butter in small dollops over the brownie batter. The amount and placement of the dollops is up to you, depending on how much peanut butter flavor you want in each bite.
- Use a knife to swirl the peanut butter into the brownie batter. Drag the knife through the dollops in a swirling motion to create a marbled effect. Don’t over-swirl, as this can muddy the colors. A few distinct swirls are more visually appealing.
- Bake the brownies for 22-27 minutes, rotating the pan halfway through the baking time to ensure even cooking. The brownies are done when a toothpick inserted into the center comes out with a few moist crumbs attached. Avoid overbaking, as this will result in dry brownies.
- Let the brownies cool completely in the pan on a wire rack for about 2 hours. Cooling them completely is important for the texture and ease of cutting.
- Once the brownies are completely cool, remove them from the pan by grabbing the two sides of the foil and lifting. Transfer the brownies to a cutting board and cut them into squares.
Expert Tips & Tricks
- For extra fudgy brownies: Reduce the baking time by a minute or two. The center will be slightly gooey, but that’s part of the charm!
- Blooming the chocolate: After melting the butter and chocolate, add a tablespoon of hot coffee or water to the mixture. This helps to “bloom” the chocolate, enhancing its flavor.
- Nutty Boost: Toast the chopped walnuts or pecans and add them in the batter for an added texture and nutty flavor.
- Elevate the Peanut Butter: Use a high-quality natural peanut butter for the best flavor and texture.
Serving & Storage Suggestions
Serve these Lunchbox Peanut Butter Brownies at room temperature, either as a simple snack or as part of a more elaborate dessert spread. They are especially delicious with a cold glass of milk or a scoop of vanilla ice cream.
To store, keep the brownies in an airtight container at room temperature for up to 3 days, or in the refrigerator for up to a week. For longer storage, freeze the brownies in an airtight container for up to 2 months. To reheat, thaw the brownies at room temperature and then warm them slightly in the microwave.
Nutritional Information
| Nutrient | Amount per Serving | % Daily Value |
|---|---|---|
| Calories | 186.5 kcal | N/A |
| Calories from Fat | N/A | 58% |
| Total Fat | 11.9 g | 18% |
| Saturated Fat | 6.1 g | 30% |
| Cholesterol | 41.7 mg | 13% |
| Sodium | 83.3 mg | 3% |
| Total Carbohydrate | 19.2 g | 6% |
| Dietary Fiber | 1.4 g | 5% |
| Sugars | 13.1 g | 52% |
| Protein | 3.4 g | 6% |
Variations & Substitutions
- Gluten-Free: Substitute the all-purpose flour with a gluten-free all-purpose blend. Be sure to choose a blend that contains xanthan gum for the best texture.
- Dairy-Free: Use a dairy-free butter substitute. Coconut oil can also be used.
- Different Nut Butters: Experiment with other nut butters like almond butter or cashew butter for a unique flavor profile.
- Chocolate Chips: Add 1/2 cup of chocolate chips (milk chocolate, dark chocolate, or white chocolate) to the batter for an extra chocolatey treat.
- Espresso Powder: Add 1 teaspoon of espresso powder to the batter to enhance the chocolate flavor.
FAQs (Frequently Asked Questions)
Q: Can I use a different size pan?
A: Yes, but the baking time will need to be adjusted. If you use a larger pan, the brownies will be thinner and will bake faster. If you use a smaller pan, they will be thicker and will bake longer.
Q: Can I make these ahead of time?
A: Absolutely! These brownies are perfect for making ahead of time. They can be stored at room temperature for a few days, or in the freezer for longer storage.
Q: My brownies are dry. What did I do wrong?
A: Overbaking is the most common cause of dry brownies. Be sure to check the brownies for doneness a few minutes before the recommended baking time, and remove them from the oven when a toothpick inserted into the center comes out with a few moist crumbs attached.
Q: Can I use natural peanut butter?
A: Yes, you can use natural peanut butter, but be sure to stir it well before using it, as the oil tends to separate.
Q: Can I add nuts to these brownies?
A: Yes, adding chopped nuts like walnuts or pecans to the batter will give the brownies a delightful texture and added flavor.
Final Thoughts
These Lunchbox Peanut Butter Brownies are more than just a recipe; they’re a sweet reminder of simpler times. The combination of rich chocolate and creamy peanut butter is a classic for a reason, and this recipe delivers that comforting flavor in a perfectly fudgy, dense brownie. Whether you’re packing a lunch, looking for a quick dessert, or simply craving a taste of nostalgia, these brownies are sure to hit the spot. I encourage you to give them a try and share your experience. Perhaps pair them with a scoop of your favorite ice cream or a steaming mug of coffee for the ultimate indulgence!