
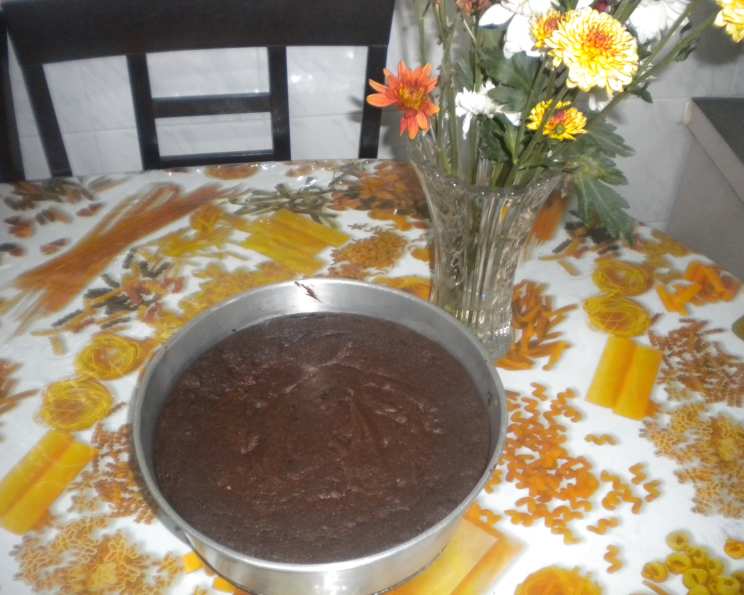
Decadent Dreams: Mastering the Luxury Chocolate Cake
The aroma of warm chocolate cake baking in the oven… it’s a scent that instantly transports me back to childhood. I remember standing on a stool, barely tall enough to reach the counter, watching my grandmother meticulously measure ingredients for her famous chocolate cake. The entire house would be filled with anticipation, and that first bite, still slightly warm, was pure bliss. This recipe, while not my grandmother’s exact cake, captures that same feeling of comforting indulgence, a luxurious treat that’s perfect for any celebration – or just because.
Recipe Overview
- Prep Time: 20 minutes
- Cook Time: 40-55 minutes
- Total Time: 1 hour 5 minutes
- Servings: 8-10
- Yield: 1 cake
- Dietary Type: Vegetarian
Ingredients
- 240 g salted butter, softened
- 425 g caster sugar
- 3 large eggs (grade A)
- 100 g good quality cocoa powder
- 240 g fine flour
- 1 teaspoon baking soda
- 1 teaspoon vanilla essence
- 1 tablespoon coffee paste (1 tbsp of water mixed with 1 tsp of coffee)
Equipment Needed
- 9″x9″x3″ (height) baking pan or a 9″ round baking pan
- Parchment paper
- Electric mixer (handheld or stand mixer)
- Rubber or silicone spatula
- Wooden spoon
- Serrated knife
- Wire rack
- Sifter
Instructions
-
Preheat your oven to 170 degrees Celsius (338 degrees Fahrenheit). Line and grease a 9″x9″x3″ (height) baking pan or a 9″ round one. This ensures the cake releases easily and prevents sticking. Parchment paper is your friend here!
-
Sift together the flour, cocoa powder, and baking soda twice. This seemingly simple step is crucial for creating a light and airy cake. Set aside the sifted dry ingredients.
-
In a large bowl, cream together the softened butter and caster sugar using an electric mixer on high speed. If using a regular mixer, beat for five minutes. If using a more powerful mixer like a Kenwood or Kitchen Aid, beat for only two minutes. The mixture should become amalgamated, fluffy, pale, and somewhat risen. This incorporates air into the batter, resulting in a lighter cake.
-
During the creaming process, remember to scrape down the sides of the bowl periodically with a rubber or silicone spatula. This ensures that all the butter and sugar are evenly incorporated.
-
To test if the butter and sugar are properly creamed, place a small amount of the mixture on your thumb and rub it between your thumb and forefinger. If you can still feel the sugar granules, beat for an additional minute or two. However, be careful not to overbeat, as this can result in a curdled-looking mix.
-
If the mixture appears curdled, don’t panic! It’s salvageable. Stop beating immediately and use a wooden spoon to gently fold the mix in one direction while the bowl is tilted at a 45-degree angle. This will help bring the mixture back together.
-
Once the butter and sugar are properly creamed, pour in the three eggs, one at a time, beating well after each addition. Ensure each egg is fully incorporated before adding the next.
-
Always break the eggs individually into a saucer before pouring them into the bowl. This prevents a spoiled egg from contaminating the rest of the mixture.
-
Add the vanilla essence and coffee paste, beating well after each addition. The coffee paste enhances the chocolate flavor without making the cake taste like coffee.
-
Stop the mixer and scrape the sides of the bowl again to ensure even mixing.
-
Fold in the combined dry ingredients (flour, cocoa powder, and baking soda) using the same wooden spoon in one direction, a little at a time. It should take between three and four additions.
-
Always fold and stir in one direction with the bowl placed at a 45-degree angle to ease mixing. Be gentle to avoid overmixing, which can result in a tough cake.
-
Ensure that no pockets of flour remain before giving the filled cake tin a gentle thwack on the counter to remove any trapped air bubbles. This helps to create an even cake.
-
Place the cake in the preheated oven for 40 minutes. Check for doneness every five minutes after the thirty-minute mark.
-
Remove the cake from the oven and insert a skewer or toothpick into the center of the cake. It should come out clean or with a few crumbs sticking to it.
-
Should the skewer come out wet, place the cake back in the oven for between 10 to 15 minutes and monitor closely.
-
When lightly pressed, the top of the cake should bounce back.
-
Cool the cake for five minutes in the pan before inverting it onto a wire rack to cool completely.
-
Never slice a cake while it is still hot or warm, as it is still soft and therefore crumbly.
-
Always use a serrated knife for cutting a cake. The saw-like action of the serrations cuts through the cake cleanly without tearing it.
-
A chocolate cake, like most spiced or fruity cakes, tastes even better the next day as the flavors have had time to meld together.
-
The cake can be placed outside for up to 3 days before it needs to be refrigerated, as it does not contain any preservatives.
-
As an alternative, you can also add a handful of chopped nuts for a nuttier flavor, raisins to increase the chewiness factor, or chocolate chips to further enhance the chocolate flavor.
-
If using additions, always dust them with a half teaspoon of cocoa powder before folding them into the mix prior to adding the flour mixture. This prevents the additions from sinking to the bottom of the cake and splitting the cake into two halves when cutting into it.
Expert Tips & Tricks
- For an even richer chocolate flavor, try using Dutch-processed cocoa powder.
- To prevent the cake from sticking, even with greasing and lining, consider using baking spray that contains flour.
- If you don’t have coffee paste, you can use a strong brewed coffee in its place.
- For a smoother batter, ensure the butter is fully softened before creaming it with the sugar.
- If the cake starts to brown too quickly in the oven, loosely cover it with foil.
Serving & Storage Suggestions
Serve this luxurious chocolate cake with a dusting of cocoa powder, a scoop of vanilla ice cream, or a generous dollop of whipped cream. It pairs beautifully with a glass of cold milk, a cup of hot coffee, or a rich dessert wine.
To store, wrap the cake tightly in plastic wrap or place it in an airtight container. It will last for up to 3 days at room temperature, up to a week in the refrigerator, or up to 3 months in the freezer. To reheat, thaw the cake in the refrigerator overnight and then warm it gently in the oven or microwave.
Nutritional Information
| Nutrient | Amount per Serving | % Daily Value |
|---|---|---|
| Calories | 520 kcal | 26% |
| Total Fat | 25g | 38% |
| Saturated Fat | 15g | 75% |
| Cholesterol | 128mg | 43% |
| Sodium | 320mg | 13% |
| Total Carbohydrate | 74g | 25% |
| Dietary Fiber | 4g | 16% |
| Sugars | 48g | N/A |
| Protein | 7g | 14% |
Note: Nutritional information is an estimate and may vary based on specific ingredients and serving sizes.
Variations & Substitutions
- Gluten-Free: Substitute the all-purpose flour with a gluten-free flour blend. You may need to add a binder like xanthan gum for better texture.
- Dairy-Free: Replace the butter with a plant-based butter alternative and ensure your vanilla essence is dairy-free.
- Chocolate Frosting: Elevate the cake with a decadent chocolate frosting. A simple ganache made with chocolate and heavy cream (or coconut cream for a dairy-free option) works beautifully.
- Espresso Infusion: Substitute the coffee paste with espresso powder for a more intense coffee flavor.
- Orange Zest: Add a teaspoon of orange zest to the batter for a citrusy twist that complements the chocolate.
FAQs (Frequently Asked Questions)
Q: Can I use unsalted butter instead of salted butter?
A: Yes, you can. Just add 1/4 teaspoon of salt to the dry ingredients to compensate.
Q: Can I use a different size pan?
A: Yes, but you’ll need to adjust the baking time accordingly. A smaller pan will require a longer baking time, while a larger pan will require a shorter baking time.
Q: How do I prevent my cake from sinking in the middle?
A: Ensure your oven temperature is accurate and avoid opening the oven door frequently during baking. Overmixing the batter can also contribute to sinking.
Q: Can I make this cake ahead of time?
A: Absolutely! The cake actually tastes better the next day. Just store it properly wrapped at room temperature or in the refrigerator.
Q: What’s the best way to decorate this cake?
A: The possibilities are endless! A simple dusting of cocoa powder, a drizzle of ganache, fresh berries, or a layer of buttercream frosting all work well.
Final Thoughts
This Luxury Chocolate Cake is more than just a recipe; it’s an invitation to create a moment of pure indulgence. Whether you’re celebrating a special occasion or simply craving a comforting treat, this cake is sure to delight. Don’t be afraid to experiment with variations and substitutions to make it your own. And most importantly, enjoy the process of baking and savor every delicious bite! Share your creations and feedback – I’d love to hear how it turns out! Perhaps pair it with a rich red wine or a scoop of homemade vanilla bean ice cream for the ultimate decadent experience. Happy baking!