
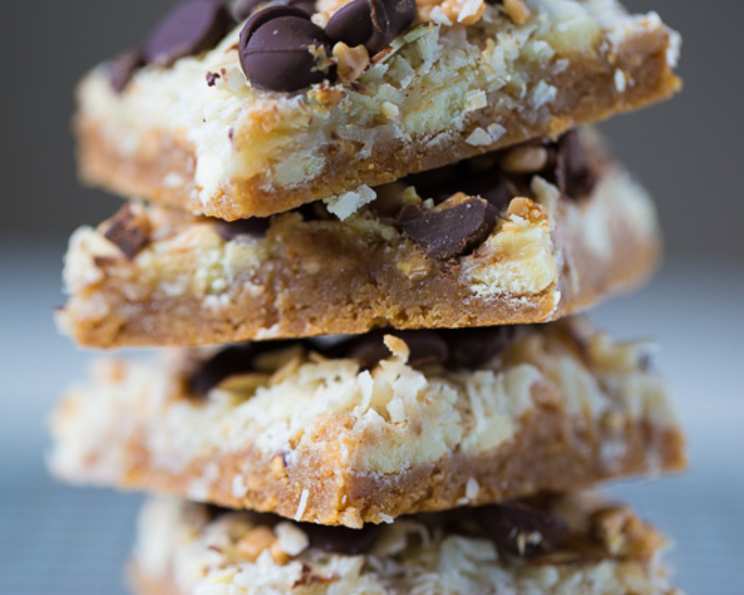
The Irresistible Allure of Magic Cookie Bars
My grandmother, Nana Betty, had a way of making everything feel special, and her Magic Cookie Bars were no exception. I remember being a child, perched on a stool in her sunny kitchen, watching her sprinkle layer upon layer of delectable ingredients into a shimmering glass baking dish. The anticipation was almost unbearable as the aroma of toasted coconut and melting chocolate filled the air. Each bite was a symphony of textures and flavors – the buttery crunch of the graham cracker crust, the gooey sweetness of the condensed milk, and the contrasting bursts of chocolate, nuts, and coconut. To this day, just the thought of them transports me back to that warm, loving kitchen.
Recipe Overview
- Prep Time: 10 minutes
- Cook Time: 25 minutes
- Total Time: 35 minutes
- Yields: 2-3 dozen bars
- Dietary Type: Not Gluten-Free
Ingredients
- 1 1⁄2 cups graham cracker crumbs
- 1⁄2 cup butter or 1/2 cup margarine, melted
- 1 (14 ounce) can sweetened condensed milk
- 1⁄2 cup semi-sweet chocolate chips
- 1⁄2 cup white chocolate chips
- 1⁄2 cup butterscotch chips
- 1⁄2 cup peanut butter chips
- 1 1⁄3 cups flaked coconut
- 1 cup nuts, chopped (walnuts or pecans recommended)
Equipment Needed
- 13×9 inch baking pan
- Small mixing bowl
- Measuring cups and spoons
- Fork
Instructions
- Preheat your oven to 350 degrees Fahrenheit (or 325 degrees Fahrenheit if using a glass baking dish). This lower temperature for glass helps prevent over-browning.
- In a small bowl, combine the graham cracker crumbs and melted butter (or margarine). Mix thoroughly until the crumbs are evenly moistened and resemble wet sand.
- Press the graham cracker crumb mixture firmly and evenly into the bottom of your 13×9 inch baking pan. This forms the base of your Magic Cookie Bars.
- Pour the entire can of sweetened condensed milk evenly over the graham cracker crust. Ensure the crust is completely covered, as this is the glue that holds everything together and provides the signature sweetness.
- Now comes the fun part – layering! Sprinkle the semi-sweet chocolate chips evenly over the sweetened condensed milk. Follow with the white chocolate chips, butterscotch chips, and peanut butter chips, distributing them as uniformly as possible.
- Next, sprinkle the flaked coconut generously over the chocolate chips.
- Finally, add the chopped nuts (walnuts or pecans are classic choices). Distribute them evenly across the top.
- Gently press down on the entire mixture with a fork. This helps to compress the layers and ensure everything adheres together during baking.
- Bake in the preheated oven for 25 minutes, or until the edges are lightly browned and the coconut is toasted. Keep a close eye on the bars during the last few minutes of baking to prevent burning.
- Remove from the oven and let cool completely in the pan on a wire rack. Cooling completely is crucial for the bars to set properly and be easy to cut.
- Once completely cool, cut the bars into squares or rectangles. A sharp knife and a firm hand will help you achieve clean cuts.
- Store leftovers covered in an airtight container.
Expert Tips & Tricks
- Toast the coconut: For a deeper, more intense coconut flavor, lightly toast the flaked coconut in a dry skillet over medium heat before adding it to the bars. Watch carefully, as it burns easily.
- Use parchment paper: Line your baking pan with parchment paper before pressing in the graham cracker crust. This makes removing the bars a breeze and eliminates sticking. Leave an overhang of parchment on the sides to easily lift the entire batch out of the pan.
- Customize your chocolate: Don’t be afraid to experiment with different types of chocolate chips. Dark chocolate, milk chocolate, or even chopped chocolate bars can add unique flavor profiles.
- Salted nuts: Using salted nuts will add a nice contrast to the sweetness of the rest of the bars.
- Pressing the crust: Use the bottom of a measuring cup to really pack the crust in. This will help it stay together while baking.
- Dealing with a hot oven: Every oven is a little different. If you notice the top browning too quickly, loosely tent the pan with foil for the last 5-10 minutes of baking.
Serving & Storage Suggestions
Magic Cookie Bars are best served at room temperature. Their rich, gooey texture is perfectly satisfying on its own, but they also pair well with a scoop of vanilla ice cream or a dollop of whipped cream. For a sophisticated touch, serve them alongside a glass of dessert wine or a cup of freshly brewed coffee.
Store leftover bars in an airtight container at room temperature for up to 3 days, or in the refrigerator for up to a week. For longer storage, freeze the bars for up to 2 months. Thaw them completely at room temperature before serving. Reheating is generally not recommended, as it can make them too soft.
Nutritional Information
(Estimated per bar, based on 24 bars per batch)
| Nutrient | Amount per Serving | % Daily Value |
|---|---|---|
| Calories | 285 kcal | 14% |
| Total Fat | 11.5g | 18% |
| Saturated Fat | 5.7g | 29% |
| Cholesterol | 8.3mg | 3% |
| Sodium | 73.5mg | 3% |
| Total Carbohydrate | 12.6g | 4% |
| Dietary Fiber | 0.8g | 3% |
| Sugars | 10.2g | – |
| Protein | 2.0g | 4% |
Variations & Substitutions
- Gluten-Free: Use gluten-free graham crackers for the crust. You can find these at most grocery stores.
- Dairy-Free: Substitute coconut oil for the butter in the crust. Use dairy-free chocolate chips and omit the butterscotch chips (or find a dairy-free alternative).
- Nut-Free: Omit the nuts entirely or substitute with sunflower seeds or pumpkin seeds.
- Different Flavors: Try adding dried cranberries, chopped pretzels, or even a swirl of caramel to the top of the bars for a unique twist.
- Seasonal Variations: During the holidays, add a sprinkle of crushed peppermint candies or gingerbread spice to the bars for a festive flavor.
FAQs (Frequently Asked Questions)
Q: Can I use a different size pan?
A: Yes, but the baking time may need to be adjusted. If using a smaller pan, the bars will be thicker and may require a longer baking time. A larger pan will result in thinner bars and a shorter baking time. Keep an eye on them and adjust accordingly.
Q: My bars are too gooey. What did I do wrong?
A: This could be due to underbaking. Make sure the edges are lightly browned and the coconut is toasted. Also, ensure the bars are completely cooled before cutting.
Q: Can I make these ahead of time?
A: Absolutely! Magic Cookie Bars are a great make-ahead dessert. They can be stored in the refrigerator for up to a week or frozen for up to two months.
Q: What kind of nuts work best?
A: Walnuts and pecans are the classic choices, but you can use any nuts you like, such as almonds, macadamia nuts, or even peanuts.
Q: Can I use less sweetened condensed milk?
A: While you can reduce it slightly, the sweetened condensed milk is essential for the texture and sweetness of the bars. Using significantly less will result in a dry and crumbly texture.
Final Thoughts
Magic Cookie Bars are more than just a dessert; they’re a nostalgic treat that evokes feelings of warmth, comfort, and connection. Whether you’re baking them for a special occasion or simply craving a sweet indulgence, these bars are sure to delight. So, gather your ingredients, preheat your oven, and prepare to experience the magic for yourself. And don’t hesitate to get creative with your own variations – the possibilities are endless! I’d love to hear how they turn out, so feel free to leave a comment below with your own tips and tricks! Pair with a cold glass of milk or a warm cup of coffee and enjoy!