
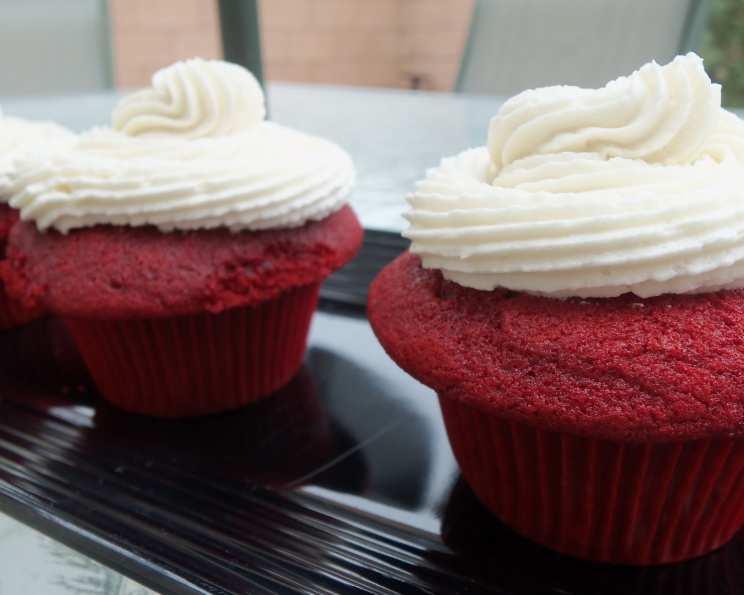
The Quintessential Red Velvet Cupcakes: A Magnolia Bakery Classic
The first time I tasted a Red Velvet cupcake, it was like a culinary revelation. I was a wide-eyed culinary student in New York City, and a friend dragged me to this little bakery in the West Village called Magnolia. The line snaked down the block, but the promise of a fluffy, crimson cupcake topped with clouds of vanilla frosting kept us going. That first bite – the tang of buttermilk, the subtle chocolate notes, and the unbelievably smooth frosting – sealed my fate. I knew I had to learn the secrets behind this iconic treat, and now I’m thrilled to share them with you.
Recipe Overview
- Prep Time: 30 minutes
- Cook Time: 20 minutes
- Total Time: 50 minutes
- Servings: 24
- Yield: 24 cupcakes
- Dietary Type: Not specified (contains dairy and gluten)
Ingredients
For the Red Velvet Cupcakes:
- 3 ½ cups cake flour (not self-rising)
- ¾ cup unsalted butter, softened
- 2 ½ cups sugar
- 3 large eggs, at room temperature
- 6 tablespoons red food coloring
- 3 tablespoons unsweetened cocoa
- 1 ½ teaspoons vanilla extract
- 1 ½ teaspoons salt
- 1 ½ cups buttermilk
- 1 ½ teaspoons cider vinegar
- 1 ½ teaspoons baking soda
For the Creamy Vanilla Frosting:
- 6 tablespoons all-purpose flour
- 2 cups milk
- 2 cups unsalted butter, softened
- 2 cups sugar
- 2 teaspoons vanilla extract
Equipment Needed
- Electric mixer (stand or hand-held)
- Two 12-cup cupcake pans
- Cupcake liners
- Small bowls
- Large bowl
- Measuring cups and spoons
- Rubber spatula
- Medium-size saucepan
- Whisk
- Waxed paper
- Cooling rack
Instructions
-
Preheat your oven to 350°F (175°C). Grease and lightly flour two 12-cup cupcake pans (or use cupcake liners). This prevents the cupcakes from sticking and ensures easy removal.
-
Prepare the dry ingredients: In a small bowl, sift the cake flour. Sifting is crucial for a light and tender crumb. Set aside.
-
Cream butter and sugar: In a large bowl, using an electric mixer on medium speed, cream the softened butter and sugar together until very light and fluffy. This process should take about 5 minutes. The mixture should be pale and almost doubled in volume. This step is essential for incorporating air into the batter, resulting in a light and airy cupcake.
-
Incorporate the eggs: Add the eggs, one at a time, to the creamed butter and sugar mixture, beating well after each addition. Room-temperature eggs emulsify more easily, creating a smoother batter.
-
Create the red velvet color and flavor base: In a small bowl, whisk together the red food coloring, cocoa, and vanilla extract. This mixture will add both the characteristic red color and a subtle chocolatey flavor to the cupcakes. Add this mixture to the batter and beat well until thoroughly combined.
-
Combine buttermilk and salt: In a measuring cup, stir the salt into the buttermilk. This helps the salt dissolve evenly into the batter.
-
Alternate wet and dry ingredients: Add the buttermilk mixture to the batter in three parts, alternating with the flour. With each addition, beat until the ingredients are just incorporated. Be careful not to overbeat the batter at this stage, as overmixing can develop gluten and result in tough cupcakes.
-
Activate the red velvet reaction: In a small bowl, stir together the cider vinegar and baking soda. This mixture will fizz and foam – this is the reaction that gives red velvet its signature tang and helps create a light and airy texture. Add this mixture to the batter and mix well.
-
Ensure a smooth batter: Using a rubber spatula, scrape down the sides and bottom of the bowl to ensure that all ingredients are well blended and the batter is smooth.
-
Fill the cupcake liners: Divide the batter evenly among the prepared cupcake pans, filling each liner about two-thirds full.
-
Bake the cupcakes: Arrange the oven racks in the upper and lower thirds of the oven and bake the cupcakes, switching positions of the pans halfway through baking, until a cake tester (or toothpick) inserted into the center comes out clean. This should take about 20 minutes. Rotating the pans ensures even baking.
-
Cool the cupcakes: Cool the cupcakes in the pans for 10 minutes, then remove them from the pans and cool completely on a wire rack before frosting. This prevents the bottoms of the cupcakes from becoming soggy.
-
Prepare the Creamy Vanilla Frosting: In a medium-size saucepan, whisk the flour into the milk until smooth. This prevents lumps from forming during cooking. Place over medium heat and, stirring constantly, cook until the mixture becomes very thick and begins to bubble, 10-15 minutes.
-
Cool the milk mixture: Cover the thickened milk mixture with waxed paper placed directly on the surface and cool to room temperature, about 30 minutes. Covering the surface prevents a skin from forming.
-
Cream the butter: In a large bowl, on the medium-high speed of an electric mixer, beat the softened butter for 3 minutes, until smooth and creamy.
-
Add sugar gradually: Gradually add the sugar to the creamed butter, beating continuously for 3 minutes until fluffy.
-
Add vanilla: Add the vanilla extract and beat well.
-
Incorporate the milk mixture: Add the cooled milk mixture to the butter mixture and continue to beat on medium-high speed for 5 minutes, until very smooth and noticeably whiter in color. This step is crucial for achieving the signature light and airy texture of Magnolia Bakery’s frosting.
-
Chill briefly: Cover and refrigerate the frosting for 15 minutes (no less and no longer – set a timer!). This helps the frosting firm up slightly, making it easier to pipe or spread.
-
Frost and enjoy: Use the creamy vanilla frosting to generously frost the cooled cupcakes.
Expert Tips & Tricks
- Cake Flour is Key: Using cake flour is non-negotiable for achieving that delicate, melt-in-your-mouth texture.
- Room Temperature Ingredients: Make sure your butter, eggs, and buttermilk are all at room temperature for optimal emulsification and a smoother batter.
- Don’t Overbake: Overbaking will result in dry cupcakes. Start checking for doneness at 18 minutes.
- Frosting Consistency: If your frosting is too soft after chilling, beat it again for a minute or two to incorporate more air. If it’s too stiff, add a tablespoon of milk at a time until it reaches your desired consistency.
- Piping Perfection: For a professional look, use a piping bag fitted with a large round tip to swirl the frosting onto the cupcakes.
Serving & Storage Suggestions
These Red Velvet Cupcakes are best served fresh, ideally within a few hours of frosting. They can be stored at room temperature in an airtight container for up to 2 days. For longer storage, refrigerate them for up to 5 days. Allow the cupcakes to come to room temperature before serving for the best flavor and texture. You can also freeze unfrosted cupcakes for up to 2 months. Thaw them completely before frosting.
Nutritional Information
(Estimated per cupcake)
| Nutrient | Amount per Serving | % Daily Value |
|---|---|---|
| Calories | 442 kcal | 22% |
| Total Fat | 23g | 35% |
| Saturated Fat | 14g | 70% |
| Cholesterol | 83mg | 28% |
| Sodium | 263mg | 11% |
| Total Carbohydrate | 57g | 19% |
| Dietary Fiber | 1g | 4% |
| Sugars | 38g | 76% |
| Protein | 4g | 8% |
Variations & Substitutions
- Gluten-Free: Substitute the cake flour with a gluten-free all-purpose flour blend. You may need to add a binder like xanthan gum to help with the texture.
- Dairy-Free: Use a plant-based butter alternative and non-dairy milk (such as almond or soy milk) in both the cupcake batter and the frosting.
- Natural Food Coloring: Experiment with beet juice powder or other natural food coloring alternatives to achieve the red hue. The color may not be as vibrant as with traditional food coloring.
- Cream Cheese Frosting: For a classic twist, substitute half of the butter in the vanilla frosting with softened cream cheese.
FAQs (Frequently Asked Questions)
Q: Why is cake flour so important in this recipe?
A: Cake flour has a lower protein content than all-purpose flour, resulting in a more tender and delicate crumb.
Q: Can I use a different type of food coloring?
A: Gel food coloring is recommended for its concentrated color and minimal liquid, but liquid food coloring can be used. You may need to use slightly more to achieve the desired shade of red.
Q: Can I make the frosting ahead of time?
A: Yes, the frosting can be made a day in advance and stored in the refrigerator. Allow it to come to room temperature and beat it again before using.
Q: Why do I need to chill the frosting?
A: Chilling the frosting briefly helps it firm up, making it easier to pipe or spread.
Q: My cupcakes are sinking in the middle. What did I do wrong?
A: This could be due to several factors, including overmixing the batter, using too much leavening agent (baking soda), or opening the oven door too frequently during baking.
Final Thoughts
These Red Velvet Cupcakes are more than just a recipe; they’re a taste of nostalgia, a slice of New York City charm, and a guaranteed crowd-pleaser. Don’t be intimidated by the number of steps – each one is crucial to achieving that perfect balance of flavor and texture. So, gather your ingredients, preheat your oven, and prepare to embark on a baking adventure. I encourage you to try this recipe and share your creations with friends and family. Pair these cupcakes with a steaming mug of coffee or a glass of cold milk for the ultimate indulgence. Happy baking!