
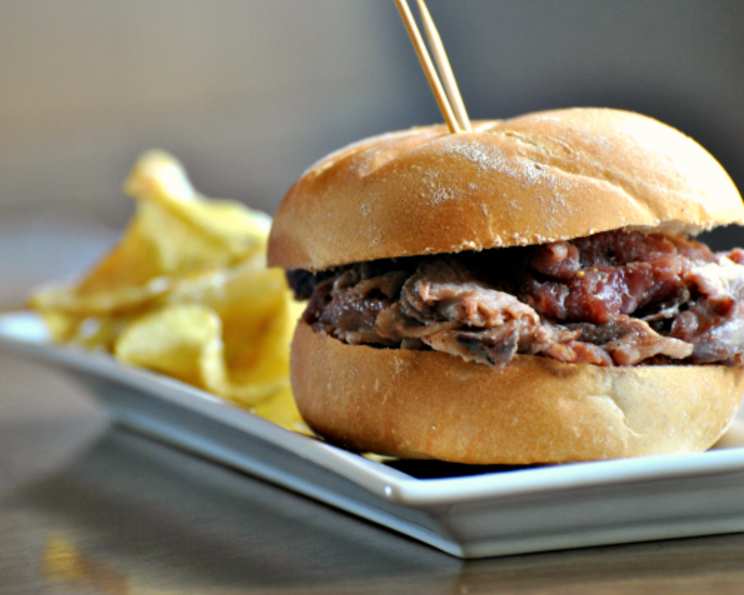
Make-Ahead Tenderloin Sandwiches: The Crowd-Pleasing Delight
The aroma still lingers in my memory – that comforting, savory perfume that wafted from the kitchen during every family reunion. My husband’s cousin Katie had a secret weapon: these mini beef tenderloin sandwiches. They weren’t just food; they were edible love, devoured in seconds by kids and adults alike. I remember elbowing my way through the crowd just to snag one (or three!), and shamelessly begging her for the recipe before the night was over. Now, I’m sharing that precious gem with you. Get ready to become a party favorite!
Recipe Overview
- Prep Time: 30 minutes
- Cook Time: 2 hours 15 minutes
- Total Time: 2 hours 45 minutes
- Yields: 10 sandwiches
- Serves: 8
- Dietary Type: Not specified; contains meat and dairy
Ingredients
- 2-3 lbs beef tenderloin
Basting Mixture:
- 1/2 cup (1 stick) butter, melted
- 1 teaspoon garlic powder
- 1 teaspoon dry mustard
Bun Spread:
- 1/2 lb (2 sticks) butter, softened
- 1 1/2 teaspoons dried parsley
- 1/2 teaspoon garlic powder
- 1 teaspoon dried thyme
- 1 teaspoon celery salt
Equipment Needed
- Roasting Pan
- Small saucepan (for melting butter)
- Mixing bowl
- Bread knife
- Electric knife (recommended)
- Jelly roll pan
- Parchment paper
- Aluminum foil
Instructions
-
Preheat your oven to a very low 200 degrees Fahrenheit. This slow roasting method is key to a supremely tender result.
-
Prepare the basting mixture. In a small saucepan, melt the butter over low heat. Once melted, stir in the garlic powder and dry mustard until well combined. Set aside.
-
Place the beef tenderloin in the roasting pan. Begin roasting the tenderloin for 2 hours, turning and basting with the prepared basting mixture every 20 minutes. This frequent basting ensures the meat stays moist and flavorful throughout the long cooking process. A meat thermometer is your best friend here!
-
The tenderloin will be cooked to medium-rare at an internal temperature of 145 degrees Fahrenheit. Check the temperature in the thickest part of the tenderloin. If you prefer it more well-done, continue roasting, checking the temperature frequently until it reaches your desired doneness. Remember that the internal temperature will rise a little more as it rests.
-
While the tenderloin is roasting, prepare the bun spread. In a mixing bowl, cream together the softened butter, dried parsley, garlic powder, dried thyme, and celery salt until light and fluffy. This flavorful butter is what will make the sandwiches truly special.
-
Slice the small silver dollar rolls (or slider buns) in half horizontally. Generously spread the prepared bun spread mixture on both the top and bottom halves of each bun.
-
Once the beef tenderloin is cooked, remove it from the oven and let it rest for at least 30 minutes. Ideally, letting it rest even longer – up to overnight in the refrigerator – will make it easier to slice thinly. This resting period is crucial as it allows the juices to redistribute throughout the meat, ensuring maximum tenderness and flavor.
-
Using an electric knife (or a very sharp carving knife), slice the cooled tenderloin into thin slices. The thinner the slices, the more tender and enjoyable the sandwiches will be. An electric knife makes this task significantly easier and produces consistently thin slices.
-
Pile several slices of the thinly sliced tenderloin onto the bottom half of each bun. Top with the other half of the bun.
-
Arrange the assembled sandwiches on a jelly roll pan lined with parchment paper. Cover the pan tightly with aluminum foil.
-
At this stage, you can either bake the sandwiches immediately or refrigerate them for later. If refrigerating, place a slightly damp towel over the foil to prevent the buns from drying out.
-
When ready to bake, preheat your oven to 350 degrees Fahrenheit. Remove the foil from the pan and bake the sandwiches for 10-15 minutes, or until the buns are warmed through and the butter spread is melted and fragrant.
-
Serve immediately and prepare for the rave reviews! If you have any leftovers (which is unlikely!), see the storage suggestions below.
Expert Tips & Tricks
- Don’t skip the resting period! Allowing the tenderloin to rest is paramount for a juicy and tender result. Even an hour of resting makes a significant difference.
- Invest in an electric knife. Slicing the tenderloin thinly is essential, and an electric knife will make this task much easier and more consistent.
- Make the bun spread in advance. The bun spread can be made several days ahead of time and stored in the refrigerator. This saves time on the day of serving.
- Adjust the baking time based on your oven. Keep a close eye on the sandwiches while they are baking to prevent the buns from becoming overly browned.
- For added flavor, try adding a thin layer of horseradish sauce or a sprinkle of blue cheese crumbles to the sandwiches before baking.
Serving & Storage Suggestions
Serve these mini tenderloin sandwiches warm, straight from the oven. They are perfect for parties, potlucks, game-day gatherings, or even a special weeknight meal. For an elegant presentation, arrange the sandwiches on a platter and garnish with fresh parsley or thyme sprigs.
Storage: Leftover sandwiches can be stored in the refrigerator for up to 3 days. For longer storage, wrap individual sandwiches tightly in plastic wrap and freeze them for up to 2 months.
Reheating: To reheat refrigerated sandwiches, bake them in a preheated 350-degree Fahrenheit oven for 5-10 minutes, or until warmed through. Frozen sandwiches should be thawed in the refrigerator overnight before reheating.
Nutritional Information
(Note: Values are approximate and will vary based on specific ingredients and portion sizes.)
| Nutrient | Amount per Serving | % Daily Value |
|---|---|---|
| Calories | 589 kcal | N/A |
| Total Fat | 55 g | 84% |
| Saturated Fat | 30 g | 150% |
| Cholesterol | 188 mg | 62% |
| Sodium | 361 mg | 15% |
| Total Carbohydrate | 1 g | 0% |
| Dietary Fiber | 0 g | 0% |
| Sugars | 0 g | 0% |
| Protein | 23 g | 45% |
Variations & Substitutions
- Spicy Kick: Add a pinch of cayenne pepper or a dash of hot sauce to the bun spread for a spicy twist.
- Garlic Lovers: Increase the amount of garlic powder in both the basting mixture and the bun spread for an extra garlicky flavor. You can also add some fresh minced garlic to the bun spread.
- Herb Garden: Experiment with different herbs in the bun spread. Rosemary, oregano, or basil would all be delicious additions.
- Different Buns: Use mini croissants or brioche rolls instead of silver dollar rolls for a richer, more decadent sandwich.
- Gluten-Free: If you have guests with gluten sensitivities, use gluten-free buns.
FAQs (Frequently Asked Questions)
Q: Can I use a different cut of beef?
A: While beef tenderloin is the most tender and flavorful option, you could substitute with sirloin, but it might not be as tender and you will need to watch the cooking time closely.
Q: Can I make these sandwiches ahead of time and freeze them?
A: Yes! Assemble the sandwiches, wrap them individually in plastic wrap, and freeze for up to 2 months. Thaw overnight in the refrigerator before reheating.
Q: How do I prevent the buns from getting soggy?
A: Make sure to use a generous amount of butter spread, as it acts as a barrier against moisture. Also, avoid overfilling the sandwiches with tenderloin.
Q: Can I use pre-sliced sandwich rolls instead of silver dollar rolls?
A: Absolutely! Just adjust the amount of bun spread accordingly.
Q: What’s the best way to slice the tenderloin if I don’t have an electric knife?
A: Use a very sharp carving knife and slice the tenderloin against the grain. Chill the tenderloin thoroughly before slicing to make it easier to cut thin, even slices.
Final Thoughts
These Make-Ahead Tenderloin Sandwiches are more than just a recipe; they’re a tradition, a memory, a guaranteed crowd-pleaser. Whether you’re hosting a sophisticated soirée or a casual game-day gathering, these sandwiches are sure to be a hit. Don’t be surprised if your guests start begging you for the recipe, just like I did! Now, go forth and create some edible magic! Pair these with a crisp green salad and a glass of your favorite wine for a truly unforgettable experience. I can’t wait to hear how they turn out for you!