
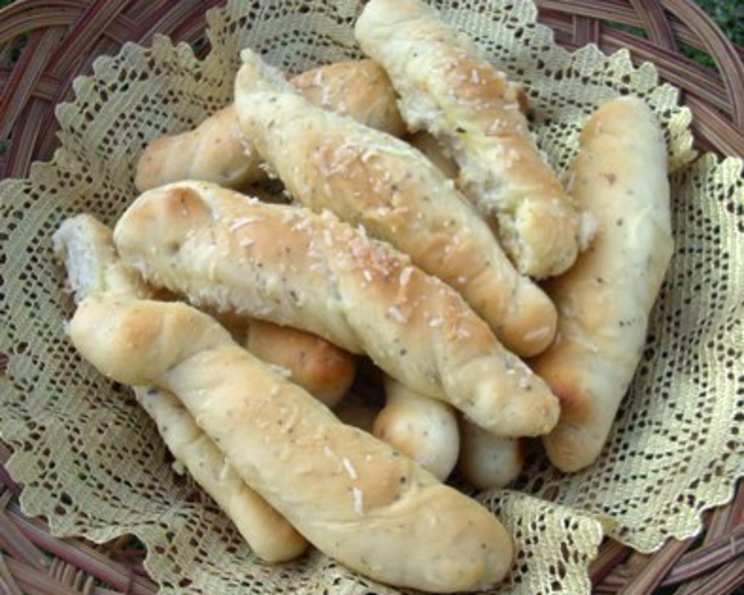
Make and Freeze Breadsticks: A Baker’s Delight
The scent of freshly baked bread, particularly breadsticks, instantly transports me back to my grandmother’s kitchen. She always had a batch proofing on the counter, a warm, yeasty promise of the delightful snacks to come. I remember eagerly watching her roll out the dough, her hands moving with practiced ease, transforming simple ingredients into something magical. These breadsticks were a staple, served alongside everything from hearty soups to simple salads, and they always disappeared in minutes. Recreating that comforting experience in my own kitchen is a joy, and the ability to freeze them for later makes it even better.
Recipe Overview
- Prep Time: 30 minutes
- Cook Time: 15 minutes
- Total Time: 1 hour 45 minutes (includes rising time)
- Yields: 24 breadsticks
- Serves: 12
- Dietary Type: Vegetarian
Ingredients
- 1 cup warm water
- 4 tablespoons butter
- 2 teaspoons salt
- 3 cups unbleached bread flour
- 2 tablespoons sugar
- 1 teaspoon garlic powder
- 1 teaspoon Italian seasoning
- 2 1⁄4 teaspoons active dry yeast
- 2 tablespoons Parmesan cheese
Equipment Needed
- Stand mixer (KitchenAid recommended) with paddle and dough hook attachments
- Mixing bowl
- Measuring cups and spoons
- Greased baking sheets
- Rolling surface
- Freezer bags
Instructions
-
In the bowl of a stand mixer fitted with the paddle attachment, combine 1 cup warm water, 3 tablespoons softened butter, and 2 1/4 teaspoons active dry yeast. Let this mixture sit for about a minute to allow the yeast to proof, ensuring it’s active and ready to work its magic. You should see some bubbling or frothing.
-
In a separate bowl, whisk together the dry ingredients: 3 cups unbleached bread flour, 2 teaspoons salt, 2 tablespoons sugar, 1 teaspoon Italian seasoning, and 1 teaspoon garlic powder. This ensures the flavors are evenly distributed throughout the dough.
-
Turn the mixer on low speed and gradually add the flour mixture to the wet ingredients. Mix until a shaggy dough forms.
-
Switch to the dough hook attachment on your stand mixer. Process the dough on low to medium speed for 5 minutes. This kneading process develops the gluten, creating a smooth and elastic dough that will give the breadsticks their characteristic chewiness.
-
Place the dough in a lightly oiled bowl, turning to coat. Cover the bowl with plastic wrap or a clean kitchen towel and let it rise in a warm place for 40-60 minutes, or until doubled in size. This step is crucial for developing the flavor and texture of the breadsticks.
-
Once the dough has risen, turn it out onto a lightly floured surface. Divide the dough in half.
-
Cut each half into 12 equal pieces, resulting in 24 pieces in total.
-
Roll each piece into a 4-6 inch rope. Aim for a consistent thickness to ensure even baking.
-
Place the breadstick ropes 2 inches apart on a greased baking sheet.
-
Cover the baking sheet with plastic wrap or a clean kitchen towel and let the breadsticks rise again until doubled in size, about 20 minutes. This second rise contributes to a lighter, airier texture.
-
Preheat your oven to 350°F (175°C).
-
Bake the breadsticks for 15 minutes, or until golden brown. Keep a close eye on them to prevent overbaking.
-
Remove the breadsticks from the oven and immediately brush them with the remaining 1 tablespoon melted butter. This adds richness and shine.
-
Sprinkle the breadsticks with 2 tablespoons Parmesan cheese. The heat from the breadsticks will melt the cheese slightly, creating a delicious, savory topping.
-
To freeze uncooked breadsticks: Place the rolled dough ropes on a flat surface lined with parchment paper in the freezer until solid. Once frozen, transfer them to a freezer bag. This prevents them from sticking together.
-
To bake frozen breadsticks: Place the frozen dough ropes on a greased baking sheet and allow them to thaw for 60-90 minutes before baking as usual.
Expert Tips & Tricks
- For a richer flavor, use melted butter instead of oil to grease the baking sheet.
- If your kitchen is cold, place the dough in a slightly warmed oven (turned off) to encourage rising. You can also place a bowl of hot water near the dough.
- Don’t overmix the dough, as this can result in tough breadsticks.
- For extra flavor, try adding herbs like rosemary, thyme, or oregano to the dough.
- If you don’t have a stand mixer, you can knead the dough by hand for about 8-10 minutes.
- To prevent the breadsticks from becoming too dry, brush them with butter immediately after baking.
- Experiment with different toppings, such as sesame seeds, poppy seeds, or everything bagel seasoning.
- If the breadsticks are browning too quickly, tent them with foil during the last few minutes of baking.
Serving & Storage Suggestions
Serve these delicious breadsticks warm, straight from the oven. They make a fantastic accompaniment to soups, salads, pasta dishes, or even as a snack on their own.
Storage:
- Room Temperature: Store cooled breadsticks in an airtight container for up to 2 days.
- Refrigerator: Store in an airtight container for up to 5 days.
- Freezer (Baked): Wrap baked and cooled breadsticks tightly in plastic wrap, then place them in a freezer bag for up to 2 months. Reheat in a 350°F (175°C) oven for 5-10 minutes until warmed through.
- Freezer (Unbaked): As described above, unbaked breadsticks can be frozen for up to 3 months.
Nutritional Information
| Nutrient | Amount per Serving | % Daily Value |
|---|---|---|
| Calories | 172.6 kcal | N/A |
| Calories from Fat | 42 g | 25% |
| Total Fat | 4.7 g | 7% |
| Saturated Fat | 2.7 g | 13% |
| Cholesterol | 10.9 mg | 3% |
| Sodium | 435.9 mg | 18% |
| Total Carbohydrate | 27.5 g | 9% |
| Dietary Fiber | 1.1 g | 4% |
| Sugars | 2.2 g | 8% |
| Protein | 4.8 g | 9% |
Nutritional information is an estimate and may vary based on specific ingredients and preparation methods.
Variations & Substitutions
- Garlic Breadsticks: Increase the garlic powder to 2 teaspoons and add 1/4 cup of minced fresh garlic to the melted butter for brushing.
- Herb Breadsticks: Add 1-2 tablespoons of your favorite dried herbs (such as rosemary, thyme, or oregano) to the dough.
- Cheese Breadsticks: Use a blend of Parmesan and Asiago cheese for a bolder flavor. You can also add a layer of shredded mozzarella cheese during the last few minutes of baking.
- Spicy Breadsticks: Add a pinch of red pepper flakes to the dough or brush the breadsticks with chili oil.
- Whole Wheat Breadsticks: Substitute half of the unbleached bread flour with whole wheat flour for a nuttier flavor and added fiber.
FAQs (Frequently Asked Questions)
Q: Can I use a different type of flour?
A: While bread flour is recommended for its higher gluten content, you can substitute it with all-purpose flour. The breadsticks might be slightly less chewy.
Q: My yeast isn’t bubbling. Is it still good?
A: If your yeast isn’t bubbling after a few minutes, it may be expired. You should use fresh yeast for the best results.
Q: Can I make the dough ahead of time and refrigerate it?
A: Yes, you can refrigerate the dough after the first rise for up to 24 hours. Punch it down before rolling and baking.
Q: How do I prevent the breadsticks from becoming too hard?
A: Avoid overbaking the breadsticks. Bake them until they are golden brown but still slightly soft. Brushing with butter immediately after baking also helps.
Q: Can I bake these in an air fryer?
A: Yes, you can air fry these breadsticks. Preheat your air fryer to 350°F (175°C) and bake for about 8-10 minutes, or until golden brown, flipping halfway through.
Final Thoughts
I truly hope you’ll give this recipe for make-and-freeze breadsticks a try. There’s something incredibly rewarding about creating your own bread, and the ability to freeze these for a quick and satisfying snack or side dish is a real game-changer. Don’t be afraid to experiment with different flavors and toppings to make them your own! I’d love to hear how they turn out for you – please share your feedback and any creative twists you add. Serve them alongside a comforting bowl of tomato soup or a crisp garden salad for a truly delightful meal. Happy baking!