
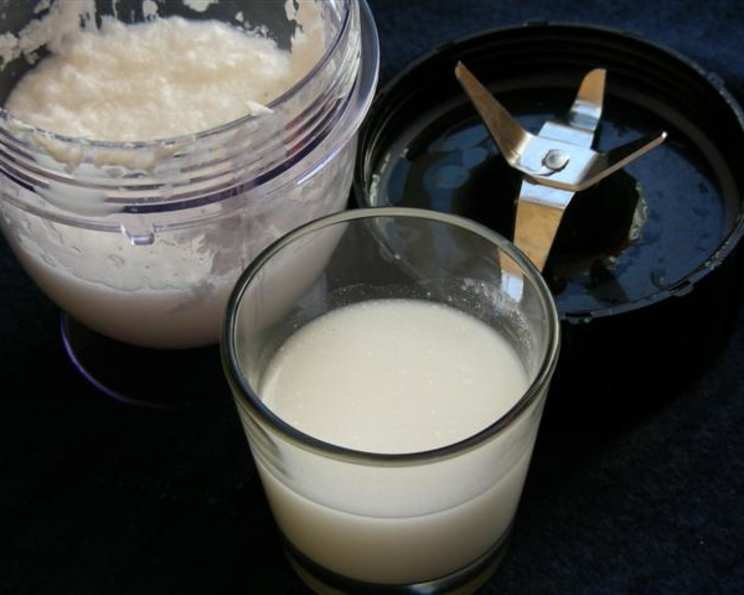
Make Your Own Coconut Milk: A Chef’s Guide
The first time I truly understood the magic of coconut milk was on a small island in Thailand. The air was thick with the scent of frangipani, and the local cooks were preparing a vibrant green curry. The secret, they told me, wasn’t just the chilies or the herbs, but the freshly made coconut milk, squeezed from grated coconut flesh right before my eyes. The aroma alone was intoxicating – sweet, creamy, and utterly transformative. From that moment on, I was convinced: homemade coconut milk is an experience, not just an ingredient.
Recipe Overview
- Prep Time: 30 minutes
- Cook Time: 10 minutes
- Total Time: 1 hour 10 minutes
- Yields: 2 cups
- Dietary Type: Vegan, Gluten-Free, Dairy-Free
Ingredients
- 8 ounces desiccated coconut (dry)
- 3 1/2 cups water
Equipment Needed
- Medium-sized pot
- Blender or food processor
- Large sieve
- Large bowl
- Spoon
Instructions
-
In a medium-sized pot, combine the desiccated coconut and water. Stir to ensure the coconut is evenly moistened.
-
Allow the mixture to soak for 30 minutes. This allows the coconut to rehydrate and release its flavor into the water.
-
After the soaking period, place the pot over low heat and gently bring the mixture to a simmer. Be careful not to boil it vigorously.
-
Cover the pot and simmer gently for 10 minutes. This helps to further extract the coconut flavor and create a richer milk.
-
Turn off the heat and leave the pot on the element (or remove it from the burner) for another 30 minutes. This steeping process allows the flavors to meld and deepen.
-
After the final 30-minute rest, carefully transfer the entire coconut mixture to a blender or food processor.
-
Process the mixture for about 45 seconds, or until the coconut is finely ground and the liquid appears milky and opaque. Be cautious when blending hot liquids; start on low speed and gradually increase to high.
-
Place a large sieve over a bowl. This will act as your strainer.
-
Pour the coconut mixture into the sieve.
-
Using the back of a spoon, press down hard on the coconut solids to extract as much coconut milk as possible. This step is crucial for maximizing your yield and ensuring you get all the creamy goodness.
-
Discard the remaining coconut pulp (or save it for another use, see variations below).
-
The resulting liquid in the bowl is your homemade coconut milk. This method typically yields approximately 2 cups of coconut milk.
-
The coconut milk can be used immediately or stored for later.
Expert Tips & Tricks
- For extra creamy coconut milk: Use warm, but not hot, water. The warmth helps to release more of the coconut’s natural oils.
- Don’t throw away the coconut pulp! Spread it out on a baking sheet and bake at a low temperature (around 200°F or 93°C) until completely dry. You can then use it as coconut flour in baking or toast it for a crunchy topping.
- Prevent splattering: When blending the hot coconut mixture, start on the lowest speed and gradually increase it. You can also vent the blender lid slightly to allow steam to escape.
- Taste as you go: While this recipe provides a good starting point, you can adjust the water-to-coconut ratio to achieve your desired consistency. For a richer, thicker milk, use less water.
- If you don’t have a blender: You can use an immersion blender directly in the pot after the mixture has cooled slightly.
- For a smoother texture: Strain the coconut milk through a cheesecloth-lined sieve for even finer straining and removal of any remaining coconut particles.
Serving & Storage Suggestions
Freshly made coconut milk is best used within a few days. Store it in an airtight container in the refrigerator for up to 2 days. As it sits, the milk will naturally separate into a thick, creamy layer on top and a thinner liquid layer underneath. This is perfectly normal. Simply shake or stir the milk well before using to re-emulsify it. The creamy fat layer will readily melt back into the liquid when heated. It is not recommended to leave it at room temperature for more than 2 hours. Freezing is not recommended, as the texture may change significantly upon thawing.
Nutritional Information
Note: Nutritional information is an estimate and may vary based on specific ingredients and preparation methods.
| Nutrient | Amount per Serving (1 cup) | % Daily Value* |
|---|---|---|
| Calories | 269 kcal | 13% |
| Total Fat | 18.25g | 28% |
| Saturated Fat | 16.15g | 81% |
| Cholesterol | 0mg | 0% |
| Sodium | 149.3mg | 6% |
| Total Carbohydrate | 27g | 9% |
| Dietary Fiber | 2.45g | 10% |
| Sugars | 24.55g | – |
| Protein | 1.85g | 4% |
*Percent Daily Values are based on a 2,000 calorie diet.
Variations & Substitutions
- Spice it up: Add a pinch of ground cinnamon, nutmeg, or cardamom to the coconut and water mixture before simmering for a subtly spiced coconut milk.
- Sweetened coconut milk: Add a tablespoon of maple syrup, agave nectar, or your preferred sweetener to the mixture before blending.
- Coconut cream: For a thicker, richer coconut cream, use less water (about 2 cups) and chill the coconut milk in the refrigerator for several hours. The thick cream will rise to the top and can be scooped off.
- Use fresh coconut: For an even more authentic flavor, use fresh coconut instead of desiccated. You’ll need to crack open a mature coconut, grate the flesh, and then proceed with the recipe. This will impart the most intense coconut flavor.
- Nut-free alternative: While this recipe is coconut milk, you could, in theory, apply a similar process to other nuts and seeds for alternative nut-free milks. Adjust simmering times and processing times accordingly.
FAQs (Frequently Asked Questions)
Q: Why do I need to soak the desiccated coconut before simmering?
A: Soaking allows the coconut to rehydrate and soften, which helps to release more of its flavor and oils into the water, resulting in a richer and creamier milk.
Q: Can I use shredded coconut instead of desiccated coconut?
A: Yes, you can, but the flavor may be slightly different. Shredded coconut contains more moisture than desiccated, so you may need to adjust the amount of water accordingly.
Q: How long will homemade coconut milk last in the fridge?
A: Homemade coconut milk will last for up to 2 days in the refrigerator when stored in an airtight container.
Q: What if my coconut milk separates in the fridge?
A: This is perfectly normal! The fat naturally separates from the water. Simply shake or stir the milk well before using to re-emulsify it.
Q: Can I freeze homemade coconut milk?
A: Freezing isn’t generally recommended as it can alter the texture of the milk, making it grainy upon thawing. However, if you must freeze it, consider freezing it in ice cube trays for small portions that can be easily added to smoothies or curries.
Final Thoughts
Creating your own coconut milk is a simple yet deeply rewarding experience. The fresh, aromatic flavor is unlike anything you can buy in a store. So, gather your ingredients, embrace the process, and prepare to be amazed by the transformative power of homemade coconut milk. Once you try it, you’ll never go back to the canned stuff! I encourage you to experiment with variations, share your creations, and discover the endless possibilities of this versatile ingredient. Perhaps pair it with a flavorful Thai green curry, or even a refreshing coconut cream pie. The choice is yours!