
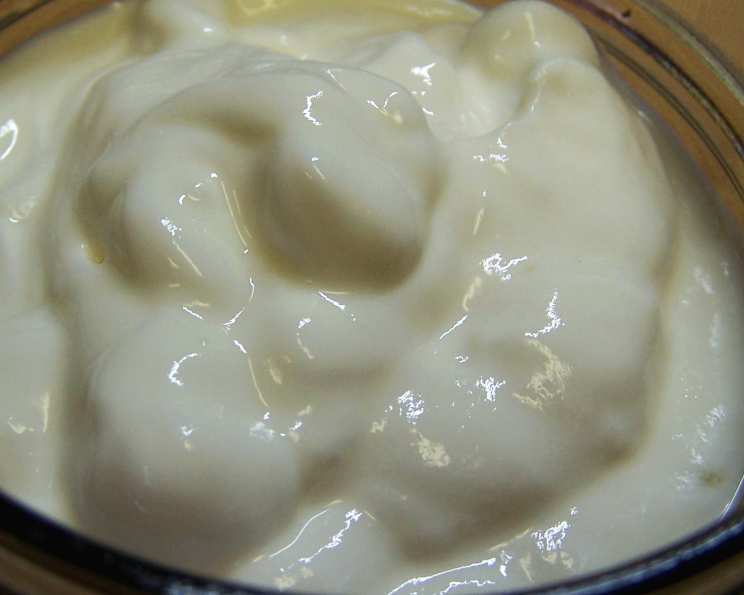
Make Your Own Exquisite Greek Yogurt at Home
I can still remember the first time I tasted authentic Greek yogurt. It was a sun-drenched morning on the island of Crete, and I was sitting at a small taverna overlooking the Aegean Sea. The yogurt, drizzled with local honey and sprinkled with walnuts, was unlike anything I’d ever had – incredibly thick, tangy, and luxuriously creamy. It was a revelation, and it sparked a lifelong passion for this simple yet extraordinary food. Now, I’m excited to share how you can recreate that same magic in your own kitchen.
Recipe Overview
- Prep Time: 15 minutes
- Cook Time: 10-20 minutes
- Total Time: 8-12 hours (plus straining time)
- Servings: 4-6
- Yield: Approximately 500-750g of yogurt (depending on milk)
- Dietary Type: Vegetarian, Gluten-Free
Ingredients
- 1 liter full-fat milk
- 2-3 tablespoons plain yogurt (room temperature) or 2-3 tablespoons of home-made yogurt, mixed with a few tablespoons of milk to thin (room temperature)
Equipment Needed
- Large pot
- Glass or earthenware dish
- Cloth or lid
- Muslin or cheesecloth bag
- Bowl
Instructions
- Begin by gently heating the milk in a large pot over medium heat. The goal is to bring the milk to just under boiling point. Watch carefully to prevent it from scorching or boiling over. You’ll see small bubbles forming around the edges of the pot, and steam rising. This is when you remove it from the heat.
- Carefully pour the heated milk into a clean glass or earthenware dish. Allow the milk to cool to approximately 42°C/104°F. This is crucial, as this temperature allows the live cultures in the yogurt starter to thrive. If you don’t have a thermometer, a good rule of thumb is that the milk should feel warm to the touch, but not hot enough to burn your finger.
- In a separate small bowl, combine the 2-3 tablespoons of plain yogurt with a few tablespoons of the cooled milk. This thins the yogurt and helps it to mix more evenly into the larger volume of milk. Ensure the yogurt is at room temperature; using cold yogurt can shock the cultures.
- Gently pour the yogurt/milk mixture into the cooled milk, taking care not to disturb any skin that may have formed on the surface of the milk. This skin is harmless, but it can create a slightly lumpy texture in the finished yogurt if mixed in.
- Cover the dish with a clean cloth or a lid. Place it in a warm, draft-free location for 8 to 12 hours, or preferably overnight. A warm oven (turned off), a proofing drawer, or even a well-insulated cooler can provide a suitable environment. The key is to maintain a consistent temperature to allow the yogurt cultures to incubate properly. Do not disturb the yogurt during this time; any movement can disrupt the setting process.
- After 8-12 hours, check the yogurt. It should have thickened to a custard-like consistency. If it’s still too liquid, allow it to incubate for a few more hours, checking periodically. Once the yogurt has thickened, refrigerate it for at least 2 hours to stop the fermentation process and allow it to chill completely.
- At this point, you have regular yogurt. To make Greek yogurt, which is thicker and tangier, you need to strain it. Line a colander with a muslin or cheesecloth bag.
- Gently pour the chilled yogurt into the lined colander. Hang the bag over a bowl to collect the whey (the liquid that drains off). Let the yogurt drain in the refrigerator for approximately 2 hours, or until you reach the desired thickness. The longer it strains, the thicker and tangier the yogurt will become. You can adjust the straining time to suit your personal preference.
- Once the yogurt has reached your desired consistency, transfer it to an airtight container and store it in the refrigerator.
Expert Tips & Tricks
- Temperature is key: Ensuring the milk is cooled to the correct temperature before adding the yogurt starter is crucial for successful fermentation. Too hot, and you’ll kill the cultures; too cold, and they won’t thrive.
- Don’t discard the whey: The whey that drains off during straining is packed with protein and nutrients. You can use it in smoothies, baking, or as a substitute for water in soups and stews.
- Experiment with milk: While full-fat milk yields the richest and creamiest yogurt, you can also use 2% milk for a lower-fat option. Just be aware that the texture will be slightly less thick.
- Use a reliable starter: Make sure your yogurt starter contains live and active cultures. Check the label to confirm.
- Homemade Starter: You can even use a tablespoon or two of your previous batch of homemade yogurt as a starter, ensuring that the process keeps going.
- No draft environment: Placing the yogurt in a place that doesn’t have cold air is important to avoid problems with the culturing process.
Serving & Storage Suggestions
Serve your homemade Greek yogurt chilled. It’s delicious on its own, drizzled with honey, or topped with fresh fruit, granola, or nuts. You can also use it in savory dishes, such as dips, sauces, and marinades. Store the yogurt in an airtight container in the refrigerator for up to 1-2 weeks. The yogurt is not suitable for freezing, as the texture will change significantly.
Nutritional Information
Note: Nutritional information is an estimate and may vary based on specific ingredients and portion sizes.
| Nutrient | Amount per Serving (1 cup) | % Daily Value |
|---|---|---|
| Calories | 150 kcal | 8% |
| Total Fat | 8g | 12% |
| Saturated Fat | 5g | 25% |
| Cholesterol | 25mg | 8% |
| Sodium | 100mg | 4% |
| Total Carbohydrate | 12g | 4% |
| Dietary Fiber | 0g | 0% |
| Sugars | 12g | |
| Protein | 8g | 16% |
Variations & Substitutions
- Flavor Infusions: While the yogurt is straining, you can add flavorings such as vanilla extract, lemon zest, or cinnamon.
- Sweeteners: If you prefer a sweeter yogurt, you can add honey, maple syrup, or agave nectar after straining.
- Vegan Yogurt: Although the current recipe requires milk, you can make vegan yogurt with soy or cashew milk.
- Honey topping: Drizzle honey and add nuts, berries, or slices of your favorite fruit for a complete breakfast or snack.
FAQs (Frequently Asked Questions)
Q: My yogurt didn’t thicken. What went wrong?
A: The most common causes are incorrect temperature during incubation or using a yogurt starter that doesn’t contain active cultures. Make sure your milk is around 104°F/42°C before adding the starter, and check the expiration date and label of your store-bought yogurt to ensure it contains live cultures.
Q: Can I use ultra-pasteurized milk?
A: Ultra-pasteurized milk can be used, but it may result in a slightly less thick yogurt. Regular pasteurized milk is generally preferred.
Q: How long does homemade Greek yogurt last in the fridge?
A: Homemade Greek yogurt typically lasts for 1-2 weeks in the refrigerator, as long as it’s stored in an airtight container.
Q: Can I freeze Greek yogurt?
A: Freezing Greek yogurt is not recommended, as it can alter the texture and make it grainy.
Q: What can I do with the whey that’s left over after straining?
A: Whey is a great source of protein and nutrients. You can use it in smoothies, baking, or as a substitute for water or broth in soups and stews. It can also be used to soak grains or legumes for easier digestion.
Final Thoughts
Making your own Greek yogurt at home is surprisingly simple and incredibly rewarding. Not only will you have a delicious and healthy treat at your fingertips, but you’ll also gain a deeper appreciation for the art of fermentation. I encourage you to give this recipe a try and experiment with different flavors and toppings. And please, share your creations and feedback – I’d love to hear about your homemade yogurt adventures! Perhaps pair your yogurt with a sprinkle of homemade granola and a glass of freshly squeezed orange juice for a truly delightful breakfast.