
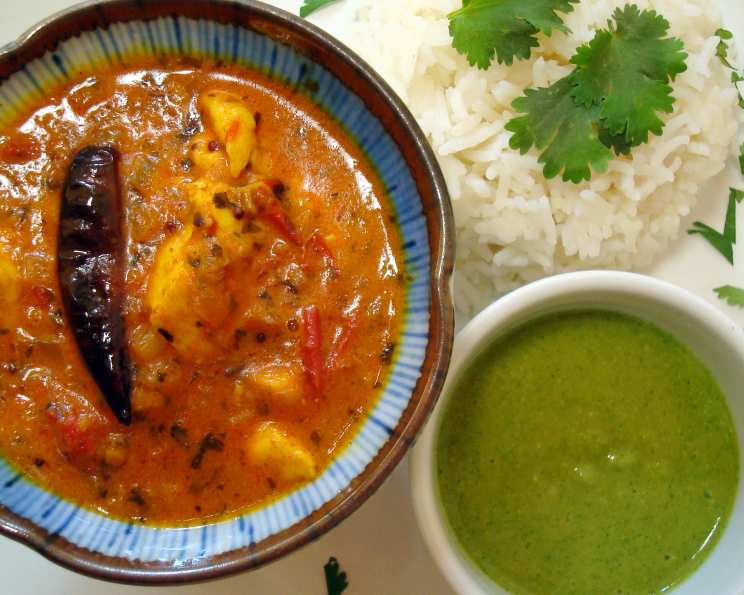
Malabar Chicken Curry: A Symphony of South Indian Flavors
The first time I tasted Malabar Chicken Curry, I was backpacking through Kerala. It was in a tiny, family-run restaurant tucked away in Fort Kochi, the air thick with the scent of spices and the sound of lively chatter. I remember the vibrant crimson hue of the curry, the tender pieces of chicken swimming in the fragrant sauce, and the explosion of flavors that danced on my tongue – the heat of the chilies, the tang of lime, the sweetness of coconut milk, all perfectly balanced. Every bite was a revelation, a taste of a culture so rich and complex. From that moment on, I was hooked, determined to recreate that magic in my own kitchen.
Recipe Overview
- Prep Time: 20 minutes
- Cook Time: 60 minutes
- Total Time: 1 hour 20 minutes
- Servings: 4-6
- Dietary Type: Dairy-Free
Ingredients
- 2 lbs chicken breasts, cut into bite-size pieces
- ½ cup vegetable oil
- 1 tablespoon vegetable oil
- 1 ½ teaspoons mustard seeds
- ½ teaspoon fenugreek seeds
- 12 -15 curry leaves, finely chopped
- 2 dried cayenne chiles
- 4 cups chopped red onions (2 large onions)
- 2 ½ tablespoons grated ginger
- 1 teaspoon chili powder
- 1 ½ tablespoons ground coriander
- 1 teaspoon turmeric
- ½ cup chopped cilantro (leaves and/or stems)
- 3 cups chopped tomatoes
- 2 tablespoons fresh lime juice
- 1 teaspoon salt
- 1 cup unsweetened coconut milk
Equipment Needed
- Large sauce pot or Dutch oven
- Skillet
- Spatula
Instructions
-
Pour ½ cup of vegetable oil into a large sauce pot or Dutch oven over medium heat. When the oil is hot (it should shimmer), add the mustard seeds, fenugreek seeds, curry leaves, and dried cayenne chiles. Be careful as the mustard seeds will splatter.
-
Sauté for 1-2 minutes, until the mustard seeds pop and the curry leaves become fragrant. This is a crucial step to release the essential oils and aromas of the spices.
-
Add the grated ginger and chopped red onions to the pot.
-
Reduce the heat to medium-low and allow the onions to brown until they are dark and soft enough to smash with a spatula – this will take approximately 25-30 minutes. This is the foundation of the curry’s flavor, so don’t rush it! Stir occasionally to prevent burning and ensure even caramelization. The onions should become a deep golden brown color.
-
Add the chili powder, ground coriander, turmeric, and chopped cilantro to the pot. Mix together well, ensuring the spices are evenly distributed and coated in the oil and onion mixture.
-
Raise the heat back to medium and add the chopped tomatoes, salt, and fresh lime juice.
-
Simmer, stirring occasionally, until the tomatoes have disintegrated and the oil separates out from the mixture – this should take around 15-20 minutes. This process thickens the sauce and intensifies the tomato flavor. You should see a layer of oil forming on the surface.
-
Add ½ cup of water and 1 cup of unsweetened coconut milk to the pot. Stir well to combine.
-
Bring the mixture to a boil, then immediately turn down the heat to low.
-
In a separate skillet, heat 1 tablespoon of vegetable oil over high heat.
-
Add the chicken pieces to the skillet in a single layer (work in batches if necessary to avoid overcrowding).
-
Brown the chicken on all sides, leaving the centers pink – this should take approximately 2-4 minutes per batch. The goal is to sear the outside of the chicken to create a flavorful crust and prevent it from drying out in the curry.
-
Add the browned chicken to the curry in the sauce pot.
-
Simmer for 5-7 minutes, or until the chicken is cooked through and the sauce has thickened slightly. The internal temperature of the chicken should reach 165°F (74°C).
-
Serve hot over basmati rice. Garnish with fresh cilantro if desired.
Expert Tips & Tricks
- Browning the onions is key: Don’t skimp on the time it takes to caramelize the onions. This step is crucial for developing the deep, rich flavor of the curry.
- Fresh spices are best: Whenever possible, use freshly ground spices for a more potent and aromatic flavor.
- Adjust the heat: If you prefer a milder curry, reduce the amount of chili powder or remove the seeds from the dried cayenne chiles.
- Marinate the chicken: For even more flavor, marinate the chicken in a mixture of ginger-garlic paste, turmeric, and a squeeze of lime juice for at least 30 minutes before cooking.
- Don’t overcook the chicken: Ensure the chicken remains tender and juicy by not overcooking. It should be just cooked through.
Serving & Storage Suggestions
Malabar Chicken Curry is best served hot over a bed of fluffy basmati rice. Garnish with a sprinkle of fresh cilantro for added freshness. It also pairs well with Indian bread like naan or roti.
Leftovers can be stored in an airtight container in the refrigerator for up to 3 days. To reheat, gently warm the curry in a saucepan over medium heat, stirring occasionally, until heated through. You can also reheat it in the microwave. If the curry has thickened too much, add a splash of water or coconut milk to thin it out. The flavors actually meld and deepen overnight, making it even better the next day!
Nutritional Information
| Nutrient | Amount per Serving | % Daily Value |
|---|---|---|
| Calories | 650 kcal | 33% |
| Total Fat | 45g | 58% |
| Saturated Fat | 25g | 125% |
| Cholesterol | 150mg | 50% |
| Sodium | 800mg | 35% |
| Total Carbohydrate | 30g | 11% |
| Dietary Fiber | 6g | 21% |
| Sugars | 12g | |
| Protein | 40g | 80% |
Nutritional information is an estimate and may vary based on specific ingredients and cooking methods.
Variations & Substitutions
- Vegan Malabar Curry: Substitute the chicken with firm tofu or mixed vegetables like cauliflower, potatoes, and green beans.
- Seafood Malabar Curry: Replace the chicken with shrimp or fish for a delicious seafood twist. Adjust cooking time accordingly.
- Spicier Version: Add more dried cayenne chiles or a teaspoon of cayenne pepper to the curry for an extra kick.
- Creamier Version: Stir in an extra ½ cup of coconut milk at the end of cooking for a richer and creamier texture.
- Coconut Cream: Replace the coconut milk with coconut cream for a much richer taste.
FAQs (Frequently Asked Questions)
Q: Can I make this curry ahead of time?
A: Absolutely! In fact, Malabar Chicken Curry tastes even better the next day as the flavors meld together. Store it in an airtight container in the refrigerator for up to 3 days.
Q: Can I freeze this curry?
A: Yes, you can freeze it for up to 2 months. Thaw it overnight in the refrigerator before reheating.
Q: I don’t have curry leaves. Can I still make this dish?
A: Curry leaves add a unique flavor, but if you can’t find them, you can omit them or substitute with a bay leaf for a slightly different flavor profile.
Q: Can I use chicken thighs instead of chicken breasts?
A: Yes, chicken thighs are a great alternative. They tend to be more flavorful and stay more moist during cooking. Adjust cooking time as needed to ensure they are cooked through.
Q: How do I prevent the coconut milk from curdling?
A: Use full-fat coconut milk and avoid bringing the curry to a rapid boil after adding the coconut milk. Simmering gently will prevent curdling.
Final Thoughts
Now it’s your turn to embark on a culinary journey to the heart of Kerala! This Malabar Chicken Curry is more than just a recipe; it’s an invitation to explore a world of vibrant flavors and aromatic spices. Don’t be intimidated by the ingredient list – each element plays a vital role in creating a truly unforgettable dish. Gather your ingredients, follow the steps, and let the magic of Malabar Chicken Curry transport you to the sun-kissed shores of South India. Serve it with a crisp, dry white wine like a Gewürztraminer to complement the spices. Share your creations and feedback; happy cooking!