
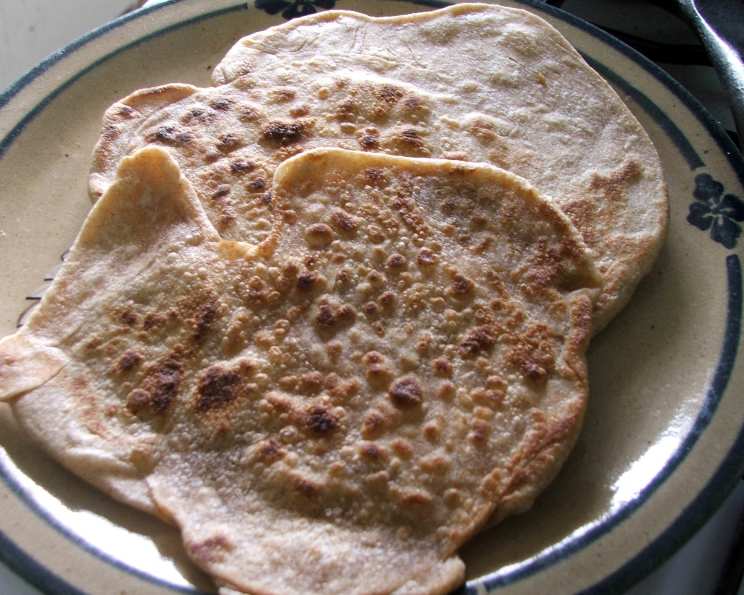
Malawah: A Taste of Yemen in Your Kitchen
I remember the first time I tasted Malawah. I was backpacking through Israel, and a friend, Yechiel, insisted I try his family’s recipe. The aroma alone – buttery, yeasty, and just a little bit savory – was enough to draw me in. Watching him expertly stretch and fold the dough, layer after layer, was mesmerizing. But the real magic happened when that flaky, golden bread hit the pan. Served with a vibrant, spicy tomato sauce and a dollop of tangy labneh, it was a revelation – a simple yet incredibly satisfying taste of home.
Recipe Overview
- Prep Time: 40 minutes (includes resting time)
- Cook Time: 10-15 minutes
- Total Time: 50-55 minutes
- Servings: 6
- Yield: 6 flatbreads
- Dietary Type: Vegetarian
Ingredients
- 3 cups all-purpose flour
- ¼ teaspoon baking powder
- 1 cup water
- 1 cup butter, melted and clarified (see notes below)
- ½ teaspoon salt
- 1 teaspoon sugar
- 1 teaspoon vinegar (optional)
Ingredient Notes:
- Clarified Butter: Clarifying butter removes the milk solids and water, leaving behind pure butterfat. This results in a higher smoke point and a richer flavor. You can buy clarified butter (also known as ghee) or make it yourself by gently melting butter and skimming off the foam that rises to the surface.
- Vinegar: The vinegar helps to tenderize the dough, but it’s optional if you prefer a slightly chewier texture.
Equipment Needed
- Large mixing bowl
- Rolling pin
- Non-stick skillet or frying pan
- Small bowls for buttering
- Clean surface for rolling
Instructions
-
Combine Dry Ingredients: In a large mixing bowl, sift the baking powder into the flour. This helps to distribute the baking powder evenly, resulting in a lighter texture.
-
Make a Well: Create a well in the center of the flour mixture.
-
Add Wet Ingredients: Add the water, 1 tablespoon of the melted butter, salt, sugar, and vinegar (if using) to the well.
-
Knead the Dough: Knead the ingredients together until a smooth, elastic dough forms. This will take about 5-7 minutes. The dough should be soft and pliable but not sticky. If the dough is too dry, add a little more water, 1 tablespoon at a time. If it’s too sticky, add a little more flour, 1 tablespoon at a time.
-
First Rest: Cut the dough into 6 equal portions. Shape each portion into a ball. Place the balls on a lightly floured surface, cover them with a clean towel or plastic wrap, and allow them to rest in a cool place for 20 minutes. This resting period allows the gluten to relax, making the dough easier to roll out.
-
First Flattening & Rolling: After the first rest, take one dough ball and flatten it into a 6-inch round using a rolling pin.
-
First Buttering & Rolling: Brush the entire surface of the flattened round with the melted butter. Then, tightly roll the dough up into a sausage shape.
-
Second Rest: Allow the rolled dough to rest for another 20 minutes, covered, in a cool place. This second rest is crucial for developing the flaky layers.
-
Second Flattening & Rolling: Repeat the flattening, rolling, and brushing procedure. Flatten each “sausage” into a larger, thinner round. Brush generously with melted butter, and then roll it tightly again.
-
Third Rest: Rest the rolls for a final 20 minutes, covered. Patience is key to achieving the best results!
-
Final Flattening: After the final rest, flatten each roll into a thin circle, similar to a pita bread. The thinner you roll the dough, the flakier the final product will be.
-
Cook the Malawah: Heat a non-stick skillet or frying pan over medium heat. You don’t need to add any additional oil to the pan, as the dough is already rich with butter.
-
Fry to Golden Brown: Carefully place one of the flattened dough circles into the hot pan. Fry for 3-5 minutes per side, or until golden brown and slightly puffed up, flipping them over at half time. Watch closely to prevent burning.
-
Serve Immediately: Remove the cooked Malawah from the pan and serve immediately. Repeat with the remaining dough circles.
Expert Tips & Tricks
- Butter Temperature: Make sure the melted butter is not too hot when brushing the dough. If it’s too hot, it will melt the dough and make it difficult to roll.
- Rolling Technique: Use a light touch when rolling out the dough. Avoid pressing down too hard, as this can compress the layers and result in a less flaky texture.
- Pan Temperature: The temperature of the pan is crucial. If the pan is too hot, the Malawah will burn on the outside before it’s cooked through on the inside. If the pan is not hot enough, the Malawah will be pale and greasy.
- Doneness Check: The Malawah is done when it’s golden brown on both sides and slightly puffed up. You can also check for doneness by inserting a toothpick into the center of the bread. If the toothpick comes out clean, the Malawah is cooked through.
- Make-Ahead Tip: You can prepare the dough up to the final flattening stage and store it in the refrigerator for up to 24 hours. Just be sure to wrap it tightly in plastic wrap to prevent it from drying out. Bring the dough to room temperature before frying.
Serving & Storage Suggestions
Malawah is best served hot and fresh. It’s delicious on its own, but it’s even better when paired with dips and spreads. Serve it with:
- Zhoug: A spicy Yemenite condiment made with cilantro, parsley, garlic, chili peppers, and spices.
- Puréed Tomatoes: Simply blend canned tomatoes with garlic, olive oil, and salt.
- Hummus: A classic Middle Eastern dip made with chickpeas, tahini, lemon juice, and garlic.
- Labneh: A tangy strained yogurt cheese.
- Honey: For a sweet and savory treat.
Leftover Malawah can be stored at room temperature for up to 2 days or in the refrigerator for up to 5 days. To reheat, warm it in a dry skillet or in a preheated oven at 350°F (175°C) for a few minutes. You can also freeze Malawah for up to 2 months. Wrap it tightly in plastic wrap and then in foil to prevent freezer burn. Thaw overnight in the refrigerator before reheating.
Nutritional Information
| Nutrient | Amount per Serving | % Daily Value |
|---|---|---|
| Calories | 501.6 kcal | N/A |
| Calories from Fat | 281 g | 56% |
| Total Fat | 31.3 g | 48% |
| Saturated Fat | 19.5 g | 97% |
| Cholesterol | 81.3 mg | 27% |
| Sodium | 428.9 mg | 17% |
| Total Carbohydrate | 48.5 g | 16% |
| Dietary Fiber | 1.7 g | 6% |
| Sugars | 0.9 g | 3% |
| Protein | 6.8 g | 13% |
Note: Nutritional information is an estimate and may vary based on specific ingredients and cooking methods.
Variations & Substitutions
- Gluten-Free Malawah: Substitute the all-purpose flour with a gluten-free all-purpose flour blend. You may need to adjust the amount of water to achieve the right consistency.
- Vegan Malawah: Replace the butter with a vegan butter substitute.
- Spiced Malawah: Add a pinch of cardamom, cinnamon, or cumin to the flour mixture for a warm and aromatic twist.
- Herb Malawah: Sprinkle fresh herbs, such as chopped parsley, cilantro, or dill, over the dough before rolling it up.
FAQs (Frequently Asked Questions)
Q: Why is it important to clarify the butter?
A: Clarifying the butter removes the milk solids, which can burn at high temperatures. Clarified butter also has a richer, nuttier flavor that enhances the taste of the Malawah.
Q: Can I use olive oil instead of butter?
A: While you can use olive oil, it will significantly change the flavor and texture of the Malawah. Butter is essential for achieving the characteristic flakiness and richness.
Q: What if my dough is too sticky?
A: If your dough is too sticky, add a little more flour, 1 tablespoon at a time, until it reaches a smooth, elastic consistency. Be careful not to add too much flour, as this can make the dough dry.
Q: How do I prevent the Malawah from burning?
A: Ensure the pan is heated to medium heat and monitor the Malawah closely while cooking. Flip it over when it’s golden brown on the bottom. If it starts to burn too quickly, reduce the heat.
Q: Can I freeze the cooked Malawah?
A: Yes, you can freeze cooked Malawah. Wrap it tightly in plastic wrap and then in foil to prevent freezer burn. Thaw overnight in the refrigerator before reheating.
Final Thoughts
Malawah is more than just a flatbread; it’s a taste of tradition and a testament to the simple joys of home cooking. This recipe, passed down from my friend Yechiel, is my way of sharing a little piece of that experience with you. Don’t be intimidated by the multiple steps – the process is meditative, and the reward is well worth the effort. So, gather your ingredients, put on some music, and embark on a culinary journey to Yemen. I encourage you to try this recipe, and please share your creations and any variations you discover along the way. Serve it alongside a flavorful shakshuka for a complete and satisfying meal!