
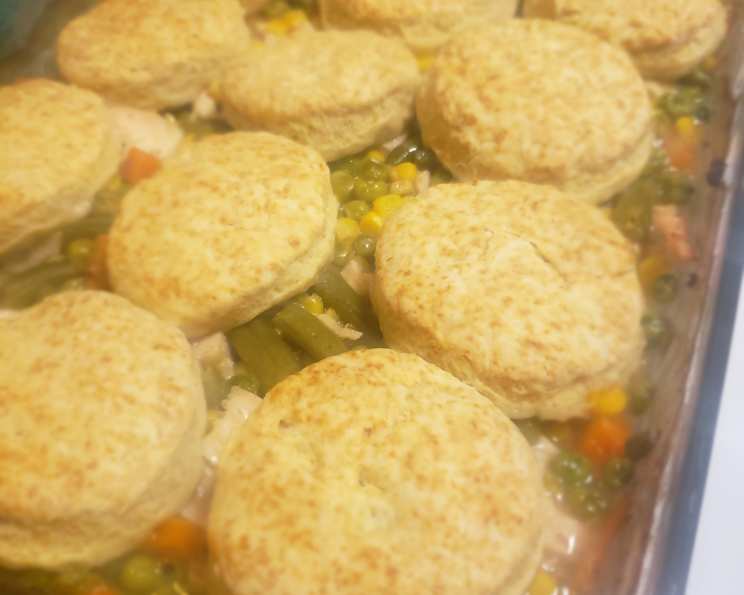
Mama’s Easy Biscuits: A Taste of Home
The scent of baking biscuits is more than just a smell; it’s a time machine. One whiff, and I’m instantly transported back to my grandmother’s kitchen, a haven of warmth and deliciousness. I remember standing on a rickety stool, my little hands dusted in flour, watching her effortlessly transform simple ingredients into golden, fluffy biscuits. These weren’t just biscuits; they were a symbol of love, comfort, and family. Now, with her well-worn recipe in hand, I’m excited to share a piece of that magic with you.
Recipe Overview
- Prep Time: 10 minutes
- Cook Time: 15 minutes
- Total Time: 25 minutes
- Yields: 12 biscuits
- Serves: 6
- Dietary Type: Vegetarian
Ingredients
- 2 cups flour
- 2 teaspoons cream of tartar
- 1 teaspoon baking soda
- 5 tablespoons shortening
- 1/4 teaspoon salt
- 2/3 cup milk
Equipment Needed
- Large mixing bowl
- Measuring cups and spoons
- Pastry blender or two knives
- Lightly floured surface
- Rolling pin
- Biscuit cutter or knife
- Baking sheet
Instructions
-
Preheat your oven to 425°F (220°C). Ensure your oven rack is positioned in the center for even baking.
-
In a large mixing bowl, sift together the flour, cream of tartar, baking soda, and salt. Sifting ensures that the dry ingredients are evenly distributed, contributing to a lighter and more consistent biscuit texture.
-
Cut in the shortening using a pastry blender or two knives. The goal is to incorporate the shortening into the dry ingredients until the mixture resembles coarse crumbs. This process creates pockets of fat that, when baked, will create flaky layers within the biscuits. If you don’t have a pastry blender, simply use two knives in a criss-cross motion.
-
Stir in the milk until the mixture just comes together. Be careful not to overmix at this stage. Overmixing develops the gluten in the flour, resulting in tough biscuits. The dough should be slightly shaggy and just holding together.
-
Turn the dough out onto a lightly floured surface. Gently knead the dough 5 or 6 times, just enough to form a ball. Over-kneading will result in tough biscuits, so handle the dough with a light touch.
-
Pat down the dough to about 1/2 inch thickness. You can use a rolling pin to gently roll the dough, but avoid pressing down too hard. The goal is to maintain the delicate layers that will create a tender biscuit.
-
Use a biscuit cutter or a knife to cut the dough into circles. If you don’t have a biscuit cutter, a drinking glass works in a pinch! Avoid twisting the cutter as you press down, as this can seal the edges and prevent the biscuits from rising properly.
-
Place the biscuit rounds onto a baking sheet. A baking sheet lined with parchment paper ensures easy removal and prevents sticking.
-
Bake for 15 minutes at 425°F (220°C), or until the biscuits are golden brown. Keep a close eye on them during the last few minutes of baking, as oven temperatures can vary.
-
Remove from the oven and let cool slightly on a wire rack before serving.
Expert Tips & Tricks
- Keep your ingredients cold: Cold ingredients, especially the shortening and milk, are key to creating flaky biscuits. Consider chilling the flour and mixing bowl as well for optimal results.
- Don’t overmix: Overmixing develops the gluten in the flour, leading to tough biscuits. Mix the dough just until the ingredients come together.
- Handle the dough gently: Just like overmixing, rough handling of the dough can result in tough biscuits. Use a light touch when kneading and rolling.
- For extra-flaky biscuits: After cutting the biscuits, stack them on top of each other, then gently pat them down again before placing them on the baking sheet. This creates even more layers of buttery goodness.
- Brush with melted butter: For a golden-brown and flavorful crust, brush the tops of the biscuits with melted butter before baking.
- Refrigerate before baking: For a more tender biscuit, refrigerate the cut biscuits for 15-20 minutes before baking. This allows the shortening to firm up, creating a flakier texture.
Serving & Storage Suggestions
Serve these delightful biscuits warm, straight from the oven. They are perfect alongside a comforting bowl of soup, chili, or stew. Slather them with butter, jam, honey, or even gravy for a truly satisfying experience.
To store leftover biscuits, allow them to cool completely and then place them in an airtight container. They will keep at room temperature for 1-2 days, in the refrigerator for up to 5 days, or in the freezer for up to 2 months.
To reheat, wrap the biscuits in foil and warm them in a 350°F (175°C) oven for about 10-15 minutes. You can also microwave them for a quicker option, but they may lose some of their crispness. For frozen biscuits, thaw them in the refrigerator overnight before reheating.
Nutritional Information
| Nutrient | Amount per Serving | % Daily Value |
|---|---|---|
| Calories | 265.9 kcal | N/A |
| Calories from Fat | N/A | N/A |
| Total Fat | 12.1 g | 18% |
| Saturated Fat | 3.4 g | 16% |
| Cholesterol | 3.8 mg | 1% |
| Sodium | 321.3 mg | 13% |
| Total Carbohydrate | 33.7 g | 11% |
| Dietary Fiber | 1.1 g | 4% |
| Sugars | 0.1 g | 0% |
| Protein | 5.2 g | 10% |
Note: Nutritional information is an estimate and may vary based on specific ingredients and portion sizes.
Variations & Substitutions
- Buttermilk Biscuits: Substitute the milk with buttermilk for a tangy flavor and extra-tender texture. You may need to adjust the amount of liquid slightly.
- Cheese Biscuits: Add 1/2 cup of shredded cheddar cheese to the dry ingredients for a cheesy twist.
- Herb Biscuits: Mix in 1-2 tablespoons of chopped fresh herbs, such as rosemary, thyme, or chives, to the dry ingredients for an aromatic flavor.
- Sweet Biscuits: Add 2 tablespoons of sugar to the dry ingredients for a slightly sweet biscuit, perfect for topping with fruit or whipped cream.
- Gluten-Free Biscuits: Substitute the all-purpose flour with a gluten-free flour blend. Be sure to use a blend that is designed for baking and contains xanthan gum. You may need to adjust the amount of liquid slightly.
- Vegan Biscuits: Substitute the milk with plant-based milk, such as almond, soy, or oat milk. Use a vegan shortening or chilled coconut oil.
FAQs (Frequently Asked Questions)
Q: Why are my biscuits flat and dense?
A: This is usually caused by overmixing the dough, using warm ingredients, or not using enough leavening (baking soda and cream of tartar). Be sure to follow the recipe carefully and handle the dough gently.
Q: Can I make the dough ahead of time?
A: Yes, you can prepare the dough, wrap it tightly in plastic wrap, and store it in the refrigerator for up to 24 hours. Let the dough sit at room temperature for 15-20 minutes before rolling and baking.
Q: Can I freeze the baked biscuits?
A: Yes, allow the biscuits to cool completely, then wrap them individually in plastic wrap and place them in a freezer bag. They can be stored in the freezer for up to 2 months.
Q: What can I use if I don’t have cream of tartar?
A: Cream of tartar helps to create a tender crumb in the biscuits. If you don’t have it, you can try substituting it with lemon juice or vinegar, but the results may vary slightly.
Q: How do I get a golden-brown top on my biscuits?
A: Brush the tops of the biscuits with melted butter or milk before baking. You can also increase the oven temperature slightly during the last few minutes of baking.
Final Thoughts
These biscuits aren’t just a recipe; they’re a connection to the past, a taste of home, and a reminder of the simple joys in life. I encourage you to try this recipe and experience the warmth and comfort of Mama’s Easy Biscuits. Don’t be afraid to experiment with variations and make them your own. Whether you’re a seasoned baker or a beginner in the kitchen, these biscuits are sure to bring a smile to your face. Share them with your loved ones, and let the aroma of baking biscuits fill your home with love and happiness. Pair them with a cup of hot coffee or tea, and enjoy the moment!