
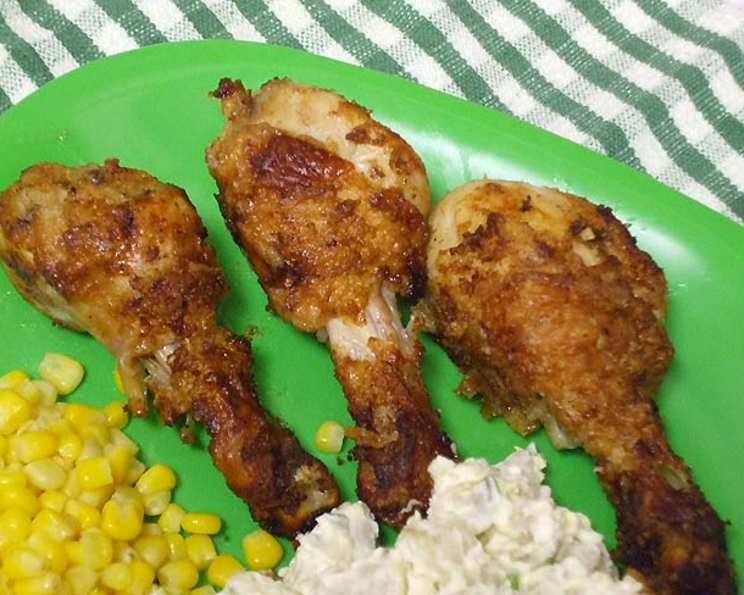
Mama’s Fried Chicken: A Culinary Homecoming
The scent of frying chicken still instantly transports me back to my grandmother’s kitchen. I can almost see her, her hands dusted in flour, carefully lowering each piece into the sizzling oil. The rhythmic crackle, the golden-brown hue deepening before my eyes – it was a culinary symphony that promised comfort, love, and a taste of home like no other. This recipe, though adapted, is my humble attempt to recreate that cherished memory, to share a piece of my past with you.
Recipe Overview
- Prep Time: 2 hours 15 minutes
- Cook Time: 15-18 minutes per batch
- Total Time: 2 hours 30-33 minutes
- Servings: 4-6
- Dietary Type: Not Gluten-Free
Ingredients
- 3-4 lbs whole chickens, cut into pieces
- 1 teaspoon salt
- 1 teaspoon pepper
- 2 cups buttermilk
- Self-rising flour
- Vegetable oil
Equipment Needed
- Shallow dish or Ziploc plastic bag
- Deep skillet or Dutch oven
- Paper towels
- Meat thermometer (optional)
Instructions
- Begin by preparing the chicken. Sprinkle the chicken pieces with salt and pepper. Ensure each piece is evenly seasoned for optimal flavor.
- Place the seasoned chicken in a shallow dish or a Ziploc plastic bag. Pour buttermilk over the chicken, ensuring each piece is submerged. This buttermilk marinade is crucial for tenderizing the chicken and adding a subtle tang.
- Cover the dish or seal the bag and chill in the refrigerator for at least 2 hours. This marinating time allows the buttermilk to work its magic, resulting in incredibly juicy chicken.
- After marinating, remove the chicken from the buttermilk, allowing any excess to drip off. Discard the buttermilk; do not reuse it.
- Now, prepare for the crucial step of dredging. Place a generous amount of self-rising flour in a shallow dish. Dredge each piece of chicken thoroughly in the flour, ensuring it’s completely coated. This flour coating is what will create that crispy, golden-brown crust we all crave.
- Pour vegetable oil into a deep skillet or Dutch oven to a depth of approximately 1 1/2 inches. Heat the oil over medium-high heat until it reaches a temperature of 360°F (182°C). Use a thermometer to ensure accuracy; the correct temperature is essential for achieving perfectly cooked chicken. If you don’t have a thermometer, you can test the oil by dropping a small amount of flour into it. If the flour sizzles and turns golden brown in a few seconds, the oil is ready.
- Carefully add the chicken to the hot oil, a few pieces at a time, being careful not to overcrowd the skillet. Overcrowding will lower the oil temperature, resulting in soggy chicken. Cover the skillet and cook for 6 minutes.
- Uncover the skillet and continue to cook for another 9 minutes. This stage allows the crust to develop a beautiful golden-brown color.
- Turn the chicken pieces over. Cover the skillet again and cook for 6 minutes.
- Uncover the skillet and continue to cook for an additional 5 to 9 minutes, turning the chicken during the last 3 minutes, if needed, to ensure even browning on all sides. Keep a close eye on the chicken during this final stage to prevent burning.
- Once the chicken is cooked through and beautifully browned, remove it from the skillet and drain on paper towels to absorb any excess oil.
- To ensure the chicken is fully cooked, you can use a meat thermometer to check the internal temperature. The thickest part of the chicken should reach 170°F (77°C). Alternatively, you can pierce the thickest portion of the chicken with a fork. If the juices run clear, the chicken is done. If the juices are still pink, continue cooking for a few more minutes, checking again until the juices run clear.
Expert Tips & Tricks
- Consistent Temperature is Key: Maintaining a steady oil temperature is paramount for evenly cooked and crispy chicken. Use a thermometer and adjust the heat as needed throughout the cooking process.
- Don’t Overcrowd: As mentioned before, overcrowding the skillet will lower the oil temperature and result in greasy chicken. Cook in batches to ensure optimal results.
- Double Dredge for Extra Crispiness: For an even crispier crust, try double-dredging the chicken. After the initial dredging, dip the chicken back into the buttermilk and then back into the flour before frying.
- Season the Flour: Enhance the flavor of your fried chicken by adding spices to the self-rising flour. Consider including garlic powder, onion powder, paprika, cayenne pepper, or your favorite seasoning blend.
- Rest the Chicken: After frying, allow the chicken to rest for a few minutes on a wire rack. This allows the juices to redistribute, resulting in a more tender and flavorful final product.
Serving & Storage Suggestions
Serve Mama’s Fried Chicken hot, right from the skillet! It pairs perfectly with classic Southern sides such as mashed potatoes, coleslaw, macaroni and cheese, green beans, or corn on the cob. Garnish with fresh parsley or a sprinkle of paprika for a pop of color.
Leftover fried chicken can be stored in an airtight container in the refrigerator for up to 3-4 days. To reheat, preheat your oven to 350°F (175°C). Place the chicken on a baking sheet lined with parchment paper and bake for 15-20 minutes, or until heated through. For crispier results, you can briefly broil the chicken for the last few minutes of reheating, but watch it carefully to prevent burning.
While fried chicken is best enjoyed fresh, you can freeze it for longer storage. Wrap each piece individually in plastic wrap and then place them in a freezer-safe bag or container. Frozen fried chicken can be stored for up to 2-3 months. To reheat, thaw the chicken in the refrigerator overnight and then follow the reheating instructions above.
Nutritional Information
| Nutrient | Amount per Serving | % Daily Value |
|---|---|---|
| Calories | 525 kcal | N/A |
| Calories from Fat | 323 | N/A |
| Total Fat | 35.9 g | 55% |
| Saturated Fat | 10.6 g | 53% |
| Cholesterol | 165.3 mg | 55% |
| Sodium | 859.7 mg | 35% |
| Total Carbohydrate | 6.2 g | 2% |
| Dietary Fiber | 0.1 g | 0% |
| Sugars | 5.9 g | N/A |
| Protein | 41.8 g | 83% |
Note: Nutritional information is an estimate and may vary based on specific ingredients and cooking methods.
Variations & Substitutions
- Spicy Fried Chicken: Add a pinch of cayenne pepper to your flour mixture.
- Herb Infused: Incorporate dried herbs, such as thyme, rosemary or oregano, into the flour mixture.
- Gluten-Free Fried Chicken: Substitute the all-purpose flour with a gluten-free blend. Consider adding a binder like xanthan gum for better texture.
- Lemon Pepper Fried Chicken: Zest one lemon and add it to the flour, along with a teaspoon of black pepper.
FAQs (Frequently Asked Questions)
Q: Why do I need to marinate the chicken in buttermilk?
A: Buttermilk tenderizes the chicken and adds a subtle tanginess. The acid in the buttermilk breaks down the proteins, resulting in a more juicy and flavorful final product.
Q: Can I use a different type of oil for frying?
A: Yes, you can use other oils with a high smoke point, such as peanut oil, canola oil, or grapeseed oil.
Q: How do I know when the chicken is fully cooked?
A: The internal temperature of the thickest part of the chicken should reach 170°F (77°C). Alternatively, you can pierce the chicken with a fork; the juices should run clear.
Q: My fried chicken is soggy. What did I do wrong?
A: Soggy fried chicken is usually caused by overcrowding the skillet or not maintaining a high enough oil temperature. Be sure to cook in batches and monitor the oil temperature throughout the cooking process.
Q: Can I bake the chicken instead of frying it?
A: While this recipe is specifically for fried chicken, you can adapt it for baking. Dredge the chicken as directed, place it on a baking sheet, and bake at 400°F (200°C) for about 45-60 minutes, or until cooked through. The texture will be different, but it’s a healthier alternative.
Final Thoughts
Mama’s Fried Chicken is more than just a recipe; it’s a legacy passed down through generations. It’s a dish that embodies comfort, love, and the simple joy of sharing a delicious meal with family and friends. Don’t be intimidated by the process – with a little practice and patience, you’ll be able to create a fried chicken masterpiece that will impress even the most discerning palates. So, gather your ingredients, put on some music, and get ready to experience the magic of Mama’s Fried Chicken. I encourage you to try it and, more importantly, adapt it to your own tastes. And when you do, be sure to share your experience and your own family stories! Perhaps a side of collard greens or sweet potato pie would add a special touch to your meal?