
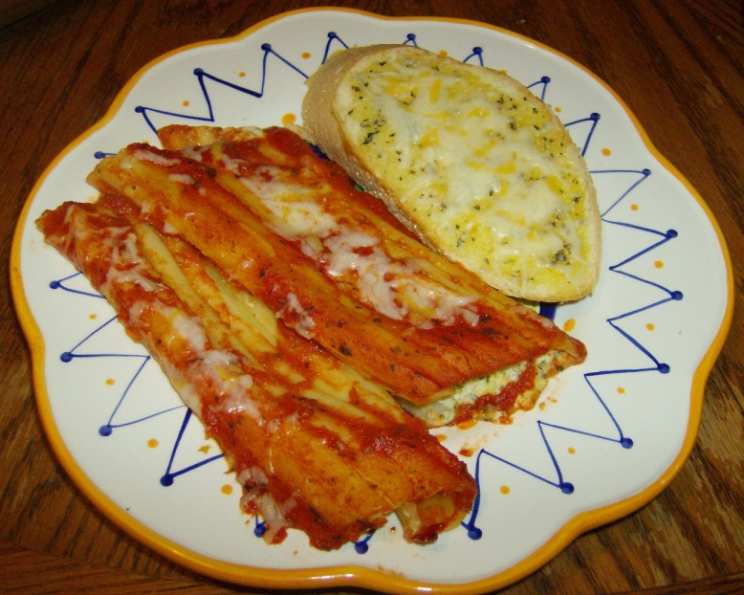
Mama’s Manicotti: A Taste of Home
The scent of simmering tomato sauce, garlic sizzling in olive oil, and bubbling cheese are, for me, the very essence of Sunday dinners at my grandmother’s house. I can still picture her, apron dusted with flour, carefully stuffing manicotti shells with a creamy ricotta mixture, her hands moving with practiced ease. It wasn’t just a meal; it was an act of love, a gathering of family, and a tradition I cherish to this day. That feeling is what I try to re-create with every batch I make.
Recipe Overview
- Prep Time: 25 minutes
- Cook Time: 40 minutes
- Total Time: 1 hour 5 minutes
- Servings: 6-8
- Yield: 1 casserole dish
- Dietary Type: Vegetarian
Ingredients
- 3 cups spaghetti sauce (preferably homemade)
- 1 (16 ounce) container ricotta cheese
- 8 ounces mozzarella cheese, grated
- 16 manicotti shells
- ½ cup pesto sauce
- 2 tablespoons chopped garlic
- ½ cup fresh grated parmesan cheese
Equipment Needed
- Large pot
- Colander
- 9×13-inch glass baking dish
- Mixing bowl
- Spoon
Instructions
- Begin by cooking the manicotti shells according to the package directions. Remember to cook them al dente, as they will continue to cook in the oven. A slightly undercooked shell is better than an overcooked one, which can easily tear. Drain the cooked shells in a colander and set aside to cool slightly.
- While the pasta is cooking, prepare the cheese filling. In a mixing bowl, combine the ricotta cheese, mozzarella cheese, pesto sauce, chopped garlic, and ¼ cup of the parmesan cheese. Mix thoroughly until all ingredients are well incorporated. The pesto adds a lovely depth of flavor, but you can adjust the amount to your liking.
- Preheat your oven to 350°F (175°C).
- Pour 2 cups of the spaghetti sauce into the bottom of a 9×13-inch glass baking dish. This creates a flavorful base for the manicotti and prevents them from sticking. Make sure to spread the sauce evenly across the bottom of the dish.
- Now comes the fun part: stuffing the manicotti shells. Using a spoon or a piping bag (if you prefer), carefully fill each shell with the cheese mixture. Be gentle to avoid tearing the pasta.
- Place the stuffed manicotti shells in the prepared baking dish, arranging them in a single layer.
- Once all the shells are stuffed and arranged, top them with the remaining spaghetti sauce, ensuring that each shell is well covered. This will help keep the pasta moist and flavorful during baking.
- Sprinkle the remaining ¼ cup of parmesan cheese evenly over the top of the sauce. This will create a golden-brown and slightly crispy crust.
- Bake in the preheated oven for approximately 40 minutes, or until the sauce is bubbling and the cheese is melted and lightly browned. To prevent the cheese from burning, you can loosely cover the dish with aluminum foil during the last 15 minutes of baking.
- Once baked, let the manicotti rest for about 5-10 minutes before serving. This allows the cheese to set slightly and prevents the filling from oozing out when you cut into it.
Expert Tips & Tricks
- Homemade Sauce is Best: While store-bought spaghetti sauce works in a pinch, homemade sauce truly elevates this dish. If you have the time, make a batch of your favorite sauce a day or two in advance. The flavors will meld together beautifully.
- Don’t Overcook the Pasta: It’s crucial to cook the manicotti shells al dente. They should be pliable enough to stuff without breaking, but still firm. Overcooked pasta will become mushy in the oven.
- Vary the Cheese: Feel free to experiment with different types of cheese in the filling. A little provolone or fontina can add a nice, subtle flavor.
- Make Ahead: Manicotti is a great dish to make ahead. Assemble it completely and refrigerate it for up to 24 hours before baking. Add an extra 10-15 minutes to the baking time if baking from cold.
- Freezing for Later: For longer storage, you can freeze the assembled, unbaked manicotti. Wrap it tightly in plastic wrap and then foil. Thaw it completely in the refrigerator before baking as directed.
- Garlic Infusion: For a deeper garlic flavor, sauté the minced garlic in a tablespoon of olive oil before adding it to the ricotta mixture. Be careful not to burn the garlic.
- Herb Boost: Fresh herbs like basil, oregano, or parsley can add a vibrant touch to the filling. Chop them finely and mix them in with the cheese.
Serving & Storage Suggestions
Mama’s Manicotti is best served hot, straight from the oven. A simple green salad with a vinaigrette dressing and some crusty garlic bread make the perfect accompaniments. A glass of robust red wine, such as Chianti or Cabernet Sauvignon, complements the richness of the dish.
Leftovers can be stored in an airtight container in the refrigerator for up to 3-4 days. To reheat, you can microwave individual portions or reheat the entire dish in a preheated oven at 350°F (175°C) until heated through.
For longer storage, you can freeze the cooked manicotti. Allow it to cool completely before wrapping it tightly in plastic wrap and then foil. It can be frozen for up to 2-3 months. Thaw it in the refrigerator overnight before reheating.
Nutritional Information
| Nutrient | Amount per Serving | % Daily Value |
|---|---|---|
| Calories | 382.9 kcal | N/A |
| Calories from Fat | 216 g | 56% |
| Total Fat | 24 g | 36% |
| Saturated Fat | 13.3 g | 66% |
| Cholesterol | 77.3 mg | 25% |
| Sodium | 1032.3 mg | 43% |
| Total Carbohydrate | 18.6 g | 6% |
| Dietary Fiber | 0.6 g | 2% |
| Sugars | 11.8 g | 47% |
| Protein | 23.1 g | 46% |
Note: Nutritional information is an estimate and may vary based on specific ingredients and portion sizes.
Variations & Substitutions
- Meat Lovers: Add cooked ground beef or Italian sausage to the ricotta cheese mixture for a heartier dish.
- Vegetarian Boost: Add chopped spinach, mushrooms, or zucchini to the filling for extra nutrients and flavor. Sauté them lightly before adding them to the cheese mixture to remove excess moisture.
- Spice It Up: Add a pinch of red pepper flakes to the sauce or the filling for a little heat.
- Gluten-Free: Use gluten-free manicotti shells and gluten-free spaghetti sauce to make this dish gluten-free.
- Dairy-Free Option: Substitute the ricotta and mozzarella cheese with plant-based alternatives. Nutritional yeast can add a cheesy flavor to the filling.
FAQs (Frequently Asked Questions)
Q: Can I use dried herbs instead of fresh?
A: Yes, you can substitute dried herbs for fresh, but use about half the amount, as dried herbs are more concentrated.
Q: My manicotti shells keep tearing when I try to stuff them. What am I doing wrong?
A: This likely means your shells are either overcooked or not cooled enough. Be sure to cook them al dente and allow them to cool slightly before handling.
Q: Can I use a different type of cheese for the filling?
A: Absolutely! Feel free to experiment with cheeses like provolone, fontina, or even a little bit of goat cheese for a unique flavor.
Q: How do I prevent the sauce from splattering in the oven?
A: Loosely covering the baking dish with aluminum foil during the last 15 minutes of baking will help prevent splattering and browning too quickly.
Q: Can I prepare this dish ahead of time?
A: Yes, you can assemble the manicotti and refrigerate it for up to 24 hours before baking. Add an extra 10-15 minutes to the baking time if baking from cold.
Final Thoughts
Mama’s Manicotti is more than just a recipe; it’s a taste of home, a comforting classic that’s perfect for family gatherings or a cozy night in. Don’t be afraid to experiment with the ingredients and make it your own. I encourage you to try this recipe and share it with your loved ones. And of course, I’d love to hear your feedback and any creative twists you add to this timeless dish. Buon appetito!