
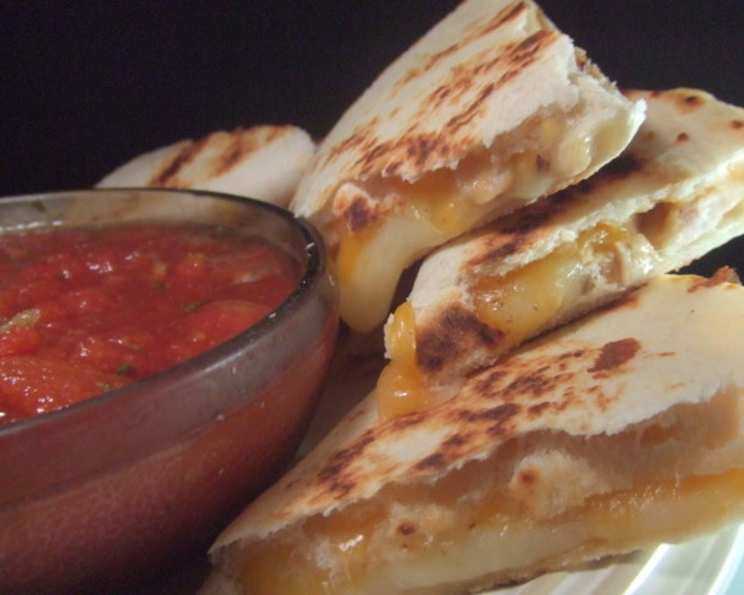
Mama’s Quesadillas: A Taste of Home
I can still picture it: the worn, blue-tiled counter in my grandmother’s kitchen, the sizzle of butter in the pan, and the aroma of melted cheese mingling with the faint scent of masa harina. Those were quesadilla days, and every bite was pure comfort. My grandmother, Mama Elena, had a way of transforming simple ingredients into something magical, a talent I’ve always strived to emulate in my own cooking. This recipe, though adapted slightly over the years, is my tribute to her culinary spirit, a reminder that the best meals are often the simplest, made with love and shared with family.
Recipe Overview
- Prep Time: 5 minutes
- Cook Time: 5 minutes
- Total Time: 10 minutes
- Servings: 2
- Dietary Type: Vegetarian (adaptable)
Ingredients
- 4 ounces Monterey Jack cheese or Monterey Jack pepper cheese
- 1/4 cup Green onion, chopped (white and green parts – about 4)
- 1/2 cup Cooked chicken, shredded (optional)
- 4 Flour tortillas
- Salsa (optional, for serving)
- Sour cream (optional, for serving)
Equipment Needed
- Skillet
- Cooking spray
- Cutting board
- Knife
Instructions
-
Heat a skillet over medium-high heat. It’s important to get the skillet hot enough so the quesadilla gets a nice golden-brown color.
-
While the skillet heats, prepare the quesadillas. On top of one flour tortilla, sprinkle half of the cheese.
-
If desired, sprinkle the cooked chicken evenly over the cheese. The chicken adds protein and a savory flavor, but the quesadillas are equally delicious without it.
-
Sprinkle the green onion over the chicken or cheese. The onion adds a fresh, mild bite that complements the richness of the cheese.
-
Sprinkle the remaining cheese on top of the green onion. This extra layer of cheese will help hold the two tortillas together and create a melty, gooey center.
-
Top with another flour tortilla to form a “sandwich”. Gently press down to ensure the filling is evenly distributed.
-
Spray the hot skillet with cooking spray. This will prevent the quesadilla from sticking and help it brown evenly.
-
Carefully lay the tortilla sandwich in the hot pan.
-
Cook until the bottom tortilla is browned and the cheese begins to melt, approximately 2-3 minutes. Keep a close eye on it to prevent burning!
-
Gently flip the quesadilla to the other side. A wide spatula is helpful for this step to avoid breaking the quesadilla.
-
Cook until the second side is browned and the cheese is fully melted and gooey, approximately another 2-3 minutes. Again, be careful not to burn it.
-
Remove the quesadilla from the skillet to a cutting board.
-
Let the quesadilla rest for about 2 minutes before cutting. This allows the melted cheese to set slightly, making it easier to slice.
-
Using a knife, slice the quesadilla into four pieces, like cutting a pie or pizza.
-
Serve immediately with your favorite toppings, such as salsa and sour cream.
Expert Tips & Tricks
- Cheese Choice Matters: While Monterey Jack is classic, experiment with other cheeses like cheddar, Oaxaca, or even a blend of cheeses for a more complex flavor.
- Prevent Soggy Quesadillas: Ensure the skillet is hot enough before adding the quesadilla. Also, don’t overload the filling, as this can cause the quesadilla to steam instead of crisp.
- Crispy Tortillas: For extra crispy tortillas, brush them lightly with melted butter or olive oil before adding them to the skillet.
- Even Cooking: Press down on the quesadilla with a spatula while it’s cooking to ensure even contact with the skillet and even melting of the cheese.
- Spice It Up: Add a pinch of chili powder or a few drops of hot sauce to the cheese mixture for a spicy kick.
- Make-Ahead Option: You can assemble the quesadillas ahead of time and store them in the refrigerator until ready to cook. Just be sure to wrap them tightly to prevent the tortillas from drying out.
Serving & Storage Suggestions
Serve these quesadillas immediately while they are hot and the cheese is melted and gooey. Arrange the slices attractively on a plate and garnish with a dollop of sour cream and a sprinkle of fresh cilantro (if desired).
Leftover quesadillas can be stored in an airtight container in the refrigerator for up to 3 days. Reheat them in a skillet over medium heat, in a toaster oven, or in a microwave. Reheating in a skillet will help maintain the crispy texture of the tortillas. Microwaving is the quickest option, but it can make the tortillas slightly soggy.
Quesadillas are best enjoyed fresh, but they can also be frozen for longer storage. Wrap individual quesadillas tightly in plastic wrap and then place them in a freezer-safe bag. They can be stored in the freezer for up to 2 months. To reheat frozen quesadillas, thaw them in the refrigerator overnight and then reheat them in a skillet or toaster oven.
Nutritional Information
| Nutrient | Amount per Serving | % Daily Value |
|---|---|---|
| Calories | 394.6 kcal | N/A |
| Calories from Fat | 187 g | 47% |
| Total Fat | 20.8 g | 32% |
| Saturated Fat | 11.4 g | 56% |
| Cholesterol | 60 mg | 20% |
| Sodium | 757.9 mg | 31% |
| Total Carbohydrate | 33.4 g | 11% |
| Dietary Fiber | 2.2 g | 8% |
| Sugars | 3.1 g | N/A |
| Protein | 18.1 g | 36% |
Note: Nutritional information is an estimate and may vary based on specific ingredients and portion sizes.
Variations & Substitutions
- Vegetarian Delight: Omit the chicken for a classic vegetarian quesadilla. Add more vegetables, such as bell peppers, mushrooms, or black beans, to make it heartier.
- Spicy Fiesta: Use Monterey Jack pepper cheese for a spicy kick. Add a pinch of cayenne pepper or a few slices of jalapeño peppers to the filling.
- Mexican Pizza: For a more substantial meal, use a large flour tortilla as the base and spread it with refried beans. Top with cheese, chicken, vegetables, and your favorite toppings, then bake in the oven until the cheese is melted and bubbly.
- Breakfast Quesadilla: Scramble some eggs and add them to the filling along with cheese and your favorite breakfast meats, such as bacon or sausage.
- Gluten-Free Option: Use gluten-free tortillas for a gluten-free version of this classic dish.
- Different Cheeses: Try using cheddar, Oaxaca, or even a blend of cheeses for a more complex flavor profile.
- Add Veggies: Don’t be afraid to add your favorite vegetables! Tomatoes, spinach, avocados, or mushrooms all work well in quesadillas.
FAQs (Frequently Asked Questions)
Q: Can I use corn tortillas instead of flour tortillas?
A: While you can use corn tortillas, they are more prone to cracking and tearing than flour tortillas. Flour tortillas are generally preferred for quesadillas due to their flexibility.
Q: What if my cheese isn’t melting properly?
A: Make sure your skillet is hot enough. Also, try covering the skillet with a lid for a minute or two to trap the heat and help the cheese melt faster.
Q: Can I add beans to my quesadilla?
A: Absolutely! Black beans or refried beans are a delicious and nutritious addition to quesadillas.
Q: How do I prevent my quesadilla from sticking to the pan?
A: Be sure to use cooking spray or a little bit of oil in the pan. Also, make sure the pan is hot before adding the quesadilla.
Q: What’s the best way to reheat a quesadilla?
A: Reheating in a skillet over medium heat is the best way to maintain the crispy texture of the tortillas. You can also use a toaster oven. Microwaving is the quickest option, but it can make the tortillas slightly soggy.
Final Thoughts
Mama’s quesadillas were more than just a quick and easy meal; they were a symbol of her love and generosity. I encourage you to try this recipe and create your own memories around this simple yet satisfying dish. Feel free to experiment with different fillings and toppings to find your perfect quesadilla combination. And don’t forget to share your creations with family and friends! Pair your quesadillas with a refreshing agua fresca or a crisp Mexican beer for a complete and delicious meal. Buen provecho!