
The Art of Mandu-Pi: Crafting Perfect Dumpling Wrappers From Scratch
There’s a certain magic in watching my halmeoni, my grandmother, effortlessly transform a simple ball of dough into dozens of delicate mandu-pi – dumpling wrappers. I remember sitting at her worn kitchen table, mesmerized as her nimble fingers rolled each piece into a perfect circle, a testament to years of practice and love. The scent of sesame oil and kimchi always filled the air, promising a delicious feast to come. While you could always buy them pre-made, the taste and texture of homemade mandu-pi are simply unmatched, and the process itself is a rewarding culinary adventure.
Recipe Overview
- Prep Time: 30 minutes
- Cook Time: 0 minutes (No cooking required for the wrappers themselves)
- Total Time: 30 minutes (plus resting time)
- Servings: Varies depending on the size of mandu made
- Yield: Approximately 16 wrappers
- Dietary Type: Vegetarian, Vegan
Ingredients
- 2 cups all-purpose flour
- ½ teaspoon salt
- ⅔ cup water
- ¼ cup flour, for dusting
Equipment Needed
- Large mixing bowl
- Wooden spoon
- Plastic bag or airtight container
- Cutting board
- Rolling pin
Instructions
- In a large mixing bowl, combine 2 cups of flour, ½ teaspoon of salt, and ⅔ cup of water.
- Use a wooden spoon to mix the ingredients until they form a shaggy lump.
- Turn the dough out onto a lightly floured surface and knead it by hand for a few minutes until it becomes a little softer and more cohesive.
- Place the dough in a plastic bag or airtight container to prevent it from drying out. Let it rest for 10 to 30 minutes on the kitchen counter. This resting period allows the gluten to relax, making the dough easier to work with.
- Remove the dough from the plastic bag. You’ll notice it’s now a little softer, more pliable, and slightly moist.
- Knead the dough again for 5 to 7 minutes, until it’s smooth and elastic. This step is crucial for developing the proper texture of the wrappers. The dough should bounce back slightly when poked.
- Place the dough on a cutting board that has been lightly dusted with flour.
- Divide the dough into 2 equal pieces.
- Return one half to the plastic bag to keep it from drying out while you work on the other half.
- Cut the exposed piece of dough into 8 equal-sized pieces.
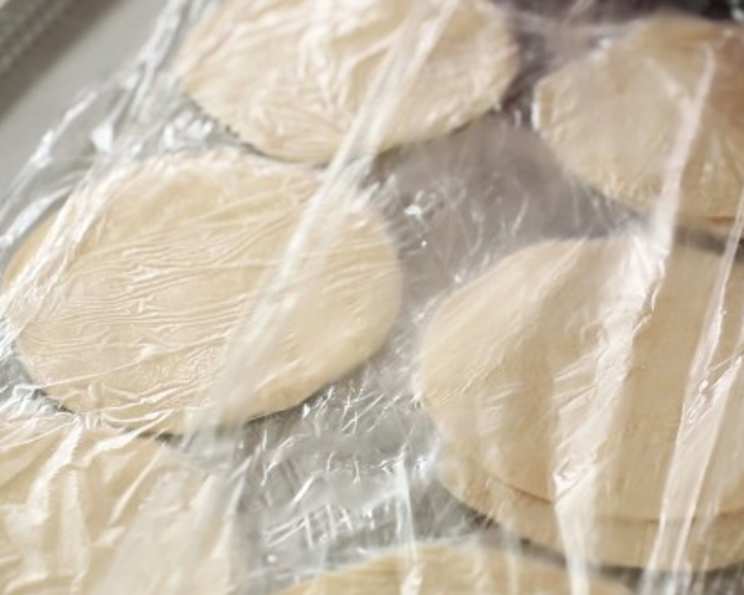
- Roll each piece out with a rolling pin into 5½ to 6 inch round circle disks. The wrappers should be a little thinner on the edges than in the middle. This is because you’ll be pinching the edges together when making mandu, and you don’t want them to be too thick and doughy. A thin edge also helps to create a better seal.
- Take the second half of the dough out of the bag and repeat the process, making eight more mandu wrappers.
- Use the wrappers immediately to make mandu, or freeze them for later use.
Expert Tips & Tricks
- Resting is Key: Don’t skip the resting period! It allows the gluten in the flour to relax, resulting in a more tender and pliable dough. If you’re short on time, a minimum of 10 minutes is sufficient, but a longer rest will yield even better results.
- Hydration Levels: The amount of water needed can vary slightly depending on the humidity and the type of flour used. Start with the specified amount and add a teaspoon or two more if the dough is too dry. Conversely, if the dough is too sticky, add a little more flour, one tablespoon at a time.
- Rolling Technique: When rolling out the wrappers, aim for a consistent thickness. Use light, even pressure to avoid tearing the dough. Rotating the wrapper as you roll will help create a more circular shape.
- Preventing Sticking: To prevent the wrappers from sticking to each other, dust them lightly with flour and stack them between layers of parchment paper or plastic wrap.
- Freezing for Later: If you’re not using the wrappers immediately, freeze them for later use. Stack them between layers of parchment paper in a freezer-safe bag or container. When ready to use, thaw them in the refrigerator for several hours or overnight.
Serving & Storage Suggestions
Freshly made mandu wrappers are best used immediately for making delicious dumplings. Serve the cooked mandu as a side dish, appetizer, or main course.
If you have leftover wrappers, you can store them in the refrigerator for up to 2 days, tightly wrapped in plastic wrap to prevent them from drying out. You can also freeze them for longer storage. To freeze, stack the wrappers between sheets of parchment paper in a freezer-safe bag or container. They can be stored in the freezer for up to 2 months. Thaw them in the refrigerator before using.
Nutritional Information
Note: Nutritional information is an estimate and will vary based on specific ingredients and serving size.
| Nutrient | Amount per Serving (per wrapper) | % Daily Value* |
|---|---|---|
| Calories | 64 kcal | 3% |
| Total Fat | 0.2 g | 0% |
| Saturated Fat | 0 g | 0% |
| Cholesterol | 0 mg | 0% |
| Sodium | 73.3 mg | 3% |
| Total Carbohydrate | 13.4 g | 4% |
| Dietary Fiber | 0.5 g | 2% |
| Sugars | 0.1 g | 0% |
| Protein | 1.8 g | 4% |
- Percent Daily Values are based on a 2000 calorie diet.
Variations & Substitutions
- Gluten-Free Mandu-Pi: Substitute all-purpose flour with a gluten-free flour blend. You may need to add a little more water to achieve the desired consistency. Ensure the gluten-free flour blend contains xanthan gum or a similar binder to help with the dough’s elasticity.
- Whole Wheat Mandu-Pi: Replace half of the all-purpose flour with whole wheat flour for a nuttier flavor and added fiber. You might need to add a touch more water, as whole wheat flour absorbs more liquid.
- Colored Mandu-Pi: For a fun twist, add a small amount of vegetable juice (like spinach juice for green or beet juice for pink) to the dough. This will naturally color the wrappers. Start with a tablespoon and add more until you achieve the desired color.
- Vegan Variation: This recipe is already vegan friendly.
FAQs (Frequently Asked Questions)
Q: Why are my mandu wrappers tearing when I try to roll them out?
A: This is likely due to the dough not being hydrated enough or not being kneaded sufficiently. Make sure you knead the dough for the recommended time, and add a teaspoon of water at a time if it seems too dry. Resting the dough properly is also important for gluten development, which helps with elasticity.
Q: Can I use bread flour instead of all-purpose flour?
A: Bread flour can be used, but it will result in a chewier wrapper. If you prefer a more tender wrapper, stick to all-purpose flour. If you do use bread flour, you might need to adjust the amount of water slightly.
Q: How do I prevent my mandu wrappers from sticking together after I roll them out?
A: Dust the wrappers lightly with flour and stack them between layers of parchment paper or plastic wrap. This will create a barrier and prevent them from sticking together.
Q: Can I make the dough in a food processor?
A: Yes, you can use a food processor. Pulse the flour, salt, and water until the dough comes together. Then, knead it by hand for a few minutes to develop the gluten. Be careful not to over-process the dough, as this can lead to a tough wrapper.
Q: How long can I store the finished mandu wrappers in the freezer?
A: Properly stored mandu wrappers can be kept in the freezer for up to 2 months without a significant loss in quality. Make sure they are well-sealed to prevent freezer burn.
Final Thoughts
Making mandu-pi from scratch might seem intimidating at first, but it’s a skill that’s well worth learning. The process is surprisingly therapeutic, and the end result – delicate, flavorful dumplings – is incredibly rewarding. So, gather your ingredients, put on some music, and give it a try. Don’t be afraid to experiment with different fillings and flavors. And, most importantly, share your creations with family and friends – they’ll thank you for it! The best pairing for a plate of perfectly cooked Mandu, in my opinion, is a chilled glass of Soju. Enjoy!