
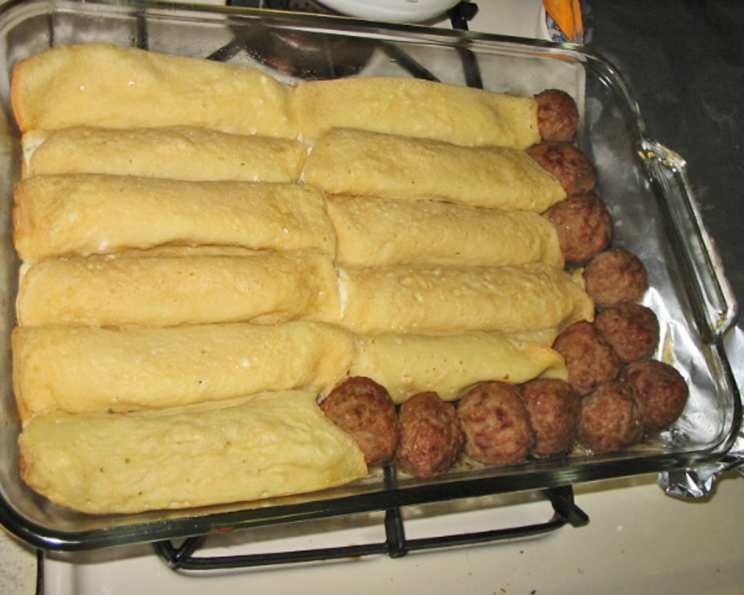
Manicotti: Cheese-Filled Italian Crepes
The scent of bubbling marinara and melting mozzarella takes me right back to my childhood. Every Sunday, my Nonna would transform her tiny kitchen into a pasta-making factory, and her manicotti, delicate crepes embracing a creamy ricotta filling, were the crown jewel of the meal. I remember standing on a stool, mesmerized as she expertly rolled each crepe, humming a tune that was as comforting as the dish itself. Now, carrying on that tradition, the aroma fills my own home, a warm hug from the past reminding me of family, love, and the simple joy of good food.
Recipe Overview
- Prep Time: 45 minutes
- Cook Time: 55 minutes
- Total Time: 1 hour 40 minutes
- Yields: 16 Manicotti
- Serves: 6-8
- Dietary Type: Vegetarian
Ingredients
Crepes
- 3 eggs
- 1 cup water
- 1 1/2 cups all-purpose flour
- Non-stick Pam cooking spray
Filling
- 2 lbs whole milk ricotta cheese
- 1/2 cup pecorino romano cheese, freshly grated
- 1 cup shredded whole milk mozzarella
- 3 tablespoons fresh basil, chopped (dried can be used)
- 4 tablespoons fresh parsley, chopped (dried can be used)
- 2 eggs, beaten
- 1/2 teaspoon fresh ground pepper
Other Items
- 2 quarts marinara sauce
- 1 cup shredded mozzarella cheese, for topping
Equipment Needed
- Blender or mixing bowl
- Large bowl
- 8-inch non-stick fry pan or crepe pan
- Aluminum foil
- 13×9-inch baking pan (or larger)
Instructions
- Prepare the Crepe Batter: In a blender or mixing bowl, combine the eggs and water. Mix well. Gradually add the flour, mixing continuously until the batter is smooth. Ensure there are no lumps.
- Rest the Batter: Cover the crepe batter and refrigerate for at least 30 minutes. This resting period allows the gluten to relax, resulting in more tender crepes. Ideally, you can prepare the batter a day in advance to save time.
- Prepare the Filling: While the crepe batter is resting, begin preparing the cheese filling. In a large bowl, combine the ricotta cheese, pecorino romano cheese, mozzarella cheese, fresh basil, fresh parsley, eggs, and pepper.
- Mix the Filling: Mix all filling ingredients thoroughly until everything is well incorporated.
- Refrigerate the Filling: Cover the filling and refrigerate until needed. This helps the flavors meld together.
- Cook the Crepes: After the crepe batter has rested for at least 30 minutes, you can begin cooking the crepes. Heat an 8-inch non-stick fry pan or crepe pan over medium heat. The pan must be non-stick for best results.
- Grease the Pan: Once the pan is heated, spray it generously with Pam cooking spray, ensuring the bottom and sides are well coated.
- Pour the Batter: Pour 1/3 cup of the crepe batter into the hot pan. Immediately swirl and tilt the pan to evenly coat the bottom with a thin layer of batter. Adjust the amount of batter depending on your pan size – you want a thin, even layer.
- Cook the First Side: Let the crepe cook until the top appears dry. Initially, the top will look “wet,” but it will gradually transform and look “dry”. This takes about 1 minute or so.
- Flip the Crepe: Once the top is dry, use a butter knife or spatula to gently slide under the crepe and flip it over.
- Cook the Second Side: Cook the other side for just 5 seconds more.
- Remove the Crepe: The crepe should easily slide out of the pan onto your work surface. I recommend laying a sheet of aluminum foil on your counter. As you make the crepes, slide them onto the foil to cool.
- Repeat: Spray the pan again with Pam cooking spray and repeat the cooking process until all the batter is used. This recipe will yield approximately 16-20 crepes. Once cooled, you can arrange them on the foil, slightly overlapping each other.
- Preheat the Oven: Preheat your oven to 325°F (160°C).
- Prepare the Baking Pan: Take a 13×9-inch baking pan (or larger) and cover the bottom with a thin layer of marinara sauce. Ensure the sauce is at room temperature.
- Assemble the Manicotti: To assemble each manicotti, place about 2 tablespoons of the cheese filling in a line across the center of a crepe. Roll the crepe up tightly and place it seam-side down in the prepared baking pan.
- Fill the Pan: Continue filling and rolling the crepes, arranging them snugly in the baking pan. The number of manicotti that fit will depend on the size of your pan.
- Freeze Extras (Optional): Any extra rolled manicotti that don’t fit in the pan can be frozen individually in a freezer bag for up to 3 months.
- Top with Sauce: Once the pan is full, pour another layer of marinara sauce over the top of the stuffed manicotti, ensuring they are all well covered.
- Cover and Bake: Cover the baking pan tightly with aluminum foil. Place it in the preheated 325°F (160°C) oven and bake for 40 minutes.
- Add Cheese Topping: Remove the foil and sprinkle the remaining 1 cup of shredded mozzarella cheese evenly over the top of the manicotti.
- Melt the Cheese: Return the pan to the oven and bake for another 5-10 minutes, or until the cheese is melted and lightly browned.
- Rest and Serve: Take the pan out of the oven and let it rest for at least 10 minutes before serving. This allows the filling to set slightly and the flavors to meld further. Enjoy! Serve with a side salad and a warm loaf of Italian bread for a complete and satisfying meal.
Expert Tips & Tricks
- Crepe Thickness: If your crepes are too thick, add a tablespoon of water at a time to the batter until you reach the desired consistency.
- Preventing Sticking: If your crepes are sticking to the pan despite using non-stick spray, ensure the pan is properly heated before adding the batter. You may also need to add a bit of oil to the pan in addition to the spray.
- Filling Consistency: If the ricotta cheese seems too watery, drain it in a cheesecloth-lined sieve for an hour or two before using it in the filling.
- Make Ahead: You can assemble the manicotti a day ahead of time. Cover and refrigerate until ready to bake. Add a few minutes to the baking time.
Serving & Storage Suggestions
Serve the manicotti hot, straight from the oven, garnished with a sprinkle of fresh parsley or basil. Leftovers can be stored in an airtight container in the refrigerator for up to 3 days. To reheat, bake in a 350°F (175°C) oven until heated through, or microwave in individual portions. Manicotti can also be frozen for up to 2 months. Thaw completely before reheating.
Nutritional Information
| Nutrient | Amount per Serving | % Daily Value |
|---|---|---|
| Calories | 848.5 kcal | N/A |
| Calories from Fat | 373 g | 44% |
| Total Fat | 41.5 g | 63% |
| Saturated Fat | 21.2 g | 106% |
| Cholesterol | 268.5 mg | 89% |
| Sodium | 1828.6 mg | 76% |
| Total Carbohydrate | 77 g | 25% |
| Dietary Fiber | 9.9 g | 39% |
| Sugars | 31.4 g | N/A |
| Protein | 40 g | 80% |
Variations & Substitutions
- Gluten-Free: Substitute gluten-free all-purpose flour for the regular flour in the crepe batter.
- Spicy Manicotti: Add a pinch of red pepper flakes to the cheese filling for a touch of heat.
- Meat-Filled: Add cooked and crumbled Italian sausage or ground beef to the cheese filling for a heartier dish.
- Vegetable Boost: Mix in some chopped spinach, zucchini, or mushrooms into the cheese filling to increase the vegetable content.
- Sauce Swap: Use a creamy Alfredo sauce instead of marinara for a richer flavor.
FAQs (Frequently Asked Questions)
Q: Can I use pre-made crepes to save time?
A: Yes, you can use store-bought crepes, but homemade crepes will have a better texture and flavor.
Q: Can I freeze the manicotti after baking?
A: Yes, allow the baked manicotti to cool completely, then wrap tightly in plastic wrap and foil before freezing.
Q: How do I prevent the crepes from tearing when rolling?
A: Make sure the crepes are cool but not brittle before filling. Also, avoid overfilling them.
Q: Can I use part-skim ricotta cheese?
A: Yes, but whole milk ricotta cheese will provide a creamier, richer flavor.
Q: What if I don’t have Pecorino Romano cheese?
A: You can substitute Parmesan cheese, though the flavor will be slightly different.
Final Thoughts
Now it’s your turn to create this classic Italian comfort food in your own kitchen! Whether you’re carrying on a family tradition or discovering manicotti for the first time, I hope this recipe brings you as much joy as it has brought me. Don’t be afraid to experiment with different fillings or sauces to make it your own. And most importantly, gather your loved ones around the table, savor each bite, and share the warmth of homemade goodness. Buon appetito!