
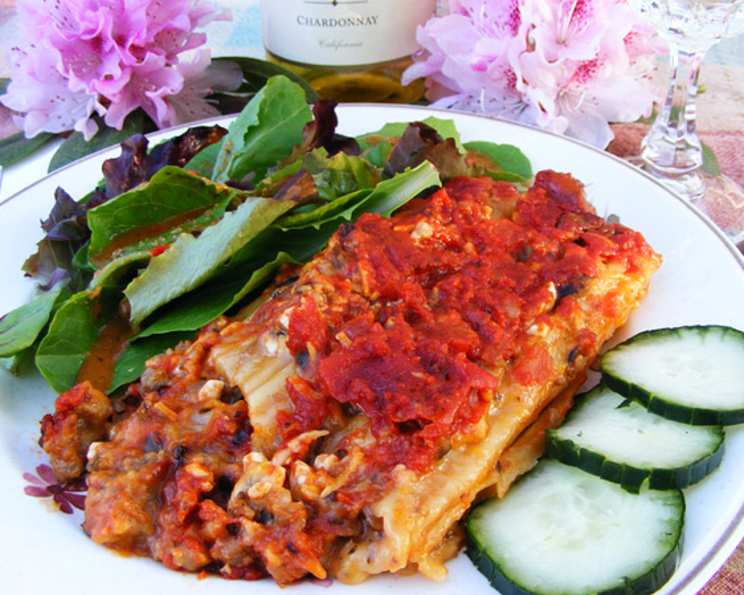
Sausage & Cheese Manicotti: A Comfort Food Classic
The aroma alone transports me back to my childhood, to Sunday dinners at my Nonna’s house. The scent of simmering tomato sauce, mingled with browned sausage and bubbling cheese, would fill the air, a promise of warmth and togetherness. Everyone would crowd around the table, eager to devour a plate piled high with these cheesy, meaty manicotti – a true testament to her love and culinary prowess. Even now, recreating this dish brings a smile to my face and a comforting sense of home.
Recipe Overview
- Prep Time: 30 minutes
- Cook Time: 40-50 minutes
- Total Time: 1 hour 10-20 minutes
- Servings: 8
- Yields: 16 stuffed shells
- Dietary Type: Not Gluten-Free
Ingredients
- 1 lb breakfast sausage, browned
- 1 medium onion, chopped finely
- 8 ounces mozzarella cheese, shredded
- 12 ounces sharp cheddar cheese, shredded
- 12 ounces cottage cheese
- 1 (15 ounce) can black olives, chopped
- 1 (16 ounce) box manicotti shells
- 2 (20 ounce) cans Hunts or Del Monte spaghetti sauce (one “Garden Vegetable”, one “Traditional” flavor)
- 12 ounces water (or ½ large can from above)
Equipment Needed
- Large bowl
- 9×13 inch Pyrex or glass baking dish
- Skillet
Instructions
- Begin by browning the breakfast sausage in a skillet over medium heat. Break it apart with a spoon as it cooks, ensuring it browns evenly. Once browned, remove from heat and allow to cool slightly.
- While the sausage is cooling, prepare the cheese mixture. In a large bowl, combine the mozzarella cheese, sharp cheddar cheese, and cottage cheese.
- Add the cooled sausage, finely chopped onion, and chopped black olives to the cheese mixture. Mix well until all ingredients are evenly distributed. This is your delicious filling!
- Now, it’s time to stuff the manicotti shells. This can be a little messy, but it’s worth it! Take each hard, uncooked shell and carefully stuff it with the cheese and sausage mixture. Use your fingers or a small spoon to pack the filling in tightly. Do not pre-cook the shells. Trust the process!
- Place the stuffed manicotti shells in a 9×13 inch Pyrex or glass baking dish, arranging them in a single layer.
- If there is any remaining sausage and cheese mixture, spread it evenly over the top of the stuffed shells. This will add extra flavor and cheesiness.
- Pour the spaghetti sauce over the top of the manicotti shells, ensuring they are well-coated. You may only need 1 1/2 cans of sauce, depending on the size of your pan and how generously you like your sauce. Use both the “Garden Vegetable” and “Traditional” flavors for a richer taste.
- Pour the water (or remaining ½ can of sauce) along the sides of the baking dish. This will help the shells cook through and prevent them from drying out.
- Cover the baking dish tightly with aluminum foil and refrigerate overnight. This crucial step allows the manicotti shells to absorb the water and soften, ensuring they cook properly in the oven. Don’t skip this step!
- The next day, preheat your oven to 350°F (175°C).
- Bake the covered manicotti for 40-50 minutes, or until bubbly and the shells are tender. To check for doneness, carefully poke a fork into one of the shells. It should be easily pierced with minimal resistance.
- Remove the foil during the last 10 minutes of baking for a more golden-brown, crispier crust on the cheese topping.
- Remove from the oven and let stand for 5-10 minutes before serving. This will allow the sauce to thicken slightly and the flavors to meld together even further.
Expert Tips & Tricks
- For an even richer flavor, consider using Italian sausage instead of breakfast sausage. Just be sure to remove the casings first.
- To prevent the shells from sticking to the bottom of the dish, lightly grease the baking dish before adding the manicotti.
- If you find it difficult to stuff the shells with your fingers, try using a pastry bag or a large zip-top bag with the corner cut off.
- To save time, you can brown the sausage and prepare the cheese mixture a day or two in advance. Store them separately in the refrigerator until ready to assemble the dish.
- If the manicotti starts to brown too quickly in the oven, tent the baking dish with aluminum foil.
Serving & Storage Suggestions
Serve the Sausage & Cheese Manicotti hot, straight from the oven. Garnish with fresh parsley or basil for a pop of color. It pairs perfectly with a simple green salad and some crusty bread for soaking up all that delicious sauce.
Leftovers can be stored in an airtight container in the refrigerator for up to 3-4 days. To reheat, simply microwave individual portions until heated through. You can also reheat the entire dish in a preheated oven at 350°F (175°C) for about 20-30 minutes, or until bubbly and heated through.
For longer storage, the manicotti can be frozen for up to 2-3 months. Thaw it completely in the refrigerator before reheating.
Nutritional Information
| Nutrient | Amount per Serving | % Daily Value |
|---|---|---|
| Calories | 885.3 kcal | N/A |
| Calories from Fat | 438 g | 50% |
| Total Fat | 48.7 g | 74% |
| Saturated Fat | 20.6 g | 102% |
| Cholesterol | 121.6 mg | 40% |
| Sodium | 2241.4 mg | 93% |
| Total Carbohydrate | 66.6 g | 22% |
| Dietary Fiber | 4.3 g | 17% |
| Sugars | 15.6 g | N/A |
| Protein | 44.5 g | 89% |
Variations & Substitutions
- For a vegetarian version, substitute the sausage with sautéed mushrooms, spinach, and zucchini.
- To make it gluten-free, use gluten-free manicotti shells and ensure the sausage and spaghetti sauce are also gluten-free.
- Add a layer of ricotta cheese to the filling for an extra creamy texture.
- Spice things up by adding a pinch of red pepper flakes to the sausage mixture.
- Experiment with different types of cheese, such as provolone or fontina.
FAQs (Frequently Asked Questions)
Q: Can I use pre-cooked manicotti shells?
A: No, it’s best to use hard, uncooked shells. Pre-cooked shells will become too mushy during baking.
Q: What if I don’t have time to refrigerate the manicotti overnight?
A: While overnight refrigeration is ideal, you can bake it after at least 2-3 hours of refrigeration, but be sure to increase the cooking time and add a bit more water.
Q: Can I use a different type of sauce?
A: Absolutely! Feel free to use your favorite homemade or store-bought sauce. A meat sauce or a creamy tomato sauce would also be delicious.
Q: How do I prevent the cheese from burning?
A: If the cheese starts to brown too quickly, tent the baking dish with aluminum foil during the last 10-15 minutes of baking.
Q: Can I make this ahead of time and freeze it before baking?
A: Yes, assemble the manicotti as directed, but do not bake. Cover tightly and freeze for up to 2-3 months. Thaw completely in the refrigerator before baking.
Final Thoughts
This Sausage & Cheese Manicotti is more than just a meal; it’s a heartwarming experience, a taste of tradition, and a celebration of comfort food at its finest. I encourage you to gather your loved ones, roll up your sleeves, and give this recipe a try. It’s a dish that’s sure to bring smiles and create lasting memories. Feel free to experiment with the variations and make it your own. And don’t forget to share your creations and feedback! Pair this with a robust Chianti for the ultimate Italian feast. Buon appetito!