
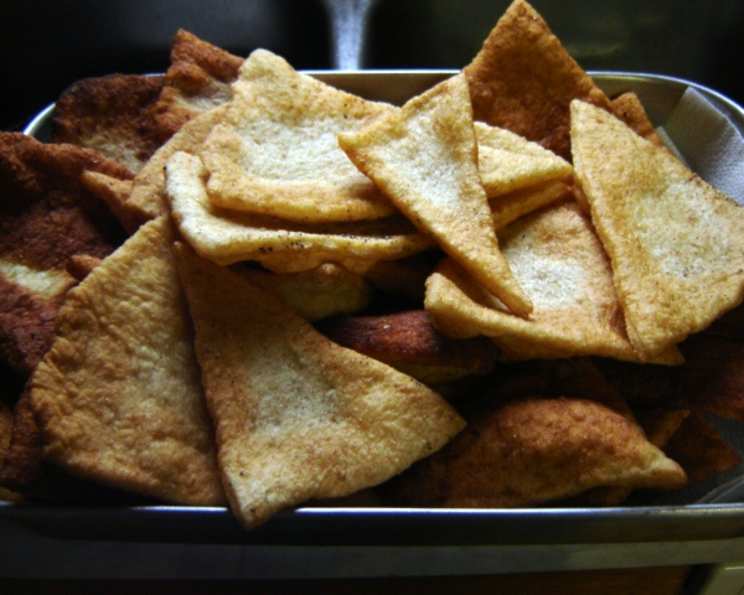
Maori Fry Bread: A Taste of Aotearoa
The aroma still lingers in my memory – warm, slightly sweet, and undeniably comforting. It was a small marae (Maori meeting ground) nestled amongst rolling green hills in the Bay of Plenty. A kuia (elderly woman) with kind eyes and hands that moved with a lifetime of experience pressed a piece of golden-brown fry bread into my hand. “Kai,” she said, “eat.” That first bite, the slightly crispy exterior yielding to a soft, pillowy interior, was a revelation. It wasn’t just bread; it was a taste of home, a symbol of manaakitanga (hospitality), and a connection to a culture rich in history and flavour.
Recipe Overview
- Prep Time: 30 minutes
- Cook Time: 15 minutes
- Total Time: 45 minutes
- Servings: 12
- Yield: 12 pieces
- Dietary Type: Vegetarian (can be made vegan with appropriate oil)
Ingredients
- 4 cups water, 110 degrees Fahrenheit (slightly hotter than warm, but not too hot to kill the yeast)
- 2 tablespoons yeast
- 2 tablespoons sugar
- 2 tablespoons all-purpose flour
- 8-10 cups all-purpose flour
- 1 pinch salt
- 1 quart cooking oil (lard, dripping, cooking oil, or tallow)
Equipment Needed
- Large bowl
- Measuring cups and spoons
- Mixing spoon
- Floured board or plain paper
- Baking board
- Cooking pot or deep fryer
Instructions
-
In a bowl, stir together the water, yeast, sugar, and 2 tablespoons of all-purpose flour.
-
Let the mixture stand in a warm place for 15 minutes. This allows the yeast to activate and create a frothy mixture. After 15 minutes, you should see about 2 inches of froth on top. This indicates the yeast is alive and ready to leaven the dough.
-
In a large bowl, place 8-10 cups of all-purpose flour. It’s crucial to use all-purpose flour, not self-rising flour, as this recipe relies on the yeast for leavening.
-
Add a pinch of salt to the flour and stir to combine. The salt helps to control the yeast and enhance the flavour of the bread.
-
Make a well in the centre of the flour mixture and pour in the yeast mixture.
-
Gradually stir the flour into the liquid, incorporating it slowly. Be careful not to add too much flour at once. The key is a light hand and allowing the liquid to absorb the flour as you go. This will result in a lighter, more tender fry bread.
-
Once the liquid has absorbed enough flour to form a dough that can be kneaded, transfer it to a floured surface. A lightly floured board or even plain paper will work.
-
Knead the dough until it is smooth and elastic. You should be able to hold the dough in the palm of your hand without it sticking excessively.
-
Spread a thin layer of all-purpose flour on a baking board.
-
Place the kneaded dough onto the floured baking board and let it rest for 15 minutes. This resting period, also known as “working time” for the yeast, allows the dough to relax and become nice and spongy. The dough should become noticeably fluffier during this time.
-
While the dough is resting, prepare your cooking pot. Add enough lard, dripping, cooking oil, or tallow to the pot to cover at least 1/3 of the cooking utensil.
-
Heat the oil until it reaches a high temperature – ideally, until it begins to produce a faint blue smoke. This ensures that the fry bread will cook quickly and develop a crispy exterior. On an electric stove, this may take approximately 15 minutes.
- Important Cooking Tip: If the oil does not reach the smoking point after 15 minutes, consider adding a small amount of used oil to the pot. Used oil tends to heat up faster than fresh oil.
-
Don’t worry too much if the dough has risen significantly before the oil is ready. Simply knead the dough again and let it rest for a shorter period, perhaps only 10 minutes this time. The goal is to have the dough and the oil ready at approximately the same time.
-
Once both the dough and the oil are ready, gently press the dough out on a floured surface. Add additional flour if the surface is sticky to prevent the dough from adhering.
-
Cut the dough into your desired shapes, such as triangles or squares. Press each piece to about 1/4 inch thick.
-
Carefully place the dough pieces into the hot oil, being mindful not to overcrowd the pot.
-
Fry one side until golden brown, then flip and fry the other side until equally browned and cooked through.
-
Remove the fry bread from the oil and place it on a paper towel-lined plate to drain any excess oil.
-
Serve hot and enjoy!
Expert Tips & Tricks
-
Temperature Control: Maintaining the correct oil temperature is crucial. If the oil is not hot enough, the fry bread will absorb too much oil and become greasy. If the oil is too hot, the outside will burn before the inside is cooked.
-
Dough Consistency: The dough should be soft and slightly sticky, but not so sticky that it is unmanageable. If the dough is too wet, add a little more flour, one tablespoon at a time.
-
Kneading: Proper kneading is essential for developing the gluten in the flour, which gives the fry bread its structure. Knead the dough for at least 5-7 minutes until it is smooth and elastic.
-
Resting the Dough: Don’t skip the resting period! This allows the gluten to relax, making the dough easier to work with and resulting in a more tender fry bread.
Serving & Storage Suggestions
Maori fry bread is best served hot, fresh from the fryer. It can be enjoyed plain, with butter, jam, honey, or savoury toppings like mince or cheese. Leftover fry bread can be stored in an airtight container at room temperature for up to 2 days. To reheat, simply warm it in a microwave, oven, or frying pan. Freezing is not recommended, as it can affect the texture.
Nutritional Information
| Nutrient | Amount per Serving | % Daily Value |
|---|---|---|
| Calories | 350 kcal | 18% |
| Total Fat | 20g | 31% |
| Saturated Fat | 5g | 25% |
| Cholesterol | 0mg | 0% |
| Sodium | 50mg | 2% |
| Total Carbohydrate | 40g | 13% |
| Dietary Fiber | 2g | 8% |
| Sugars | 3g | – |
| Protein | 5g | 10% |
Note: Nutritional information is an estimate and may vary based on specific ingredients and cooking methods.
Variations & Substitutions
-
Vegan Fry Bread: Substitute the lard, dripping, or tallow with a plant-based cooking oil such as canola, vegetable, or peanut oil.
-
Sweet Fry Bread: Add a teaspoon of vanilla extract or a pinch of cinnamon to the dough for a sweeter flavour.
-
Herb Fry Bread: Incorporate chopped fresh herbs such as rosemary, thyme, or parsley into the dough for a savoury twist.
-
Cheese Fry Bread: Add shredded cheese to the dough before frying for a cheesy and delicious variation.
FAQs (Frequently Asked Questions)
Q: Why is the water temperature important?
A: Using water that is too cold will prevent the yeast from activating properly. Using water that is too hot can kill the yeast. Aim for a temperature of around 110 degrees Fahrenheit.
Q: Can I use self-rising flour?
A: No, self-rising flour contains baking powder, which will affect the texture and flavour of the fry bread. Use all-purpose flour for best results.
Q: My dough is too sticky. What should I do?
A: Add a little more flour, one tablespoon at a time, until the dough is manageable. Be careful not to add too much flour, as this can make the fry bread tough.
Q: How do I know when the oil is hot enough?
A: The oil should be shimmering and just starting to smoke. You can also test the oil by dropping a small piece of dough into it. If the dough sizzles and turns golden brown quickly, the oil is ready.
Q: Can I bake the fry bread instead of frying it?
A: While traditionally fried, you can bake the bread at 375F. The texture will be slightly different, yielding a bread less crispy and more dense.
Final Thoughts
Making Maori fry bread is more than just following a recipe; it’s about connecting with a culture and experiencing a taste of Aotearoa. This simple yet satisfying bread is a testament to the power of simple ingredients and traditional cooking methods. Gather your ingredients, roll up your sleeves, and embrace the joy of creating something truly special. I encourage you to try this recipe and share your feedback. Whether you enjoy it with a cup of tea, as a side dish, or as a sweet treat, Maori fry bread is sure to bring a touch of warmth and hospitality to your table.