
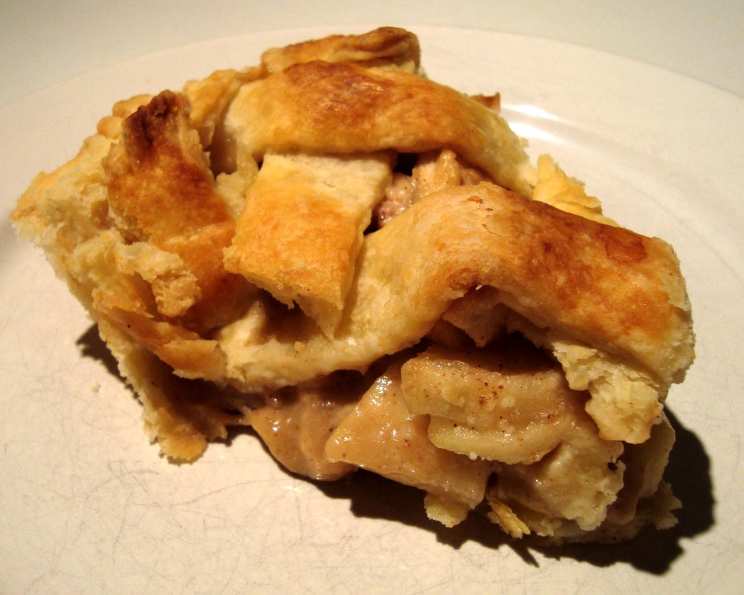
Maple Apple Pie: A Taste of Autumn
The scent of baking apples, kissed with maple, always transports me back to crisp October afternoons spent at my grandmother’s farm. Her weathered hands, dusted with flour, would guide me as we layered sweet, softened apples into a flaky crust. The warmth radiating from the oven seemed to infuse the entire kitchen with love and a promise of simple, joyful moments shared over a slice of homemade pie. Every bite of this Maple Apple Pie is a nostalgic trip to those precious memories.
Recipe Overview
- Prep Time: 30 minutes
- Cook Time: 65 minutes
- Total Time: 1 hour 35 minutes
- Servings: 6
- Yield: 1 pie
- Dietary Type: Vegetarian
Ingredients
-
For the Crust:
- 2 cups unbleached flour
- 1/2 teaspoon baking powder
- 1 teaspoon salt
- 2/3 cup Crisco shortening
- 7 to 8 tablespoons cold water
-
For the Apple Filling:
- 7 cups apples, peeled and sliced (about 6 medium apples; Honeycrisp, Gala, or Braeburn are excellent choices)
- 3/4 cup maple syrup
- 2 tablespoons cornstarch
-
For the Pecan Topping:
- 1/2 cup pecans, chopped
- 2 tablespoons maple syrup
- 1 teaspoon butter
Equipment Needed
- 9-inch pie plate
- Large mixing bowl
- Pastry blender or two knives
- Microwave-safe bowl
- Measuring cups and spoons
- Rolling pin
- Fork or crimper
Instructions
-
Prepare the Crust: In a large mixing bowl, combine the flour, baking powder, and salt. Cut in the Crisco shortening using a pastry blender or two knives until the mixture resembles coarse crumbs. It’s crucial to work the shortening in thoroughly for a flaky crust.
-
Add Water: Sprinkle the cold water in, one tablespoon at a time, mixing gently until the dough begins to form a ball. Be careful not to overwork the dough, as this will result in a tough crust. You may not need all 8 tablespoons of water.
-
Divide and Chill: Divide the dough into two equal parts. Wrap each half in plastic wrap and chill in the refrigerator for at least 30 minutes. This allows the gluten to relax, making the dough easier to roll out.
-
Preheat Oven: Preheat your oven to 375°F (190°C).
-
Roll Out Bottom Crust: On a lightly floured surface, roll out one portion of the dough into a circle approximately 1/8 inch thick and 1 1/2 inches larger than your inverted 9-inch pie plate. This extra overhang will allow you to crimp the edges later.
-
Line Pie Plate: Gently ease the crust into a greased pie plate, being careful not to stretch the dough, which can cause it to shrink during baking. Trim the edge even with the plate.
-
Pre-cook the Apples: Place the apple slices in a microwave-safe bowl. Microwave on high for 2 minutes. Stir, and repeat the procedure twice more, or until the apples begin to soften slightly. This pre-cooking step helps to prevent the pie from being soupy. Set aside.
-
Prepare the Maple Glaze: In a separate microwave-safe bowl, combine the maple syrup and cornstarch. Microwave on high for 2 minutes; stir. Repeat the procedure until the mixture starts to thicken into a glaze.
-
Combine Apples and Glaze: Add the thickened maple glaze to the softened apples. Toss lightly until the apples are well coated. Set aside to cool slightly.
-
Fill the Crust: Spoon the cooled apple filling into the unbaked pastry shell. Spread the filling evenly.
-
Make the Pecan Topping: In a microwave-safe bowl, combine the pecans, maple syrup, and butter. Microwave on high for 1 minute. Stir, and continue to microwave on a medium setting for an additional minute. Stir to break up the mixture. The topping should be fragrant and slightly caramelized.
-
Add Pecan Topping: Spread the pecan mixture evenly on top of the apple filling.
-
Roll Out Top Crust: On a lightly floured surface, roll out the remaining dough into a circle the same size as the bottom crust.
-
Cover Pie: Carefully lift the top crust onto the filled pie. Trim the top crust 1/2 inch beyond the edge of the pie plate.
-
Seal and Crimp: Fold the top edge under the bottom crust edge. Crimp the edges using your fingers or a fork to create a decorative, sealed edge.
-
Vent the Pie: Slit the top crust with a knife in several places to allow steam to escape during baking. This will prevent the crust from puffing up and cracking.
-
Bake: Bake at 375°F (190°C) for 60 minutes, or until the apples start to bubble and the crust is golden brown.
-
Maple Glaze (Final Touch): Brush the top of the pie with additional maple syrup. Continue to bake for an additional 5 minutes. This will give the crust a beautiful shine and enhance the maple flavor.
-
Cool: Let the pie cool completely on a wire rack before slicing and serving. This allows the filling to set properly.
Expert Tips & Tricks
- For a deeper maple flavor, consider using maple sugar in the crust. Substitute about 1/4 cup of the flour with maple sugar for a subtle sweetness and aroma.
- If your crust is browning too quickly, tent the pie with aluminum foil during the last 15-20 minutes of baking.
- To prevent a soggy bottom crust, try blind-baking the bottom crust for 10 minutes before adding the filling. Simply prick the bottom of the crust with a fork and bake it empty.
- Vary the apple types for a more complex flavor profile. A combination of tart Granny Smith and sweet Honeycrisp apples is a winning combination.
- Add a pinch of warm spices like cinnamon, nutmeg, or allspice to the apple filling for a festive twist.
Serving & Storage Suggestions
Serve your Maple Apple Pie warm or at room temperature. A scoop of vanilla ice cream or a dollop of whipped cream complements the warm, spiced apple filling perfectly. Store leftover pie covered in the refrigerator for up to 3 days. You can also freeze slices of pie for longer storage (up to 2 months). To reheat, simply warm individual slices in the microwave or oven until heated through.
Nutritional Information
| Nutrient | Amount per Serving | % Daily Value |
|---|---|---|
| Calories | 639.7 kcal | N/A |
| Calories from Fat | 277 g | 43% |
| Total Fat | 30.8 g | 47% |
| Saturated Fat | 6.8 g | 34% |
| Cholesterol | 1.7 mg | 0% |
| Sodium | 429.4 mg | 17% |
| Total Carbohydrate | 89.4 g | 29% |
| Dietary Fiber | 5.5 g | 22% |
| Sugars | 45.5 g | N/A |
| Protein | 5.5 g | 11% |
Note: Nutritional information is an estimate and can vary based on specific ingredients and preparation methods.
Variations & Substitutions
- Gluten-Free: Substitute the all-purpose flour in the crust with a gluten-free pie crust mix. Be sure to follow the package instructions carefully.
- Vegan: Use a vegan butter substitute for the butter in the pecan topping and ensure the Crisco shortening is plant-based.
- Spiced Apple Pie: Add 1 teaspoon of ground cinnamon and 1/2 teaspoon of ground nutmeg to the apple filling for a warmer, spicier flavor.
- Caramel Apple Pie: Drizzle caramel sauce over the apple filling before adding the pecan topping for an extra layer of sweetness.
FAQs (Frequently Asked Questions)
Q: Can I use different types of apples for this pie?
A: Absolutely! A mix of tart and sweet apples, such as Granny Smith and Honeycrisp, creates a balanced flavor. Feel free to experiment with your favorite varieties.
Q: How can I prevent the crust from getting soggy?
A: Pre-cooking the apples and blind-baking the bottom crust helps to prevent a soggy bottom. Also, be sure to avoid overfilling the pie.
Q: Can I make the pie crust ahead of time?
A: Yes, you can make the pie crust ahead of time and store it in the refrigerator for up to 2 days or in the freezer for up to 2 months. Wrap it tightly in plastic wrap.
Q: Why is it important to vent the top crust?
A: Venting the top crust allows steam to escape during baking, preventing the crust from puffing up and cracking.
Q: How do I know when the pie is done?
A: The pie is done when the crust is golden brown and the apple filling is bubbling. A knife inserted into the center of the filling should meet little resistance.
Final Thoughts
I hope this Maple Apple Pie recipe brings as much joy to your kitchen as it has to mine. The combination of sweet apples, rich maple syrup, and crunchy pecans is a true celebration of autumn flavors. Don’t hesitate to add your personal touch and make this recipe your own. Enjoy every slice, and please share your feedback – I’d love to hear about your baking adventures!