
Maple Oatmeal Nut Granola Bars: Fuel Your Day the Delicious Way
The aroma of toasted oats, warm maple syrup, and cinnamon swirling through the kitchen – it instantly takes me back to crisp autumn mornings spent apple picking as a child. My mom always packed homemade granola bars for our trips, a sticky, sweet, and utterly satisfying treat that fueled our adventures through the orchards. This recipe is my grown-up take on that childhood favorite, packed with wholesome ingredients and bursting with flavor. It’s the perfect pick-me-up for a busy day, a pre-workout boost, or a satisfying afternoon snack.
Recipe Overview
- Prep Time: 20 minutes
- Cook Time: 35 minutes
- Total Time: 55 minutes
- Servings: 10-12
- Yield: 1 Sheet Pan of Bars
- Dietary Type: Can be Gluten-Free & Vegan
Ingredients
- 3 ½ cups oats (use certified gluten-free oats for a gluten-free version)
- 2 ½ tablespoons coconut oil
- 2 tablespoons brown sugar
- ¼ cup honey (or maple syrup for vegan)
- ¼ cup maple syrup
- 1 teaspoon vanilla extract
- 1 teaspoon cinnamon
- 2 cups mixed nuts, dried fruit and seeds (such as pecans, walnuts, pumpkin seeds, almonds, goji berries, sunflower seeds, cranberries, raisins, etc.)
Equipment Needed
- Sheet pan
- Parchment paper
- Saucepan
- Large bowl
- Measuring cups and spoons
Instructions
- Preheat your oven to 350°F (175°C). Line a sheet pan with parchment paper. This will prevent the oats from sticking and make cleanup a breeze.
- Spread the oats evenly on the prepared sheet pan. Toast them in the preheated oven for 15 minutes. This toasting process is crucial as it brings out the nutty flavor of the oats and gives the granola bars a delightful crunch. Keep a close eye on them to prevent burning, tossing them halfway through for even toasting.
- While the oats are toasting, prepare the syrup mixture. In a medium saucepan, combine the coconut oil, cinnamon, vanilla extract, honey (or maple syrup), maple syrup, and brown sugar.
- Place the saucepan over medium heat and bring the mixture to a gentle boil, stirring constantly until the brown sugar is fully dissolved and the mixture is well combined. This typically takes about 3-5 minutes. Be careful not to burn the syrup.
- In a large bowl, combine the toasted oats and the mixed nuts, dried fruit, and seeds. Make sure the oats have cooled slightly before adding them to the bowl.
- Pour the warm syrup mixture over the oat and nut mixture. Use a spatula or wooden spoon to thoroughly coat all the ingredients with the syrup. Ensure that every oat, nut, and seed is evenly coated; this will help the bars bind together properly.
- Line the same sheet pan you used for toasting with a fresh piece of parchment paper. This ensures the granola bars don’t stick after baking.
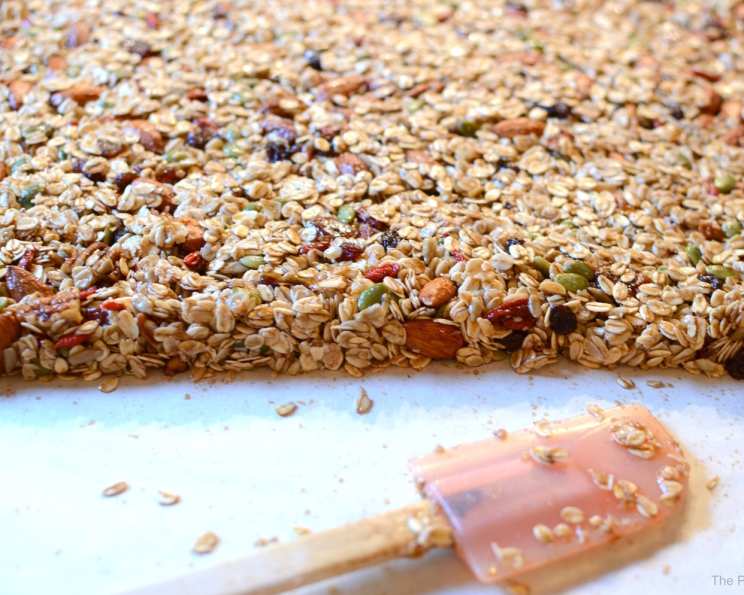
- Transfer the coated oat mixture to the parchment-lined sheet pan. Using your hands or the back of a spatula, firmly pack the mixture down to your desired thickness. The tighter you pack the mixture, the more cohesive your granola bars will be. Aim for an even layer across the entire pan.
- Bake the granola bar mixture in the preheated oven at 350°F (175°C) for 20 minutes. This baking time allows the syrup to caramelize and bind the ingredients together, creating a deliciously chewy and crunchy texture.
- Remove the sheet pan from the oven and let it cool slightly for about 5-10 minutes. While the granola is still warm but not too hot to handle, use a sharp knife to cut the mixture into your desired size and shape of bars. Cutting them while slightly warm prevents them from crumbling.
- Once cut, place the sheet pan with the granola bars in the refrigerator for at least 1 hour to allow them to set properly. This chilling period is crucial for the bars to firm up and become easy to handle.
- After chilling, carefully remove the granola bars from the sheet pan and store them in an airtight container.
Expert Tips & Tricks
- Don’t skip the toasting! Toasting the oats deepens their flavor and creates a more satisfying crunch.
- Customize your mix: Feel free to swap out any of the nuts, seeds, or dried fruits for your favorites. Chocolate chips, shredded coconut, or even a pinch of sea salt are also great additions.
- Press firmly: Packing the granola mixture firmly into the pan is key to preventing the bars from falling apart. Use the bottom of a measuring cup or a spatula to really compress the mixture.
- Adjust sweetness: Taste the syrup mixture before pouring it over the oats and nuts. If you prefer a sweeter bar, add a little more maple syrup or honey.
- For a chewier bar: Underbake the bars by a minute or two. For a crispier bar, bake them a minute or two longer.
- Vegan Option: Use maple syrup in place of honey for a completely vegan granola bar.
Serving & Storage Suggestions
Serve these Maple Oatmeal Nut Granola Bars as a quick and easy breakfast, a pre- or post-workout snack, or a healthy dessert. They are delicious on their own, but you can also crumble them over yogurt or ice cream for an added crunch.
Store the granola bars in an airtight container at room temperature for up to 1 week, in the refrigerator for up to 2 weeks, or in the freezer for up to 2 months. If freezing, wrap the bars individually in plastic wrap to prevent freezer burn. To thaw, simply leave them at room temperature for about 30 minutes.
Nutritional Information
| Nutrient | Amount per Serving | % Daily Value |
|---|---|---|
| Calories | 463 kcal | N/A |
| Fat | 21.3g | 32% |
| Saturated Fat | 5.5g | 27% |
| Cholesterol | 0mg | 0% |
| Sodium | 186.5mg | 7% |
| Carbohydrates | 58.4g | 19% |
| Fiber | 8.4g | 33% |
| Sugars | 15.7g | N/A |
| Protein | 14g | 28% |
Note: Nutritional information is an estimate and may vary based on specific ingredients used.
Variations & Substitutions
- Gluten-Free: Ensure you use certified gluten-free oats.
- Vegan: Substitute honey with maple syrup or agave nectar.
- Chocolate Lovers: Add ½ cup of chocolate chips to the oat mixture before baking. You can also drizzle melted chocolate over the cooled bars.
- Seed Power: Experiment with different seed combinations like chia seeds, flax seeds, or hemp seeds.
- Spice It Up: Add a pinch of nutmeg, ginger, or cardamom along with the cinnamon for a warmer, more complex flavor.
- Nut-Free: Substitute the nuts with more seeds or dried fruits, or use a seed butter like sunflower seed butter to help bind the bars together.
- Citrus Zest: Add the zest of an orange or lemon to the oat mixture for a bright, fresh flavor.
FAQs (Frequently Asked Questions)
Q: Why are my granola bars falling apart?
A: This is often due to not packing the mixture firmly enough into the pan, or not using enough syrup to bind the ingredients together. Make sure to press the mixture down very tightly and ensure everything is well coated with the syrup.
Q: Can I use quick-cooking oats instead of rolled oats?
A: While you can, rolled oats (also known as old-fashioned oats) provide a better texture and structure to the bars. Quick-cooking oats may result in a softer, less chewy bar.
Q: How do I prevent the granola bars from sticking to the parchment paper?
A: Make sure the parchment paper is properly fitted to the pan. You can also lightly grease the parchment paper with cooking spray before adding the granola mixture.
Q: Can I make these granola bars without nuts?
A: Yes, you can substitute the nuts with an equal amount of seeds or dried fruits. You can also use a seed butter like sunflower seed butter to help bind the bars together.
Q: How long do these granola bars last?
A: These granola bars will last for up to 1 week at room temperature, 2 weeks in the refrigerator, or 2 months in the freezer.
Final Thoughts
I hope you enjoy making these Maple Oatmeal Nut Granola Bars as much as I do! They’re a delicious and convenient way to fuel your day with wholesome ingredients. Feel free to experiment with different variations and find your perfect combination of flavors and textures. I would love to hear your feedback and see your creations, so please share your experiences in the comments below! These bars are also fantastic paired with a cup of hot coffee or a glass of cold milk for a complete and satisfying snack. Happy baking!