
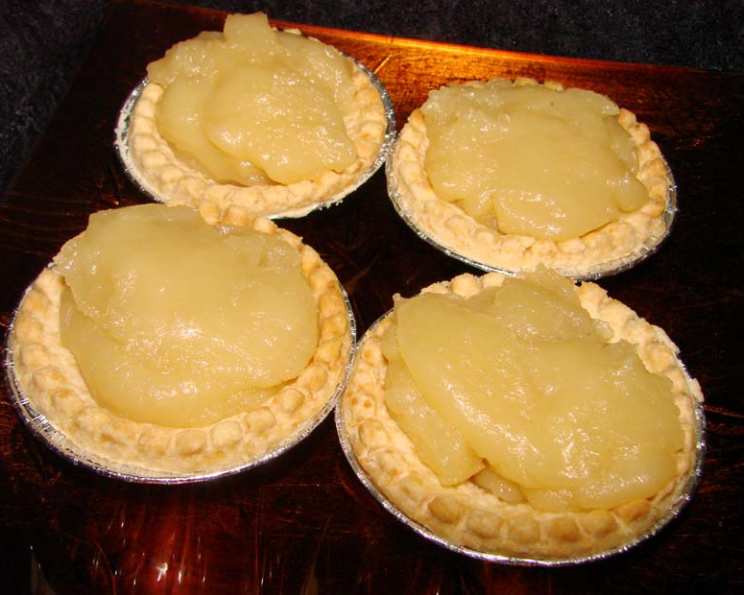
The Irresistible Allure of Maple Syrup Tarts
The scent of maple syrup is a powerful time machine for me. One whiff, and I’m instantly transported back to my childhood kitchen, standing on a wobbly stool, mesmerized as my grandmother carefully poured golden syrup into tiny tart shells. The anticipation was almost unbearable, knowing that soon I’d be biting into that sweet, gooey perfection. It was more than just a dessert; it was a symbol of warmth, family, and the simple joys of life. These tarts, with their delicate crust and rich, maple-infused filling, have a way of making any occasion feel a little bit more special.
Recipe Overview
- Prep Time: 15 minutes
- Cook Time: Varies (see instructions)
- Total Time: 45 minutes + Cooling Time
- Servings: 12
- Yield: 12 tartlets
- Dietary Type: Vegetarian (can be made vegan with substitutions)
Ingredients
- 1/3 cup butter
- 1/3 cup cornstarch
- 1 cup maple syrup
- 1/2 cup milk
- 1/2 cup chopped toasted pecans or walnuts (optional)
- 12 medium prepared tart shells, baked
Equipment Needed
- Small saucepan
- Whisk
- Measuring cups and spoons
- Spoon for filling
Instructions
-
Begin by melting the butter in a small saucepan over low heat. It’s crucial to use low heat to prevent the butter from browning or burning, which would affect the final flavor of the tarts.
-
Once the butter is completely melted, blend in the cornstarch. Whisk continuously until the cornstarch is fully incorporated and the mixture is smooth. This step is essential to prevent lumps from forming in the filling. Make sure there are no visible clumps of cornstarch before proceeding.
-
Next, add the maple syrup and milk to the saucepan. Gently whisk the ingredients together until they are well combined. The mixture should be homogenous and have a consistent color.
-
Bring the mixture to a boil over medium heat, stirring constantly. Keep a close eye on the saucepan as the mixture can quickly boil over. Stirring prevents scorching and ensures even cooking.
-
Once the mixture reaches a boil, reduce the heat to low and continue to stir and cook until thickened. This typically takes several minutes. You’ll notice the mixture gradually transforming from a thin liquid to a custard-like consistency.
-
Continue cooking for 2 or 3 minutes more, stirring frequently. This step ensures that the cornstarch is fully cooked and the filling reaches the desired thickness. The filling should be thick enough to coat the back of a spoon.
-
Remove the saucepan from the heat and let the filling cool for 15 minutes. This cooling period is important because it allows the filling to thicken further and prevents it from being too runny when poured into the tart shells. Don’t skip this step!
-
If using, gently fold the chopped toasted pecans or walnuts into the cooled filling. Ensure the nuts are evenly distributed throughout the mixture.
-
Finally, spoon the filling into the baked tart shells. Be careful not to overfill the shells, leaving a small amount of space at the top.
-
Let the filled tarts cool completely before serving. This allows the filling to set properly and enhances the flavor.
Expert Tips & Tricks
- Pre-baking the tart shells: This step is crucial to prevent a soggy crust. Blind bake the tart shells with pie weights or dried beans until they are lightly golden brown.
- Toasting the nuts: Toasting the pecans or walnuts before adding them to the filling enhances their flavor and adds a delightful crunch. Toast them in a dry pan over medium heat until fragrant and lightly browned, or in the oven at 350°F (175°C) for about 5-7 minutes.
- Preventing a skin from forming: While the filling cools, place a piece of plastic wrap directly on the surface to prevent a skin from forming.
- Adjusting sweetness: If you prefer a less sweet tart, you can reduce the amount of maple syrup slightly. However, keep in mind that the maple syrup is a key ingredient that provides both sweetness and flavor.
- Make-ahead option: The filling can be made a day in advance and stored in the refrigerator. Just be sure to whisk it well before filling the tart shells. The baked tart shells can also be prepared ahead of time and stored in an airtight container at room temperature.
- Troubleshooting a thin filling: If your filling is too thin, you can gently reheat it in a saucepan with a small amount of cornstarch mixed with cold water (a slurry). Cook over low heat, stirring constantly, until thickened.
Serving & Storage Suggestions
These maple syrup tarts are best served at room temperature or slightly chilled. They make a delightful dessert on their own or can be paired with a scoop of vanilla ice cream or a dollop of whipped cream.
To store leftover tarts, place them in an airtight container in the refrigerator. They will keep for up to 3-4 days. You can also freeze the tarts for longer storage. Wrap them individually in plastic wrap and then place them in a freezer-safe container. Frozen tarts can be stored for up to 2 months. Thaw them in the refrigerator before serving.
Reheating is generally not necessary, but if you prefer warm tarts, you can gently warm them in a low oven (around 200°F or 95°C) for a few minutes.
Nutritional Information
| Nutrient | Amount per Serving | % Daily Value |
|---|---|---|
| Calories | 166.6 kcal | N/A |
| Total Fat | 8.8g | 13% |
| Saturated Fat | 3.8g | 18% |
| Cholesterol | 15mg | 4% |
| Sodium | 44mg | 1% |
| Total Carbohydrate | 22.4g | 7% |
| Dietary Fiber | 0.5g | 1% |
| Sugars | 16.2g | N/A |
| Protein | 0.8g | 1% |
Note: Nutritional information is an estimate and may vary based on specific ingredients and portion sizes.
Variations & Substitutions
- Vegan Maple Syrup Tarts: Substitute the butter with a vegan butter alternative and the milk with a plant-based milk such as almond milk, soy milk, or oat milk. Ensure the tart shells are also vegan-friendly.
- Gluten-Free Maple Syrup Tarts: Use gluten-free tart shells. You can find pre-made gluten-free shells or make your own using a gluten-free flour blend.
- Different Nut Options: Experiment with different types of nuts, such as hazelnuts or macadamia nuts, for a unique flavor profile.
- Spice it up: Add a pinch of cinnamon, nutmeg, or cardamom to the filling for a warm and cozy flavor.
- Citrus Zest: A little lemon or orange zest can brighten the flavor of the tarts. Add about a teaspoon of zest to the filling before cooking.
FAQs (Frequently Asked Questions)
Q: Can I use store-bought tart shells?
A: Absolutely! Using store-bought shells is a convenient option, especially if you’re short on time. Just make sure they are baked before filling.
Q: Why is my filling not thickening?
A: Ensure you are using enough cornstarch and cooking the filling long enough. Also, make sure the mixture comes to a boil and then simmers for a few minutes to activate the cornstarch.
Q: Can I freeze the maple syrup tarts?
A: Yes, you can freeze the tarts for up to 2 months. Wrap them individually in plastic wrap and then place them in a freezer-safe container. Thaw them in the refrigerator before serving.
Q: What can I use if I don’t have maple syrup?
A: While maple syrup is the star of this recipe, you could try using brown sugar and a touch of maple extract for a similar flavor. However, the results will not be the same.
Q: Can I make these tarts without nuts?
A: Yes, the nuts are optional. Simply omit them from the recipe if you prefer.
Final Thoughts
I hope this recipe inspires you to create your own batch of irresistible maple syrup tarts! They’re a perfect treat for any occasion, whether it’s a cozy afternoon tea or a festive holiday gathering. Don’t be afraid to experiment with different variations and make them your own. And most importantly, share them with loved ones and enjoy the sweet moments together. I’d love to hear about your baking adventures and any creative twists you add to the recipe! Happy baking!