
The Marble Cake That Waited in the Wings
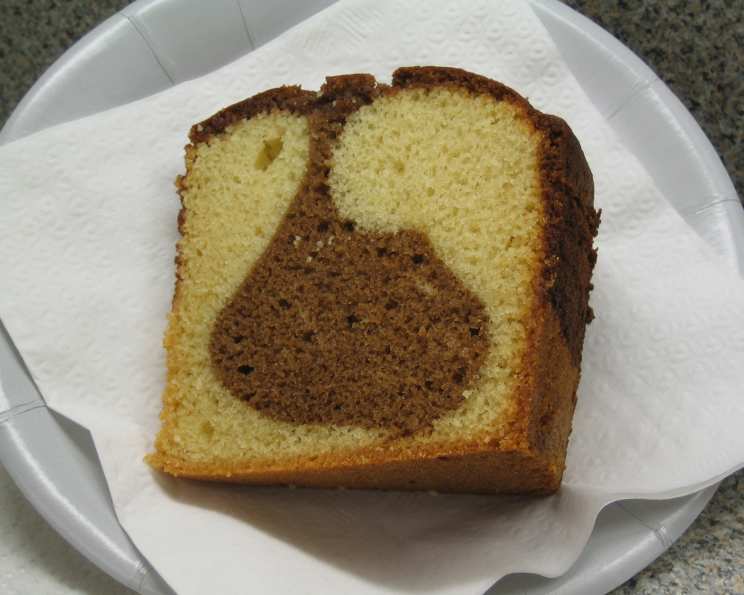
I have vivid memories of my grandmother’s kitchen, a place perpetually fragrant with vanilla and warm spices. While her apple pie was legendary, and her sugar cookies were always a hit with the grandkids, it was a simple marble cake that truly captivated me. The swirling patterns, a testament to a little culinary artistry, always felt like a magic trick, and the taste, a perfect balance of sweet vanilla and rich chocolate, was pure comfort. Rediscovering a similar recipe after all these years felt like uncovering a forgotten piece of my childhood.
Recipe Overview
- Prep Time: 20 minutes
- Cook Time: 60 minutes
- Total Time: 1 hour 20 minutes
- Servings: 16
- Yield: 1 tube pan cake or 2 loaf cakes
- Dietary Type: Not specified
Ingredients
- 1 cup margarine (trans-fat free, in tubs, suitable for baking)
- 2 cups sugar
- 3 eggs
- 1 cup milk
- 1 1/2 teaspoons vanilla extract
- 3 cups all-purpose flour
- 2 teaspoons baking powder
- 1/2 teaspoon salt
- 3/4 cup chocolate syrup
- 1/4 teaspoon baking soda
- 1/4 teaspoon vanilla extract (for the chocolate batter)
Equipment Needed
- 10-inch Tube Pan or Two Large Loaf Pans
- Mixing Bowls
- Electric Mixer
- Measuring Cups and Spoons
- Sifter (optional)
- Rubber Spatula
Instructions
- Preheat your oven to 350°F (175°C). Ensure the oven rack is positioned in the center.
- In a large mixing bowl, cream together the margarine and sugar until the mixture is light and fluffy. This step is crucial for creating a tender cake, so take your time and ensure the ingredients are thoroughly combined.
- Add the eggs, one at a time, to the creamed mixture. Beat well after each addition, ensuring each egg is fully incorporated before adding the next.
- In a separate bowl, combine the milk and 1 1/2 teaspoons of vanilla extract.
- In another bowl, whisk together the flour, baking powder, and salt. If desired, sift these dry ingredients together to ensure they are evenly distributed and to remove any lumps.
- Gradually add the wet and dry ingredients to the creamed mixture, alternating between the milk mixture and the flour mixture. Begin and end with the flour mixture. Beat well after each addition, ensuring the batter is smooth and well combined. Overmixing can lead to a tough cake, so mix until just combined.
- Grease and flour a 10-inch tube pan or two large loaf pans. This will prevent the cake from sticking to the pan and ensure easy removal. Alternatively, you can use baking spray that contains flour.
- Divide the batter. Transfer approximately 2/3 of the batter into the prepared pan(s), spreading it evenly.
- In a separate bowl, combine the remaining 1/3 of the batter with the chocolate syrup, baking soda, and 1/4 teaspoon of vanilla extract. Mix well until the chocolate batter is smooth and evenly colored. The baking soda reacts with the chocolate, creating a richer flavor and a slightly different texture.
- Pour the chocolate batter over the vanilla batter in the pan(s).
- To create the marble effect, gently swirl the two batters together using a knife or a skewer. Be careful not to overmix, as this can muddy the colors and prevent a distinct marble pattern.
- Bake in the preheated oven for 1 hour, or until a wooden skewer inserted into the center of the cake comes out clean. Baking times may vary depending on your oven, so start checking for doneness after 50 minutes. If the top of the cake is browning too quickly, you can loosely tent it with aluminum foil.
- Once baked, remove the cake from the oven and let it cool in the pan(s) for 10-15 minutes before inverting it onto a wire rack to cool completely. This allows the cake to firm up slightly, preventing it from breaking during removal.
Expert Tips & Tricks
- For an extra moist cake, add a tablespoon of sour cream or yogurt to the vanilla batter.
- To enhance the chocolate flavor, use Dutch-processed cocoa powder in place of some of the chocolate syrup.
- If you prefer a more intense vanilla flavor, use vanilla bean paste instead of vanilla extract.
- To ensure a clean release from the pan, line the bottom of the pan with parchment paper before greasing and flouring.
- For a decorative touch, dust the cooled cake with powdered sugar or drizzle it with a simple glaze.
Serving & Storage Suggestions
Once the marble cake has cooled completely, it’s ready to slice and serve. It pairs beautifully with a cup of coffee or tea. You can also serve it with a scoop of vanilla ice cream or a dollop of whipped cream for a more decadent treat.
To store any leftover cake, wrap it tightly in plastic wrap or place it in an airtight container. At room temperature, it will stay fresh for up to 3 days. In the refrigerator, it will last for up to a week. For longer storage, you can freeze the cake for up to 2 months. To freeze, wrap individual slices or the entire cake in plastic wrap and then in aluminum foil. Thaw it overnight in the refrigerator before serving.
Nutritional Information
(Please note that these values are estimates and may vary depending on specific ingredients and serving sizes.)
| Nutrient | Amount per Serving | % Daily Value |
|---|---|---|
| Calories | 359 kcal | 18% |
| Total Fat | 14 g | 22% |
| Saturated Fat | 3 g | 15% |
| Cholesterol | 42 mg | 14% |
| Sodium | 341 mg | 14% |
| Total Carbohydrate | 53 g | 18% |
| Dietary Fiber | 1 g | 4% |
| Sugars | 30 g | N/A |
| Protein | 5 g | 10% |
Variations & Substitutions
- Gluten-Free Marble Cake: Substitute the all-purpose flour with a gluten-free blend. Be sure to use a blend that contains xanthan gum or add it separately to provide structure to the cake.
- Dairy-Free Marble Cake: Use a plant-based milk alternative such as almond, soy, or oat milk in place of the regular milk. Ensure your margarine is also dairy-free.
- Spice Cake Marble: Add 1 teaspoon of ground cinnamon and 1/2 teaspoon of ground nutmeg to the flour mixture for a warm, spiced flavor. You can also add chopped nuts, such as walnuts or pecans, to the vanilla batter.
- Citrus Marble: Add the zest of one lemon or orange to the vanilla batter for a bright, citrusy flavor.
FAQs (Frequently Asked Questions)
Q: Can I use butter instead of margarine?
A: Yes, you can substitute butter for margarine in this recipe. Use unsalted butter and ensure it is softened to room temperature before creaming it with the sugar.
Q: My cake is sinking in the middle. What did I do wrong?
A: Sinking in the middle can be caused by several factors, including overmixing the batter, opening the oven door too frequently during baking, or using an oven temperature that is too low. Make sure to follow the instructions carefully and ensure your oven is properly calibrated.
Q: Can I make this recipe into cupcakes?
A: Yes, you can easily adapt this recipe for cupcakes. Fill cupcake liners about 2/3 full with the alternating batters and bake at 350°F (175°C) for about 18-20 minutes, or until a toothpick inserted into the center comes out clean.
Q: How can I prevent the chocolate batter from sinking to the bottom?
A: Make sure both the vanilla and chocolate batters are of similar consistency. If the chocolate batter is too thin, it may sink. You can also try chilling the chocolate batter for a few minutes before pouring it over the vanilla batter.
Q: Can I add a glaze to this cake?
A: Absolutely! A simple powdered sugar glaze or a chocolate ganache would be delicious additions to this cake.
Final Thoughts
This marble cake is more than just a recipe; it’s a slice of nostalgia, a reminder of simpler times spent in the kitchen with loved ones. Don’t be intimidated by the marbling technique; it’s easier than it looks, and the results are truly stunning. I encourage you to give this recipe a try and create your own marbled masterpiece. Share your creations and let me know what you think. Perhaps you’ll pair it with a scoop of homemade ice cream or a perfectly brewed cup of coffee. Whatever you choose, enjoy the process and savor every delicious bite!