
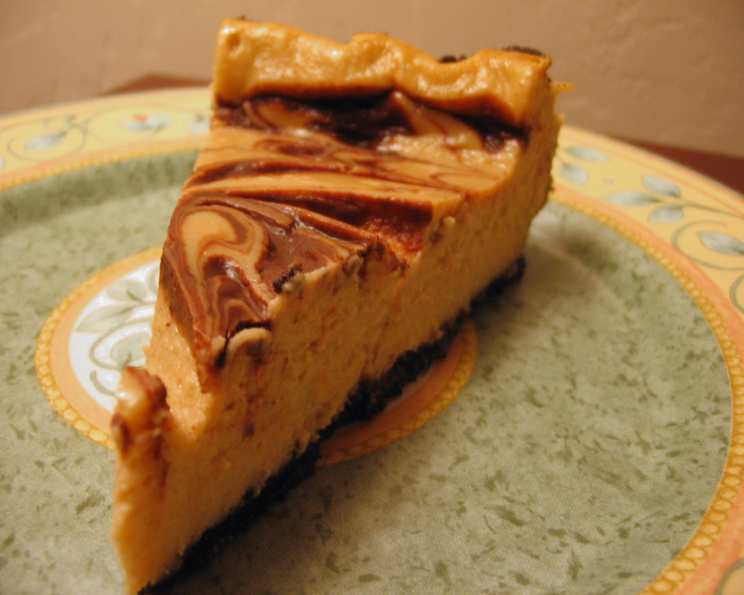
Marble Mocha Cheesecake (Light)
The first time I made this Marble Mocha Cheesecake, it was for my friend Sarah’s birthday. Sarah, a self-proclaimed cheesecake connoisseur, always insisted that “light” versions were just pale imitations of the real thing. Determined to prove her wrong, I spent weeks tweaking this recipe, carefully balancing flavors and textures. The look on her face when she took that first bite—a mixture of shock and pure delight—is a memory I cherish. From then on, this cheesecake became a birthday staple, a testament to the fact that “light” doesn’t have to mean “lacking.”
Recipe Overview
- Prep Time: 25 minutes
- Cook Time: 40-45 minutes
- Total Time: 3 hours (includes chilling time)
- Servings: 12
- Yield: 1 cake
- Dietary Type: Light
Ingredients
Crust:
- 2 1/4 cups chocolate wafer crumbs
- 2 1/2 tablespoons water
- 1 tablespoon vegetable oil
Filling:
- 1 1/2 cups smooth light ricotta cheese
- 4 ounces light cream cheese, softened
- 1 1/4 cups granulated sugar
- 3/4 cup low-fat sour cream
- 2 eggs
- 2 tablespoons flour
- 2 teaspoons instant coffee, dissolved in 1 tablespoon hot water
Marble:
- 2 tablespoons semi-sweet chocolate chips
- 2 teaspoons water
Equipment Needed
- 9-inch springform pan
- Cooking spray
- Mixing bowl
- Food processor
- Small microwave-safe bowl
- Wire rack
- Knife or skewer
Instructions
-
Preheat your oven to 350°F (175°C). Lightly spray a 9-inch springform pan with cooking spray. This will prevent the cheesecake from sticking and make it easier to remove once cooled.
-
Prepare the crust: In a medium mixing bowl, combine the chocolate wafer crumbs, water, and vegetable oil. Stir until the crumbs are evenly moistened and the mixture resembles wet sand.
-
Press the crumb mixture firmly onto the bottom and partway up the sides of the prepared springform pan. Use the back of a spoon or your fingers to create a smooth and even crust. Ensuring a compacted crust will help it hold its shape during baking.
-
Make the filling: In a food processor, combine the light ricotta cheese, light cream cheese, granulated sugar, low-fat sour cream, eggs, and flour. Process until the mixture is completely smooth and creamy. Scrape down the sides of the bowl as needed to ensure all ingredients are incorporated.
-
Dissolve the instant coffee in the hot water. Add this coffee mixture to the food processor with the rest of the filling. Process briefly to incorporate the coffee flavor evenly throughout the filling.
-
Pour the cheesecake filling into the prepared crust. Spread it evenly to ensure consistent baking.
-
Create the marble effect: In a small microwave-safe bowl, combine the semi-sweet chocolate chips and water. Heat on high in the microwave for 20 seconds. Stir until the chocolate is completely melted and smooth. If the chocolate doesn’t melt completely in 20 seconds, microwave for a few more seconds, stirring every few seconds to prevent burning.
-
Drizzle the melted chocolate over the surface of the cheesecake filling. Using a knife or a skewer, gently swirl the chocolate into the filling to create a marbled pattern. Be careful not to over-mix, as this can muddy the colors.
-
Bake in the center of the preheated oven for 40 to 45 minutes, or until the center of the cheesecake is still slightly loose. A slight jiggle in the center is normal; it will set as it cools. Avoid overbaking, as this can lead to a dry or cracked cheesecake.
-
Once baked, turn off the oven and crack the oven door slightly. Allow the cheesecake to cool in the oven for 1 hour. This gradual cooling process helps to prevent cracking.
-
Remove the cheesecake from the oven and place it on a wire rack to cool to room temperature.
-
Once the cheesecake has cooled to room temperature, cover it loosely with plastic wrap and refrigerate for at least 2 hours, or preferably overnight, to allow it to chill completely and set.
-
Before serving, carefully remove the sides of the springform pan.
Expert Tips & Tricks
- Preventing Cracks: To further minimize the risk of cracking, consider baking the cheesecake in a water bath. Wrap the bottom of the springform pan in aluminum foil to prevent water from seeping in, and place the pan inside a larger baking dish. Pour hot water into the larger dish until it reaches about halfway up the sides of the springform pan.
- Ingredient Temperature: Ensure that your cream cheese is properly softened before mixing. This will prevent lumps in the filling and result in a smoother texture.
- Flavor Boost: For a deeper mocha flavor, add a tablespoon of unsweetened cocoa powder to the filling along with the other ingredients.
- Perfect Marble: Avoid over-swirling when marbling the chocolate. A few simple swirls are all you need to create an elegant and eye-catching design.
Serving & Storage Suggestions
Serve the Marble Mocha Cheesecake chilled. A dollop of light whipped cream or a sprinkle of cocoa powder can enhance the presentation. It pairs well with fresh berries or a drizzle of chocolate sauce.
Store leftover cheesecake in an airtight container in the refrigerator for up to 3-4 days. For longer storage, you can freeze the cheesecake. Wrap it tightly in plastic wrap and then in foil, and freeze for up to 2 months. Thaw overnight in the refrigerator before serving.
Nutritional Information
| Nutrient | Amount per Serving | % Daily Value |
|---|---|---|
| Calories | 295.1 kcal | – |
| Calories from Fat | 107 g | 36% |
| Total Fat | 11.9 g | 18% |
| Saturated Fat | 5.7 g | 28% |
| Cholesterol | 58.3 mg | 19% |
| Sodium | 216.2 mg | 9% |
| Total Carbohydrate | 40.8 g | 13% |
| Dietary Fiber | 0.8 g | 3% |
| Sugars | 28.2 g | – |
| Protein | 7.6 g | 15% |
Variations & Substitutions
- Gluten-Free: Use gluten-free chocolate wafer cookies for the crust to make this cheesecake gluten-free.
- Crust Alternatives: Experiment with different crust flavors. Graham cracker crumbs or even crushed Oreo cookies (without the filling) can provide unique and delicious variations.
- Flavor Extracts: Add a teaspoon of vanilla extract or almond extract to the filling for a subtle flavor enhancement.
- Coffee Variation: Use decaf instant coffee if you prefer to reduce the caffeine content.
FAQs (Frequently Asked Questions)
Q: Can I use regular cream cheese instead of light cream cheese?
A: Yes, you can, but it will increase the overall fat and calorie content of the cheesecake.
Q: Why did my cheesecake crack?
A: Cheesecake cracking is often caused by rapid temperature changes. Cooling the cheesecake slowly in the oven and avoiding overbaking can help prevent cracks.
Q: Can I make this cheesecake ahead of time?
A: Absolutely! In fact, it’s best to make it a day in advance to allow it to chill and set completely.
Q: How do I remove the cheesecake from the springform pan without damaging it?
A: Run a thin knife or spatula around the edges of the cheesecake before releasing the springform pan.
Q: Can I freeze this cheesecake?
A: Yes, you can freeze it for up to 2 months. Wrap it tightly in plastic wrap and then in foil to prevent freezer burn. Thaw overnight in the refrigerator before serving.
Final Thoughts
I wholeheartedly encourage you to try this Marble Mocha Cheesecake recipe. Its delightful blend of chocolate and coffee, combined with a surprisingly light texture, makes it a truly special dessert. Don’t be afraid to experiment with variations and make it your own. Whether you’re celebrating a special occasion or simply craving a delicious treat, this cheesecake is sure to impress. Let me know how it turns out, and feel free to share your own creative twists! Perhaps pair it with a strong cup of coffee or a light dessert wine for the perfect ending to your meal. Happy baking!