
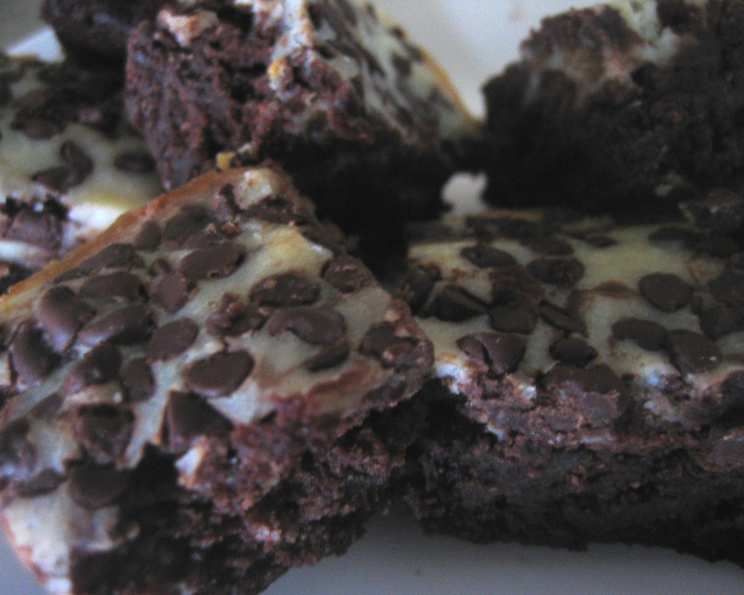
Marbled Cheesecake Brownies: A Symphony of Chocolate and Cream
The first time I tasted a marbled cheesecake brownie, it was at a neighborhood potluck. Little Lily, bless her heart, had brought a tray of these, and despite her explaining that they didn’t quite turn out how she intended, they vanished faster than you could say “double chocolate.” The fudgy brownie, swirled with tangy cheesecake, was a revelation. It was that perfect marriage of textures and flavors, a little messy, a whole lot delicious, and utterly unforgettable. These brownies have become my go-to dessert when I need a guaranteed crowd-pleaser, and I’m thrilled to share my version with you.
Recipe Overview
- Prep Time: 15 minutes
- Cook Time: 25-30 minutes
- Total Time: 40-45 minutes
- Yields: 1 8×8 pan
- Serves: 16
- Dietary Type: Vegetarian
Ingredients
For the Brownie Layer:
- 5 tablespoons butter
- 2 ounces semisweet chocolate
- 2/3 cup sugar
- 2 eggs
- 1 teaspoon vanilla
- 2/3 cup flour
- 1/2 teaspoon baking powder
For the Cheesecake Layer:
- 8 ounces cream cheese, softened
- 1/2 cup sugar
- 1 egg
- 1 teaspoon vanilla
- 1 cup semi-sweet chocolate chips
Equipment Needed
- 8×8 inch baking pan
- Microwave-safe bowl
- Mixing bowls
- Electric mixer (handheld or stand mixer)
- Rubber spatula
- Knife or skewer
Instructions
-
Preheat your oven to 350°F (175°C). Grease an 8×8 inch baking pan thoroughly. I like to use baking spray with flour for extra insurance against sticking.
-
In a microwave-safe bowl, combine the 5 tablespoons of butter and the 2 ounces of semisweet chocolate. Microwave in 30-second intervals, stirring in between, until completely melted and smooth. Be careful not to overheat the chocolate, as it can seize up.
-
Remove the melted chocolate mixture from the microwave and stir until it is smooth. Allow to cool slightly.
-
Add the 2/3 cup of sugar to the melted chocolate mixture and beat until well combined.
-
Beat in the 2 eggs, one at a time, followed by the 1 teaspoon of vanilla. Make sure each egg is fully incorporated before adding the next.
-
In a separate bowl, whisk together the 2/3 cup of flour and the 1/2 teaspoon of baking powder.
-
Gradually add the dry ingredients to the wet ingredients, blending until just combined. Be careful not to overmix the batter, as this can lead to tough brownies.
-
Pour the brownie batter into the prepared 8×8 inch baking pan and spread it evenly.
-
Now, let’s prepare the cheesecake layer. Place the 8 ounces of cream cheese in a microwave-safe bowl. Microwave until soft and warm – usually 30-60 seconds should do the trick, depending on your microwave’s power.
-
Using an electric mixer, beat the softened cream cheese until smooth.
-
Add the 1/2 cup of sugar to the cream cheese and beat until well combined.
-
Beat in the 1 egg and the 1 teaspoon of vanilla until the mixture is smooth and creamy.
-
Spoon the cheesecake mixture over the brownie batter in the baking pan.
-
Using a knife or skewer, gently swirl the cheesecake mixture through the brownie batter to create a marbled effect. Don’t over-swirl, or the layers will completely blend together.
-
Sprinkle the 1 cup of semi-sweet chocolate chips evenly over the top of the batter.
-
Bake in the preheated oven at 350°F (175°C) for 25-30 minutes, or until a toothpick inserted into the center comes out clean. A few moist crumbs are okay, but there shouldn’t be any wet batter.
-
Remove the brownies from the oven and let them cool completely in the pan before cutting into squares. Cooling completely is essential for a clean cut.
Expert Tips & Tricks
- For an extra fudgy brownie, slightly underbake them. The center should still be a bit soft.
- If you want a more pronounced cheesecake flavor, add a tablespoon of lemon juice to the cheesecake batter.
- To prevent the brownies from sticking to the pan, line the bottom with parchment paper, leaving an overhang on the sides for easy removal.
- If you don’t have semisweet chocolate chips, you can use dark chocolate or milk chocolate chips instead, depending on your preference.
- Don’t overmix the brownie batter. Overmixing develops gluten, resulting in a tougher brownie.
- For a richer brownie flavor, try using melted browned butter instead of regular melted butter. The nutty flavor adds a wonderful depth.
Serving & Storage Suggestions
Serve these marbled cheesecake brownies chilled or at room temperature. For an extra treat, pair them with a scoop of vanilla ice cream or a dollop of whipped cream. They’re also delicious with a cup of coffee or a glass of milk.
To store, keep the brownies in an airtight container at room temperature for up to 3 days or in the refrigerator for up to a week. For longer storage, you can freeze them for up to 2 months. Wrap them individually in plastic wrap and then place them in a freezer-safe bag or container. Thaw in the refrigerator before serving. To reheat, microwave individual slices for a few seconds until slightly warmed.
Nutritional Information
| Nutrient | Amount per Serving | % Daily Value |
|---|---|---|
| Calories | 239.6 kcal | N/A |
| Calories from Fat | N/A | N/A |
| Total Fat | 14.4 g | 22% |
| Saturated Fat | 8.4 g | 41% |
| Cholesterol | 60 mg | 20% |
| Sodium | 104.2 mg | 4% |
| Total Carbohydrate | 27.2 g | 9% |
| Dietary Fiber | 1.4 g | 5% |
| Sugars | 20.9 g | 83% |
| Protein | 3.5 g | 7% |
Note: Nutritional information is an estimate and may vary based on specific ingredients and serving sizes.
Variations & Substitutions
- Gluten-Free: Substitute a gluten-free all-purpose flour blend for the regular flour. Be sure to choose a blend that contains xanthan gum for binding.
- Dairy-Free: Use dairy-free butter and cream cheese alternatives. Be aware that the texture and flavor might differ slightly.
- Peanut Butter Swirl: Add dollops of peanut butter to the brownie batter and swirl it in with the cheesecake mixture.
- Espresso Powder: Add a teaspoon of espresso powder to the brownie batter for a richer, more intense chocolate flavor.
- Different Chocolate: Experiment with different types of chocolate chips, such as white chocolate or dark chocolate.
- Nuts: Add chopped walnuts, pecans, or almonds to the brownie batter or sprinkle them on top before baking.
FAQs (Frequently Asked Questions)
Q: Can I use a different size pan?
A: While an 8×8 inch pan is ideal, you can use a 9×9 inch pan. However, the brownies will be thinner, and you may need to reduce the baking time slightly.
Q: How do I know when the brownies are done?
A: Insert a toothpick into the center of the brownies. If it comes out clean or with a few moist crumbs, they are done. Be careful not to overbake them, as they will become dry.
Q: Can I make these ahead of time?
A: Yes, these brownies can be made ahead of time. Store them in an airtight container at room temperature for up to 3 days or in the refrigerator for up to a week.
Q: My cheesecake layer sank into the brownie layer. What did I do wrong?
A: This can happen if the brownie batter is too thin or the cheesecake batter is too heavy. Make sure you’re measuring the ingredients accurately and not overmixing the brownie batter.
Q: Can I freeze these brownies?
A: Yes, you can freeze them for up to 2 months. Wrap them individually in plastic wrap and then place them in a freezer-safe bag or container. Thaw in the refrigerator before serving.
Final Thoughts
These Marbled Cheesecake Brownies are truly a delightful treat. The combination of rich, fudgy brownie and tangy, creamy cheesecake is simply irresistible. Don’t be intimidated by the two-layer process; it’s much easier than it looks. Give this recipe a try, and I promise you’ll be rewarded with a batch of decadent brownies that will disappear in no time. Feel free to experiment with different variations and make them your own. And be sure to let me know how they turn out – I love hearing your feedback! Perhaps pair them with a robust red wine for an after-dinner indulgence. Happy baking!