
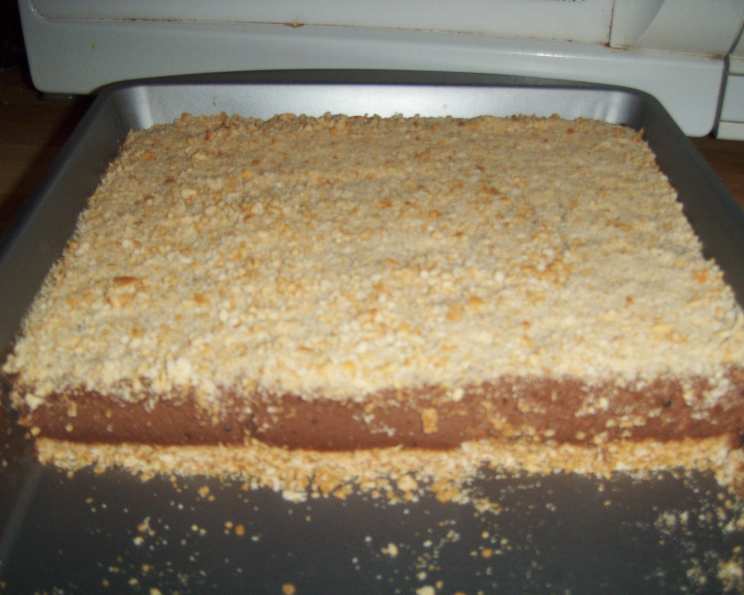
Maria Cookie Cake: A Taste of Nostalgia
There’s something about the simple, unassuming Maria cookie that just whispers “childhood” to me. I remember visiting my grandmother in Spain, and she always had a tin overflowing with these golden biscuits. We’d dunk them in our café con leche, the sweet, milky coffee softening them into pure, comforting bliss. Years later, I rediscovered these cookies and immediately knew I had to create a dessert that celebrated their humble deliciousness – and that’s how this Maria Cookie Cake came to be.
Recipe Overview
- Prep Time: 20 minutes
- Total Time: 2 hours 20 minutes
- Servings: 9-12
- Yields: 1 Cake
Ingredients
- 1/2 cup 35% cream
- 2 1/2 cups sweetened condensed milk
- 2 envelopes unflavored gelatin
- 1 (800g) box Maria cookies (box of 4 packages, 34 cookies per individual package)
- 2 cups strong coffee
- Alternate base:
- 34 Maria cookies
- 1 egg
Equipment Needed
- Electric mixer
- Cake pan (springform pan recommended for easy removal)
- Mixing bowls
- Slotted spatula
Instructions
- Begin by preparing the creamy filling. Using an electric mixer, whip the 35% cream until it forms stiff peaks. Be careful not to overwhip, as this can cause the cream to curdle.
- Gently fold the sweetened condensed milk into the whipped cream, ensuring it’s fully incorporated. Mix slowly to maintain the airy texture of the whipped cream.
- In a separate bowl, prepare the unflavored gelatin according to the package directions. Each brand may have slightly different instructions, so follow them carefully. Usually, this involves blooming the gelatin in cold water and then dissolving it in hot water.
- Once the gelatin is fully dissolved and slightly cooled, pour it into the cream and condensed milk mixture. Mix well to ensure even distribution of the gelatin, which will help the cake set properly.
- Now, it’s time to assemble the cake. Line the entire bottom of your cake pan with Maria cookies. You can break them into pieces to fill any gaps and create a solid base.
- Pour a layer of the cream and milk mixture on top of the cookie base, spreading it evenly.
- Using a slotted spatula, individually soak the Maria cookies in the strong coffee for a few seconds until lightly saturated. Don’t over-soak them, or they will become too soggy and fall apart. A quick dip is all you need.
- Layer the coffee-soaked cookies on top of the cream and milk layer. Arrange them in a single layer, covering the entire surface.
- Alternate layers of cream and milk mixture and coffee-soaked cookies until you have used all the ingredients. Aim for at least three layers of each.
- If desired, top the cake with any remaining cookie crumbs for a decorative touch. Gently press the crumbs into the top layer of cream.
- Refrigerate the cake for at least 2 hours, or preferably overnight, before cutting and serving. This allows the gelatin to set completely and the flavors to meld together.
- Alternate cookie base: If you prefer a firmer base, you can create one by finely crumbling 34 Maria cookies (one package) and mixing them with 1 egg. Firmly press this mixture into the bottom of the cake pan to create a crust. Bake the crust in a preheated oven at 350°F (175°C) for about 5 minutes. Then, turn off the oven but let the base cool inside the oven while you prepare the rest of the cake. This will create a slightly crispy and more substantial base.
Expert Tips & Tricks
- Coffee Strength: The strength of the coffee is key. Use a strong brew to ensure a noticeable coffee flavor that complements the cookies and cream. Espresso works exceptionally well.
- Gelatin Bloom: Always bloom your gelatin properly according to package instructions. This step is crucial for achieving the right consistency. Under-bloomed gelatin can result in a runny cake, while over-bloomed gelatin can become lumpy.
- Cookie Soaking: Be mindful of how long you soak the cookies in coffee. Too long, and they’ll disintegrate. A quick dip is sufficient. Too little, and they’ll remain dry.
- Layering Technique: For a visually appealing cake, ensure that each layer of cookies is evenly distributed and that there are no gaps. This will create clean slices and prevent the cream from seeping through.
- Springform Pan: Using a springform pan is highly recommended for easy removal of the cake. If you don’t have one, line your cake pan with parchment paper, leaving an overhang on the sides. This will allow you to lift the cake out easily after it has set.
Serving & Storage Suggestions
To serve the Maria Cookie Cake, carefully remove it from the cake pan. If using a regular cake pan, gently lift it out using the parchment paper overhang. Slice the cake into wedges and serve chilled.
The cake can be stored in the refrigerator for up to 3 days. Cover it tightly with plastic wrap or store it in an airtight container to prevent it from drying out. Freezing is not recommended, as it can affect the texture of the cream and cookies.
Nutritional Information
| Nutrient | Amount per Serving | % Daily Value |
|---|---|---|
| Calories | 325 kcal | N/A |
| Calories from Fat | 108 | N/A |
| Total Fat | 12g | 18% |
| Saturated Fat | 7.4g | 37% |
| Cholesterol | 64.3mg | 21% |
| Sodium | 124.5mg | 5% |
| Total Carbohydrate | 46.7g | 15% |
| Dietary Fiber | 0g | 0% |
| Sugars | 46.3g | 185% |
| Protein | 9.1g | 18% |
Note: Nutritional information is an estimate and may vary based on specific ingredients and portion sizes.
Variations & Substitutions
- Chocolate Twist: Add a couple of tablespoons of cocoa powder to the cream and milk mixture for a chocolate version. You can also dip the cookies in chocolate syrup instead of coffee.
- Citrus Zest: Add the zest of one lemon or orange to the cream mixture for a bright and refreshing flavor.
- Liqueur Infusion: Add a tablespoon of your favorite liqueur (such as rum, brandy, or coffee liqueur) to the coffee for an extra layer of flavor.
- Different Cookies: While Maria cookies are traditional, you can experiment with other types of cookies, such as graham crackers or digestive biscuits.
- Vegan Option: To make this recipe vegan, use plant-based whipped cream, condensed milk, and gelatin alternatives.
FAQs (Frequently Asked Questions)
Q: Can I use a different type of cookie?
A: Yes, you can. Graham crackers or digestive biscuits make great substitutes. Keep in mind that the flavor profile will change slightly.
Q: Can I make this cake ahead of time?
A: Absolutely! In fact, it’s best to make it a day in advance to allow the flavors to meld and the gelatin to set completely.
Q: My cake is not setting properly. What did I do wrong?
A: This is likely due to incorrect gelatin preparation. Make sure you bloom the gelatin properly and follow the package instructions carefully. Also, ensure that the gelatin is evenly distributed throughout the cream mixture.
Q: Can I freeze this cake?
A: Freezing is not recommended, as it can alter the texture of the cream and cookies.
Q: How do I prevent the cookies from becoming too soggy?
A: The key is to dip the cookies quickly in the coffee. A brief dip is sufficient to moisten them without causing them to fall apart.
Final Thoughts
This Maria Cookie Cake is more than just a dessert; it’s a trip down memory lane. Simple to make yet utterly satisfying, it’s the perfect treat for any occasion. I encourage you to try this recipe and put your own spin on it. Don’t hesitate to experiment with different flavors and ingredients to create a cake that’s uniquely yours. Whether you serve it with a cup of coffee or a scoop of vanilla ice cream, this Maria Cookie Cake is sure to bring a smile to your face. Enjoy the process, savor the flavors, and share the joy with your loved ones!