
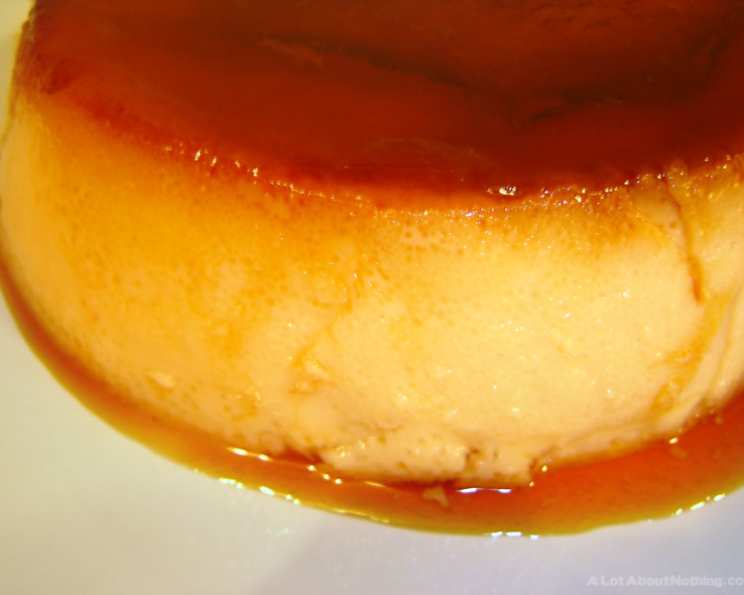
Marieville’s Pineapple Flan: A Tropical Escape in Every Bite
I remember the first time I tasted pineapple flan. It wasn’t in a fancy restaurant or a quaint bakery, but at a potluck in Marieville, a small town known for its vibrant community spirit and even more vibrant desserts. One bite of that silky, tangy flan transported me to a sun-drenched beach, the gentle sway of palm trees overhead, and the sweet scent of pineapple in the air. The creamy texture, infused with the bright, tropical flavor of pineapple, was unlike anything I’d ever experienced. It was love at first bite, and I’ve been chasing that taste of paradise ever since.
Recipe Overview
- Prep Time: 20 minutes
- Cook Time: 50 minutes
- Total Time: 4 hours 10 minutes (including chilling)
- Servings: 6-8
- Yield: 1 flan
- Dietary Type: Gluten-Free
Ingredients
- For the Caramel Sauce:
- 1 cup granulated sugar
- For the Pineapple Flan:
- 3 cups pineapple juice (look for 100% juice in the refrigerated section)
- ½ cup granulated sugar
- 18 large egg yolks
Equipment Needed
- Small saucepan
- Metal baking pan or flan mold (approx. 9-inch diameter)
- Medium saucepan
- Large bowl
- Whisk
- Larger baking pan for water bath
- Oven
Instructions
- Prepare the Caramel Sauce: Pour 1 cup of sugar into a small saucepan. Place the saucepan over low heat. This step requires patience and constant attention.
- Melt the Sugar: Watch the sugar carefully as it melts. It’s crucial to keep the heat low to prevent burning. Burnt caramel tastes bitter and will ruin the entire flan. The goal is to melt the sugar slowly and evenly until it transforms into a smooth, golden-amber liquid.
- Achieve the Perfect Caramel Color: As the sugar melts, it will gradually turn golden. Aim for a light amber color – a shade darker than honey. This indicates the caramel is ready.
- Caramelize the Pan: Immediately pour the melted caramel into your metal baking pan or flan mold. Work quickly, as the caramel hardens rapidly as it cools. Swirl the pan to evenly coat the bottom and sides with the hot caramel. It’s essential to coat the entire surface as this will both prevent sticking and create a beautiful caramel layer on the finished flan.
- Cool the Caramel: Allow the caramel to cool and harden completely before proceeding to the next step. This will typically take about 15-20 minutes.
- Prepare the Pineapple Reduction: In a medium saucepan, combine 3 cups of pineapple juice and ½ cup of sugar. Place the saucepan over high heat, stirring until the sugar dissolves completely.
- Reduce the Pineapple Juice: Once the sugar has dissolved, reduce the heat to medium. Simmer the mixture, stirring occasionally, until the pineapple juice is reduced to 2 cups. This process will concentrate the pineapple flavor and create a richer, more intense taste in the flan. This should take approximately 25 minutes.
- Cool the Pineapple Reduction: Remove the saucepan from the heat and allow the pineapple mixture to cool to room temperature. This is an important step, as adding hot liquid to the egg yolks can cause them to scramble.
- Whisk the Egg Yolks: In a large bowl, place the 18 large egg yolks. Gently whisk them until they are lightly beaten and homogenous.
- Combine the Mixtures: Gradually whisk the cooled pineapple mixture into the beaten egg yolks. It’s important to add the pineapple mixture slowly and steadily to prevent the egg yolks from curdling. Whisk until the mixture is well combined and smooth.
- Pour into the Caramelized Pan: Carefully pour the pineapple and egg yolk mixture into the baking pan that has been caramelized.
- Prepare the Water Bath: Preheat your oven to 350°F (175°C). Place the flan mold inside a larger baking pan. This will create a water bath, which helps the flan cook evenly and prevents it from drying out.
- Add Hot Water: Carefully pour hot water into the larger baking pan, ensuring the water level reaches about halfway up the sides of the flan mold.
- Bake the Flan: Gently place the baking pan with the flan and water bath into the preheated oven. Bake for approximately 50 minutes, or until the flan is golden and set.
- Check for Doneness: To check if the flan is done, insert a knife into the center. If the knife comes out clean, the flan is ready. A slight jiggle is okay.
- Cool and Refrigerate: Remove the flan from the oven and carefully remove it from the water bath. Allow the flan to cool completely to room temperature. Then, cover it with plastic wrap and refrigerate for at least 3 hours, or preferably overnight. This chilling period allows the flan to set completely and develop its full flavor.
- Invert and Serve: Before serving, run a thin knife around the edge of the flan to loosen it from the pan. Place a serving plate over the pan and carefully invert the flan onto the plate. The caramel will drizzle over the flan, creating a beautiful and delicious sauce.
Expert Tips & Tricks
- Caramel Consistency: The key to perfect caramel is patience and low heat. If the sugar starts to burn, don’t hesitate to start over.
- Preventing Curdling: To prevent the egg yolks from curdling, ensure the pineapple mixture is completely cool before adding it to the egg yolks.
- Water Bath Importance: The water bath is essential for creating a silky smooth flan. It prevents the flan from drying out and cracking during baking.
- Testing for Doneness: The flan should be set but still slightly jiggly in the center when it’s done. It will continue to firm up as it cools.
- Make Ahead: This flan is a great make-ahead dessert. It can be made up to two days in advance and stored in the refrigerator. The flavors will actually meld and deepen over time.
Serving & Storage Suggestions
Marieville’s Pineapple Flan is best served chilled, directly after inverting it onto a serving plate so that the caramel sauce drizzles beautifully. A sprig of fresh mint or a few slices of fresh pineapple can add an elegant touch. Leftovers should be stored in an airtight container in the refrigerator for up to 3 days. Freezing is not recommended, as it can alter the texture of the flan.
Nutritional Information
| Nutrient | Amount per Serving | % Daily Value |
|---|---|---|
| Calories | 450 kcal | 23% |
| Total Fat | 25g | 38% |
| Saturated Fat | 10g | 50% |
| Cholesterol | 500mg | 167% |
| Sodium | 50mg | 2% |
| Total Carbohydrate | 50g | 17% |
| Dietary Fiber | 1g | 4% |
| Sugars | 40g | – |
| Protein | 10g | 20% |
Note: Nutritional information is an estimate and may vary based on specific ingredients and portion sizes.
Variations & Substitutions
- Coconut Pineapple Flan: Substitute one cup of the pineapple juice with one cup of coconut milk for a richer, more tropical flavor.
- Citrus Zest: Add the zest of one lime or lemon to the egg yolk mixture for a bright, citrusy note.
- Spice Infusion: Infuse the pineapple juice with a cinnamon stick or a few star anise while reducing it for a warm, aromatic twist. Remove the spices before adding the pineapple mixture to the egg yolks.
FAQs (Frequently Asked Questions)
Q: Can I use canned pineapple juice for this recipe?
A: While fresh pineapple juice is always best, you can use canned pineapple juice in a pinch. Just be sure to choose 100% juice with no added sugar.
Q: Why is my caramel burning?
A: Caramel burns easily if the heat is too high. Keep the heat on low and watch the sugar carefully as it melts. If it starts to smoke or smell burnt, remove it from the heat immediately.
Q: My flan cracked during baking. What did I do wrong?
A: Cracking usually indicates that the flan was baked at too high of a temperature or without a water bath. Make sure to use a water bath and keep the oven temperature at 350°F (175°C).
Q: How do I get the flan to release cleanly from the pan?
A: Make sure the caramel has fully coated the pan before adding the pineapple mixture. Run a thin knife around the edge of the flan before inverting it.
Q: Can I make this flan ahead of time?
A: Absolutely! This flan is even better when made a day or two in advance, allowing the flavors to meld and deepen. Just store it covered in the refrigerator.
Final Thoughts
Marieville’s Pineapple Flan is more than just a dessert; it’s a taste of sunshine, a celebration of simple ingredients, and a testament to the power of community. Don’t be intimidated by the steps – each one is easy to follow, and the results are well worth the effort. Gather your ingredients, embrace the process, and prepare to be transported to a tropical paradise with every creamy, tangy bite. I encourage you to try this recipe and share your creations with friends and family. Perhaps pair it with a light, crisp white wine or a refreshing iced tea for the perfect ending to any meal. And don’t hesitate to share your feedback – I’m always eager to hear about your culinary adventures!