
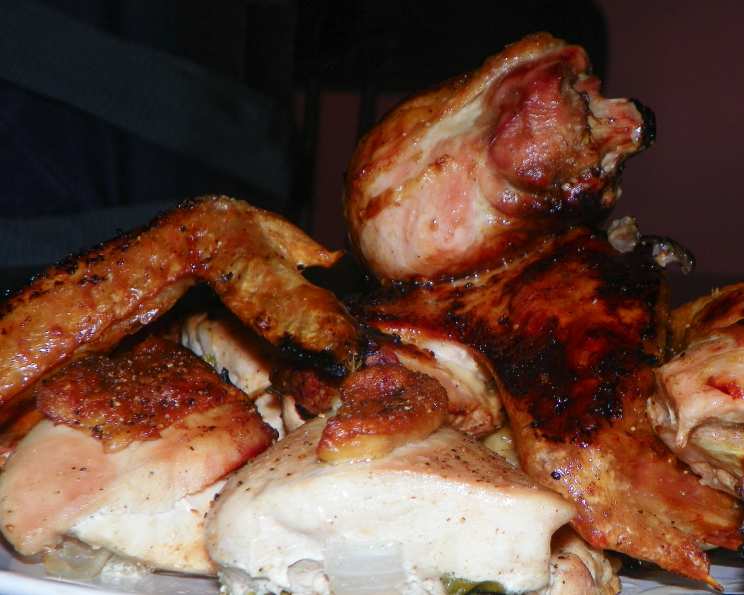
Mastering the Art of Roast Chicken Parts: A Simple Recipe with Endless Variations
There’s a scent that instantly transports me back to my grandmother’s kitchen: roasting chicken. Not just any chicken, but the deeply savory aroma of golden-brown chicken skin, kissed by herbs, filling the entire house. She never fussed over fancy techniques, just simple, honest cooking that warmed the soul. And that, for me, is the true essence of this dish – a blank canvas for culinary creativity, a reliable comfort that never fails to satisfy.
Recipe Overview
- Prep Time: 5 minutes
- Cook Time: 30-40 minutes
- Total Time: 35-45 minutes
- Servings: 6
- Yield: Variable, depending on parts used
- Dietary Type: Generally Gluten-Free, Dairy-Free
Ingredients
- 1/4 cup extra virgin olive oil or 1/4 cup butter
- 1 whole chicken, 3 to 4 pounds, trimmed of excess fat and cut into 8 pieces, or any combination of chicken parts
- Salt and freshly ground black pepper
- 1/4 cup sage (optional) or 1/4 cup a combination of herbs (optional)
Equipment Needed
- Roasting pan
Instructions
-
Preheat your oven to 450°F (232°C). Place the olive oil or butter in a roasting pan and put it in the oven for a couple of minutes, just until the oil is hot or the butter melts. This initial step ensures the chicken won’t stick and starts the browning process immediately.
-
Add the chicken pieces to the hot pan and turn them a couple of times in the fat, making sure to leave them skin side up. This positioning is crucial for achieving that coveted crispy skin. Sprinkle generously with salt and pepper, then return the pan to the oven.
-
After the chicken has cooked for 15 minutes, toss about one-quarter of the herbs (if using) over it and turn the pieces. The initial high heat sears the outside, locking in the juices and creating a flavorful foundation. Sprinkle on another quarter of the herbs and roast for another 10 minutes.
-
Turn the chicken over again (now skin side up once more), add another quarter of the herbs, and cook until the chicken is done. You’ll know it’s ready when you see clear juices if you make a small cut in the meat near the bone. The total cooking time should be 30 to 40 minutes at most. Overcooking will result in dry, tough chicken. Use a meat thermometer to ensure the internal temperature reaches 165°F (74°C) for the thickest part of the thigh.
-
Garnish with the remaining herbs and skim any excess fat from the pan juices, if necessary. Serve immediately, with some of the pan juices spooned over the chicken. These juices are liquid gold – packed with flavor from the rendered chicken fat, herbs, and seasonings.
Expert Tips & Tricks
- Don’t overcrowd the pan: If your roasting pan is too small, the chicken pieces will steam instead of roast, resulting in soggy skin. Use two pans if necessary.
- Pat the chicken dry: Before seasoning, pat the chicken skin dry with paper towels. This removes excess moisture and helps the skin crisp up better.
- Rest the chicken: Allow the chicken to rest for 5-10 minutes before carving. This allows the juices to redistribute, resulting in a more tender and flavorful final product.
- Use a meat thermometer: This is the best way to ensure your chicken is cooked to a safe internal temperature without overcooking.
- For extra crispy skin: After the chicken is cooked through you can crank up the broiler to high for 1-2 minutes, keeping a close eye so that it doesn’t burn. This gives the chicken an extra golden-brown finish.
Serving & Storage Suggestions
Serve your roast chicken parts immediately while they’re hot and juicy. It pairs wonderfully with roasted vegetables, mashed potatoes, rice pilaf, or a simple salad.
Leftover roast chicken can be stored in an airtight container in the refrigerator for up to 3-4 days. For longer storage, freeze the cooked chicken for up to 2-3 months.
To reheat, preheat your oven to 350°F (175°C). Place the chicken pieces in a baking dish with a little broth or water to prevent them from drying out. Cover the dish with foil and bake for 15-20 minutes, or until heated through. You can also reheat in the microwave, but be careful not to overcook it.
Nutritional Information
| Nutrient | Amount per Serving (estimated) | % Daily Value (approximate) |
|---|---|---|
| Calories | 450 kcal | 23% |
| Total Fat | 30g | 46% |
| Saturated Fat | 8g | 40% |
| Cholesterol | 150mg | 50% |
| Sodium | 250mg | 11% |
| Total Carbohydrate | 0g | 0% |
| Dietary Fiber | 0g | 0% |
| Sugars | 0g | 0% |
| Protein | 40g | 80% |
Note: Nutritional information is an estimate and can vary depending on the specific ingredients and portion sizes used.
Variations & Substitutions
- Roast Chicken Parts with Black Beans: Soak 2 tablespoons fermented black beans in water, sherry, or wine to cover. In place of the butter or olive oil, use peanut oil or a neutral oil, like grapeseed or corn. Mix together 1 tablespoon minced garlic, 2 minced scallions, 1 teaspoon minced fresh ginger, 2 tablespoons soy sauce, and 1 teaspoon sugar or honey. Drain the black beans and add them to this mixture; thin it to a paste, if necessary, with a little more soy sauce. Spread a little of this mixture all over the raw chicken and put the chicken in the roasting pan. Use the soy-based mixture for basting in place of the herb mixture.
- Garlic Herb Chicken: Add several (or many!) cloves of garlic along with sprigs of thyme, sage, oregano, or rosemary.
- Onion & Shallot Chicken: Add a cup or so of chopped onion, shallot, or leek.
- Mushroom Chicken: Add a cup or so of sliced fresh mushrooms, after the first 15 minutes of roasting.
- Spicy Chili Chicken: Add a lot of hot dried chiles, a couple of roasted, soaked, and chopped milder chiles, or both.
- Citrus Chicken: Add 2 or 3 lemons (or oranges and limes), cut in half; when the chicken is done, squeeze the hot lemon juice over it.
- Ginger Scallion Chicken: Use peanut oil instead of olive oil and add several slices of ginger and garlic after turning the chicken skin side up again. When chicken is done, drizzle with soy sauce and dark sesame oil, then garnish with scallions and/or cilantro.
- Pesto Chicken: Rub the chicken with 1/2 cup or so of Pesto or any other herb paste from the beginning of the cooking.
- Mustard Chicken: Stir in a dollop of grainy French-style mustard when the chicken is done.
- Tomato Olive Chicken: Add a couple handfuls of cherry tomatoes and some black olives after turning the chicken skin side up again.
- Salsa Chicken: Stir in a cup of any salsa in the last 10 minutes of cooking or spoon on top of the cooked chicken before serving.
- Curry Chicken: Stir a couple tablespoons of any curry powder into a cup of yogurt or coconut milk and spoon or brush it on as a basting sauce during cooking.
FAQs (Frequently Asked Questions)
Q: Can I use bone-in, skin-on chicken thighs instead of a whole cut-up chicken?
A: Absolutely! Bone-in, skin-on chicken thighs are a great choice. They tend to be more forgiving than chicken breasts, staying moist and flavorful during roasting.
Q: What if I don’t have a roasting pan?
A: A baking sheet with a rim will work just fine. The rim is important to catch any drippings.
Q: How do I know when the chicken is fully cooked?
A: The most reliable way is to use a meat thermometer. Insert it into the thickest part of the thigh, being careful not to touch the bone. It should read 165°F (74°C).
Q: Can I prepare the chicken ahead of time?
A: You can season the chicken a few hours ahead of time and store it in the refrigerator. However, it’s best to roast it fresh for optimal results.
Q: What’s the best way to get crispy chicken skin?
A: Patting the chicken dry before seasoning and roasting at a high temperature are key to achieving crispy skin.
Final Thoughts
This recipe is more than just a set of instructions; it’s an invitation to experiment, to trust your instincts, and to create something truly delicious. Don’t be afraid to play with different herbs, spices, and flavor combinations to find your signature roast chicken. And most importantly, don’t forget to share your culinary creations with loved ones. After all, good food is best enjoyed in good company. So go ahead, give this recipe a try, and let me know what you think! I’d love to hear about your favorite variations.