
Elevate Your Snacking: A Deep Dive into Perfect Marshmallow Treats
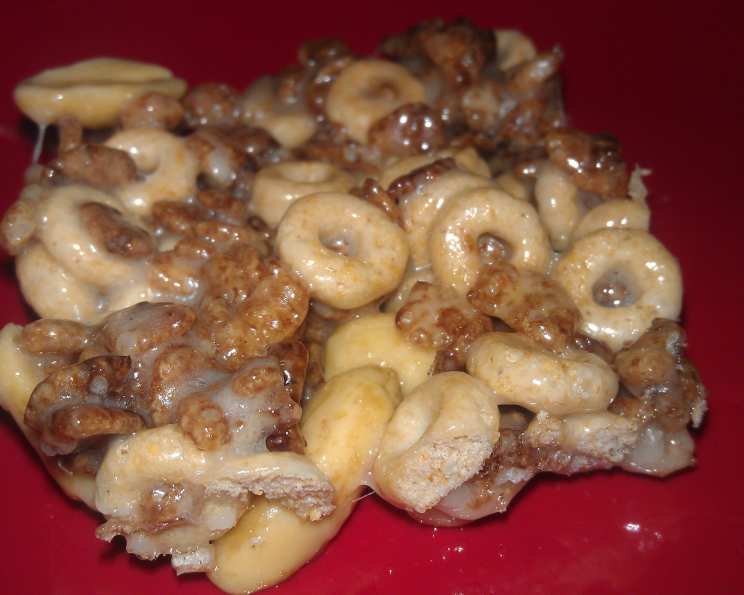
The scent of melting marshmallows instantly teleports me back to childhood. Every year at the Madison Middle School bake sale, E. Shern’s marshmallow treats were the stuff of legend. Square upon perfectly imperfect square, a symphony of textures and tastes – the gooey pull of marshmallow, the satisfying crunch of cereal, and the salty pop of peanuts. These weren’t just sweets; they were edible nostalgia, a reminder of simpler times and shared joys, and I’ve been chasing that perfect bite ever since.
Recipe Overview
- Prep Time: 5 minutes
- Cook Time: 5 minutes
- Total Time: 20 minutes
- Yields: 16 squares
- Serves: 8
- Dietary Type: Vegetarian
Ingredients
- 3 tablespoons margarine
- 1 1/2 cups small marshmallows
- 1 cup Rice Krispies
- 1 cup Cheerios toasted oat cereal
- 1/4 – 1/3 cup salted peanuts
Equipment Needed
- Double boiler
- 8 x 8 inch pan
- Grease or parchment paper
Instructions
- Prepare your workspace: Lightly grease an 8×8 inch pan. This will prevent the marshmallow treats from sticking and make removal much easier. You can also line the pan with parchment paper, leaving an overhang on two sides to easily lift the treats out later.
- Melt the margarine: In the top of a double boiler over simmering water, melt 3 tablespoons of margarine. Ensure the water doesn’t touch the top pan. The gentle heat prevents the margarine from burning and ensures even melting. Alternatively, melt the margarine in a microwave-safe bowl in 30-second intervals, stirring in between, until fully melted.
- Incorporate the marshmallows: Add 1 1/2 cups of small marshmallows to the melted margarine. Stir continuously until the marshmallows are completely melted and smooth. This step requires patience; avoid overheating, as it can make the marshmallows tough.
- Combine the cereals and peanuts: Remove the marshmallow mixture from the heat. Immediately add 1 cup of Rice Krispies, 1 cup of Cheerios toasted oat cereal, and 1/4 to 1/3 cup of salted peanuts.
- Mix thoroughly: Stir all ingredients together until they are evenly coated with the melted marshmallow mixture. Make sure the cereals and peanuts are well-distributed to ensure a consistent flavor and texture in every bite.
- Press into the pan: Transfer the mixture to the prepared 8×8 inch pan. Using a spatula or your fingers (lightly dampened to prevent sticking), gently but firmly press the mixture evenly into the pan. The goal is to create a compact layer without crushing the cereals.
- Cool and cut: Allow the marshmallow treats to cool completely at room temperature for at least 15 minutes before cutting them into squares. This allows the marshmallows to set, making them easier to cut and hold their shape.
- Slice and serve: Once cooled, cut the marshmallow treats into 16 squares. For cleaner cuts, use a sharp knife that has been lightly greased.
Expert Tips & Tricks
- Marshmallow Consistency: For an extra gooey texture, use fresh marshmallows. Stale marshmallows tend to be firmer and may not melt as smoothly.
- Flavor Infusion: Add a teaspoon of vanilla extract to the melted marshmallow mixture for an enhanced flavor profile. A pinch of sea salt can also balance the sweetness.
- Microwave Modification: While the double boiler method is preferred for even melting, a microwave can be used. Microwave the marshmallows and margarine in 30-second intervals, stirring in between, until melted. Watch carefully to avoid burning.
- Preventing Sticking: Grease your spatula or hands with a bit of margarine or cooking spray when pressing the mixture into the pan to prevent it from sticking.
- Even Distribution: To ensure an even distribution of peanuts and cereal, mix them together in a separate bowl before adding them to the melted marshmallow mixture.
- Softening Hard Treats: If your marshmallow treats become hard, microwave them for a few seconds to soften them up.
- Pan Size Variation: If you don’t have an 8×8 inch pan, a slightly larger or smaller pan will work. Just adjust the thickness of the treats accordingly.
- Nut Butter Boost: Add a tablespoon of peanut butter or almond butter to the melted marshmallow mixture for a richer flavor.
- Margarine Matters: While margarine is called for in the original recipe, unsalted butter can be used as a substitute. If using salted butter, reduce or eliminate the added salt.
Serving & Storage Suggestions
These marshmallow treats are best enjoyed fresh, when the marshmallows are still slightly gooey and the cereals are crisp. Serve them as a simple snack, a sweet addition to a lunchbox, or a fun dessert for parties.
To store, keep the marshmallow treats in an airtight container at room temperature. They will typically stay fresh for up to 2-3 days. For longer storage, you can freeze them for up to 2 months. Wrap each treat individually in plastic wrap before placing them in a freezer-safe bag to prevent freezer burn. Thaw at room temperature before serving. Storing them in the refrigerator is not recommended, as it can make them hard.
Nutritional Information
| Nutrient | Amount per Serving | % Daily Value |
|---|---|---|
| Calories | 135.8 kcal | N/A |
| Calories from Fat | 72 kcal | N/A |
| Total Fat | 8 g | 12% |
| Saturated Fat | 1.4 g | 7% |
| Cholesterol | 0 mg | 0% |
| Sodium | 154.7 mg | 6% |
| Total Carbohydrate | 14.8 g | 4% |
| Dietary Fiber | 1 g | 3% |
| Sugars | 6.2 g | 24% |
| Protein | 2.5 g | 5% |
Note: Nutritional information is an estimate and may vary based on specific ingredients and portion sizes.
Variations & Substitutions
- Gluten-Free: Ensure you are using gluten-free Rice Krispies and Cheerios. Many brands offer gluten-free versions of these cereals.
- Vegan: Substitute the margarine with a vegan butter alternative. Use vegan marshmallows, which are readily available online and in some specialty stores.
- Different Cereals: Experiment with other types of cereals, such as Cocoa Krispies, Cinnamon Toast Crunch, or even granola for a heartier texture.
- Nut-Free: Omit the peanuts entirely or substitute them with sunflower seeds or pumpkin seeds for a nut-free version.
- Chocolate Drizzle: Drizzle melted chocolate over the cooled marshmallow treats for an extra layer of indulgence.
- Sprinkles: Add sprinkles to the marshmallow mixture before pressing it into the pan for a festive touch.
- Dried Fruit: Incorporate dried cranberries, raisins, or chopped apricots for added flavor and texture.
- Spices: A dash of cinnamon, nutmeg, or even a pinch of cayenne pepper can add a unique twist to the flavor.
- Marshmallow Flavor: Use flavored marshmallows like strawberry or chocolate for a different taste experience.
FAQs (Frequently Asked Questions)
Q: Can I use large marshmallows instead of small ones?
A: Yes, but you’ll need to chop them into smaller pieces before melting to ensure even melting.
Q: My marshmallow treats are too sticky. What did I do wrong?
A: You may have overheated the marshmallows. Melt them over low heat and stir constantly. Make sure to measure your ingredients accurately.
Q: How can I prevent the treats from sticking to the pan?
A: Grease the pan thoroughly with margarine or use parchment paper to line the pan.
Q: Can I add chocolate chips to the mixture?
A: Absolutely! Add them after you’ve melted the marshmallows, and stir gently to incorporate.
Q: My treats are too hard. How can I soften them?
A: Microwave them for a few seconds, or store them in an airtight container with a slice of bread to help retain moisture.
Final Thoughts
These marshmallow treats are more than just a recipe; they’re an invitation to create memories, share joy, and indulge in a little bit of childhood magic. Whether you stick to the classic recipe or experiment with exciting variations, I encourage you to gather your ingredients, preheat your double boiler (or turn on that microwave), and embark on a sweet adventure. And after you’ve enjoyed a few squares, don’t forget to share your creations and feedback – because the best treats are always the ones shared with friends and family. Perhaps a glass of cold milk or a scoop of vanilla ice cream on the side? Happy snacking!