
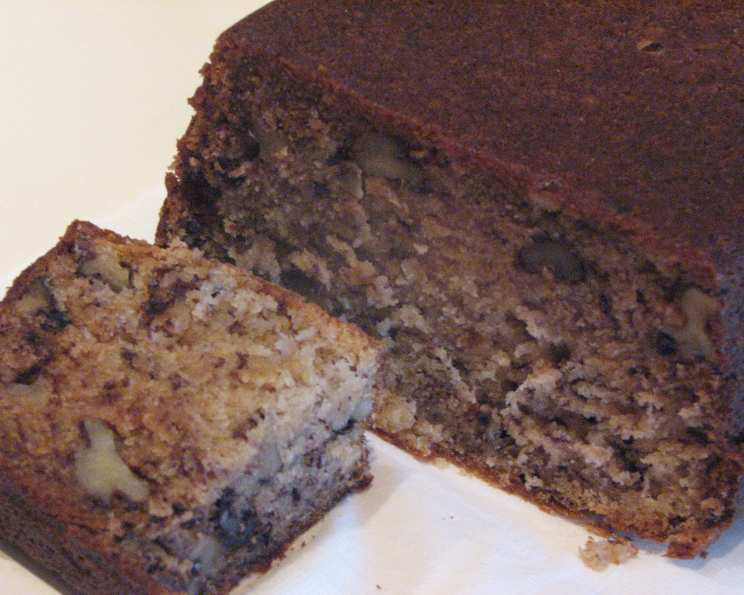
Martha Stewart’s Banana Nut Bread: A Slice of Comfort
Baking has always been my therapy, a way to turn simple ingredients into moments of pure joy. But there’s one recipe that consistently evokes a sense of nostalgia and warmth: banana nut bread. I still remember the first time I baked a loaf, guided by my grandmother’s handwritten notes, the aroma filling her cozy kitchen. It wasn’t just the taste of sweet bananas and crunchy walnuts; it was the feeling of connection, of shared memories, that made it truly special. Today, I’m thrilled to share a recipe that captures that same comforting essence: Martha Stewart’s Banana Nut Bread.
Recipe Overview
- Prep Time: 15 minutes
- Cook Time: 50-60 minutes
- Total Time: 1 hour 5 minutes – 1 hour 15 minutes
- Servings: 10-12
- Yield: 1 loaf
- Dietary Type: Vegetarian
Ingredients
- ½ cup (1 stick) butter, at room temperature
- 1 cup granulated sugar
- 2 large eggs
- 1 ½ cups all-purpose flour
- 1 teaspoon baking soda
- 1 teaspoon salt
- 1 cup mashed very ripe bananas (about 3 medium)
- ½ cup sour cream (light or full-fat)
- 1 teaspoon vanilla extract
- ½ cup chopped walnuts (optional) or ½ cup chopped pecans (optional)
Equipment Needed
- 9x5x3 inch loaf pan
- Electric mixer
- Sifter or fine-mesh sieve
- Mixing bowls
- Rubber spatula
- Cake tester or toothpick
- Cooling rack
Instructions
- Preheat your oven to 350°F (175°C). Thoroughly butter or spray a 9x5x3 inch loaf pan. This step is crucial to prevent the bread from sticking. Make sure to get into all the corners and edges.
- In a large mixing bowl, cream together the softened butter and sugar using an electric mixer on medium speed. Beat until the mixture is light and fluffy. This step can take 3-5 minutes; don’t rush it! Incorporating air at this stage is vital for a tender crumb.
- Add the eggs one at a time, beating well after each addition. Ensure each egg is fully incorporated before adding the next. Scrape down the sides of the bowl as needed to ensure even mixing.
- In a separate bowl, sift together the flour, baking soda, and salt. Sifting helps to ensure that the dry ingredients are evenly distributed and that there are no lumps. If you don’t have a sifter, you can whisk the dry ingredients together very well.
- Gradually add the dry ingredients to the butter mixture, blending on low speed until just combined. Be careful not to overmix at this stage. Overmixing can develop the gluten in the flour, resulting in a tough bread.
- In a separate bowl, mash the ripe bananas until smooth. You should have about 1 cup of mashed bananas.
- Add the mashed bananas, sour cream, and vanilla extract to the batter. Stir until just combined. Again, avoid overmixing. The batter will be slightly lumpy, which is perfectly fine.
- If using, stir in the chopped walnuts or pecans. Ensure they are evenly distributed throughout the batter.
- Pour the batter into the prepared loaf pan. Spread it evenly using a spatula.
- Bake for 50-60 minutes, or until a cake tester (or toothpick) inserted into the center comes out clean. The baking time may vary depending on your oven. Start checking for doneness at 50 minutes. If the top of the bread is browning too quickly, you can loosely tent it with aluminum foil.
- Remove the loaf pan from the oven and let it cool in the pan for 10-15 minutes. This allows the bread to set slightly before inverting it.
- Turn the bread out onto a wire rack to cool completely.
Expert Tips & Tricks
- Ripe Bananas are Key: The riper the bananas, the sweeter and more flavorful your bread will be. Look for bananas that are heavily speckled with brown or even completely brown. If your bananas aren’t ripe enough, you can speed up the ripening process by placing them in a paper bag with an apple or a ripe avocado.
- Room Temperature Ingredients: Using room temperature butter and eggs helps to create a smooth and evenly textured batter. Allow your butter and eggs to sit at room temperature for about 30 minutes before starting the recipe.
- Don’t Overmix: Overmixing the batter develops the gluten in the flour, which can result in a tough and dense bread. Mix the dry ingredients into the wet ingredients until just combined.
- Sour Cream Substitute: If you don’t have sour cream on hand, you can substitute plain Greek yogurt.
- Nut Variations: Feel free to experiment with different types of nuts, such as macadamia nuts, almonds, or even toasted hazelnuts. You can also add chocolate chips for an extra decadent treat.
- Preventing a Soggy Bottom: If you find that the bottom of your banana bread is often soggy, try placing a baking sheet on the rack below the loaf pan. This will help to deflect some of the heat and ensure that the bottom of the bread bakes evenly.
Serving & Storage Suggestions
This banana nut bread is delicious served warm or at room temperature. It’s perfect with a pat of butter, a dollop of cream cheese, or a drizzle of honey. It also pairs well with a cup of coffee or tea.
To store, wrap the cooled bread tightly in plastic wrap or place it in an airtight container. At room temperature, it will last for 2-3 days. In the refrigerator, it will last for up to a week.
For longer storage, you can freeze the bread. Wrap it tightly in plastic wrap and then in a layer of aluminum foil. Frozen banana bread will last for up to 2-3 months. To thaw, simply leave it at room temperature for a few hours. You can also reheat individual slices in the microwave or toaster oven.
Nutritional Information
| Nutrient | Amount per Serving | % Daily Value |
|---|---|---|
| Calories | 234 kcal | 12% |
| Total Fat | 11.5 g | 18% |
| Saturated Fat | 7.0 g | 35% |
| Cholesterol | 37.3 mg | 12% |
| Sodium | 232 mg | 10% |
| Total Carbohydrate | 30.7 g | 10% |
| Dietary Fiber | 0.6 g | 2% |
| Sugars | 17.8 g | – |
| Protein | 2.4 g | 5% |
Note: Nutritional information is an estimate and can vary based on specific ingredients and portion sizes.
Variations & Substitutions
- Chocolate Chip Banana Bread: Add ½ cup of chocolate chips to the batter along with the nuts.
- Cinnamon Swirl Banana Bread: Mix 1 tablespoon of cinnamon with 2 tablespoons of sugar. Swirl this mixture into the batter before baking.
- Gluten-Free Banana Bread: Substitute a gluten-free all-purpose flour blend for the regular flour. You may also need to add a binder, such as xanthan gum.
- Vegan Banana Bread: Replace the butter with a vegan butter substitute, the eggs with flax eggs (1 tablespoon of ground flaxseed mixed with 3 tablespoons of water per egg), and the sour cream with a vegan sour cream alternative.
- Spiced Banana Bread: Add ½ teaspoon of ground cinnamon, ¼ teaspoon of ground nutmeg, and ¼ teaspoon of ground cloves to the dry ingredients.
FAQs (Frequently Asked Questions)
Q: Why is my banana bread dry?
A: Overbaking is the most common cause of dry banana bread. Make sure to check for doneness with a cake tester and remove the bread from the oven as soon as it’s done. Also, avoid overmixing the batter, as this can develop the gluten in the flour and make the bread tough.
Q: Can I use frozen bananas?
A: Yes, frozen bananas work well in banana bread. Thaw them completely and drain off any excess liquid before mashing.
Q: What can I do if I don’t have sour cream?
A: You can substitute plain Greek yogurt, buttermilk, or even applesauce for the sour cream.
Q: Can I make this recipe in a different size pan?
A: Yes, you can use two smaller loaf pans or a muffin tin. Adjust the baking time accordingly.
Q: How do I prevent the top of my banana bread from burning?
A: If the top of your banana bread is browning too quickly, you can loosely tent it with aluminum foil during the last 15-20 minutes of baking.
Final Thoughts
Martha Stewart’s Banana Nut Bread is more than just a recipe; it’s an invitation to create moments of simple joy. The aroma that fills your kitchen as it bakes, the comforting taste of sweet bananas and crunchy nuts – it’s a sensory experience that brings people together. So, preheat your oven, gather your ingredients, and embark on this baking adventure. Whether you share it with loved ones or savor it all by yourself, I hope this banana nut bread brings a little bit of warmth and happiness to your day. And don’t forget to share your creations and feedback! Happy baking!