
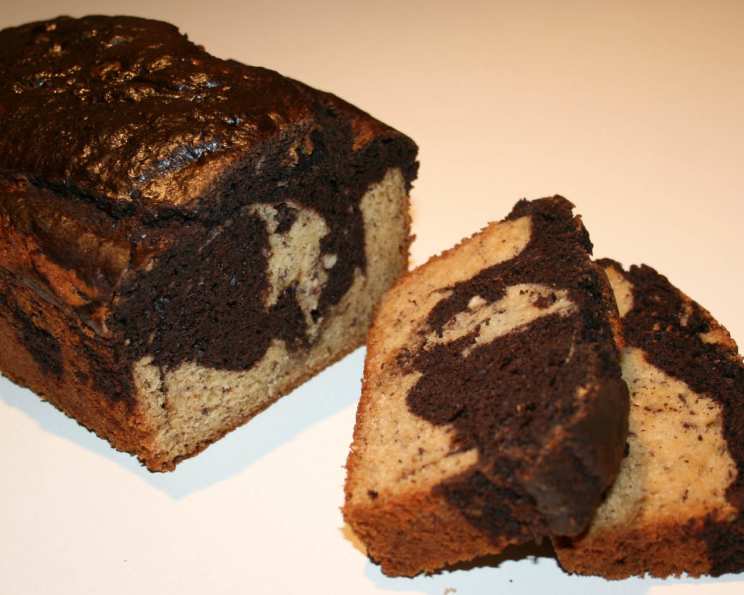
Martha Stewart’s Marble Cake With White Chocolate Glaze
The first time I tasted marble cake, it was at my grandmother’s house. Nana wasn’t much for fancy desserts, but her marble cake, always sliced and waiting under a glass dome on the counter, was legendary. The subtle swirl of vanilla and chocolate, the tender crumb – it was pure comfort. This recipe, inspired by Martha Stewart’s classic, perfectly captures that nostalgic flavor, elevated with a luscious white chocolate glaze that Nana, with her penchant for simplicity, might have initially scoffed at, but ultimately devoured.
Recipe Overview
- Prep Time: 30 minutes
- Cook Time: 40-50 minutes
- Total Time: 1 hour 10 minutes
- Servings: 9
- Yield: 1 loaf
- Dietary Type: Not Gluten-Free
Ingredients
Cake
- ½ cup unsalted butter, room temperature, plus more for pan
- 1 ¾ cups cake flour (not self-rising)
- 2 teaspoons baking powder
- ½ teaspoon salt
- 1 cup sugar
- 3 large eggs, room temperature
- 1 teaspoon pure vanilla extract
- ⅔ cup buttermilk, room temperature
- ¼ cup Dutch-processed cocoa powder, plus 1 tablespoon Dutch-processed cocoa powder
Glaze
- ¾ cup confectioners’ sugar, sifted
- 2 tablespoons milk
- 2 ¼ ounces white chocolate, melted and cooled
Equipment Needed
- 9-by-5-inch loaf pan
- Electric mixer with paddle attachment
- Whisk
- Rubber spatula
- Small bowl
- Cooling rack
Instructions
-
Preheat your oven to 350 degrees Fahrenheit (175 degrees Celsius). Generously butter a 9-by-5-inch loaf pan; set aside. This ensures the cake releases cleanly after baking.
-
In a medium bowl, whisk together the 1 ¾ cups cake flour, 2 teaspoons baking powder, and ½ teaspoon salt. This aerates the flour and evenly distributes the leavening agent and salt, resulting in a tender and properly risen cake. Set aside the mixture.
-
In the bowl of an electric mixer fitted with the paddle attachment, beat the ½ cup butter and 1 cup sugar until light and fluffy, about 5 minutes. This creaming process incorporates air, which is essential for a light and airy cake. Make sure your butter is at room temperature for optimal results.
-
Add the 3 eggs, one at a time, beating until combined after each addition and scraping down the sides of the bowl as needed. This ensures each egg is fully incorporated into the batter, preventing a curdled appearance.
-
Mix in 1 teaspoon vanilla extract. The vanilla enhances the overall flavor profile of the cake.
-
Add the flour mixture in two batches, alternating with the ⅔ cup buttermilk and beginning and ending with the flour. Start with half of the flour mixture, mix until just combined, then add all the buttermilk, mix, and finish with the remaining flour. The buttermilk adds moisture and a slight tang to the cake, contributing to its tender crumb. Be careful not to overmix at this stage, as it can develop the gluten in the flour and result in a tough cake.
-
Set aside one-third of the batter. This portion will be used to create the chocolate swirl.
-
In a small bowl, mix the ¼ cup Dutch-processed cocoa powder and 1 tablespoon Dutch-processed cocoa powder with ¼ cup plus 2 tablespoons boiling water using a rubber spatula until smooth. Dutch-processed cocoa powder has a milder flavor and darker color than natural cocoa powder. The boiling water helps to bloom the cocoa, intensifying its flavor.
-
Add the cocoa mixture to the reserved one-third of the cake batter; stir until well combined. Ensure the cocoa is fully incorporated and no streaks remain.
-
Spoon the batters into the prepared pan in two layers, alternating spoonfuls of vanilla and chocolate to simulate a checkerboard pattern. This creates the visually appealing marble effect.
-
To create marbling, run a table knife (or wooden skewer) through the batters in a swirling motion. Be careful not to over-swirl, as this can muddy the colors and result in a less defined marble pattern.
-
Bake, rotating the pan halfway through, until a cake tester comes out clean, 40 to 50 minutes. The rotation ensures even baking and prevents the cake from browning unevenly. A cake tester (or toothpick) inserted into the center of the cake should come out with just a few moist crumbs attached. If it comes out wet, continue baking for a few more minutes and check again.
-
Transfer the pan to a rack to cool 10 minutes. This allows the cake to set slightly before removing it from the pan.
-
Turn out the cake from the pan and cool completely on the rack. Ensure the cake is completely cool before glazing, as the glaze will melt if applied to a warm cake.
-
To make the glaze: In a small bowl, whisk together the ¾ cup confectioners’ sugar and 2 tablespoons milk. The sifted confectioners’ sugar prevents lumps in the glaze.
-
Whisk in the 2 ¼ ounces melted and cooled white chocolate. The white chocolate adds richness and a beautiful sheen to the glaze. Make sure the white chocolate is cooled but still liquid for the best consistency.
-
Pour the glaze over the cake, allowing it to drip down the sides.
-
Serve immediately.
Expert Tips & Tricks
- Room Temperature Matters: Ensuring your butter, eggs, and buttermilk are at room temperature is crucial for achieving a smooth, emulsified batter. This results in a cake with a more tender crumb.
- Don’t Overmix: Overmixing the batter after adding the flour can develop the gluten, leading to a tough cake. Mix only until just combined.
- Cocoa Bloom: Blooming the cocoa powder with boiling water intensifies its flavor and creates a richer, darker swirl.
- Prevent Sticking: To guarantee easy release, dust the buttered loaf pan with flour after greasing it. This creates a non-stick barrier.
- Glaze Consistency: If the glaze is too thick, add a tiny bit more milk. If it’s too thin, add a little more sifted confectioners’ sugar.
Serving & Storage Suggestions
Serve slices of the marble cake as a delightful afternoon treat or a simple dessert. The white chocolate glaze adds a touch of elegance, making it perfect for special occasions.
Storage:
- Room Temperature: The cake can be kept in an airtight container at room temperature for up to 3 days.
- Refrigerator: For longer storage, wrap the cake tightly in plastic wrap and store it in the refrigerator for up to a week. Allow it to come to room temperature before serving for the best flavor and texture.
- Freezer: The cake can also be frozen for up to 2 months. Wrap it tightly in plastic wrap and then in foil or place it in a freezer-safe bag. Thaw overnight in the refrigerator before serving.
Nutritional Information
| Nutrient | Amount per Serving | % Daily Value |
|---|---|---|
| Calories | 392.6 kcal | N/A |
| Calories from Fat | 135 g | 35% |
| Total Fat | 15.1 g | 23% |
| Saturated Fat | 8.8 g | 44% |
| Cholesterol | 99.8 mg | 33% |
| Sodium | 263 mg | 10% |
| Total Carbohydrate | 60.2 g | 20% |
| Dietary Fiber | 1.4 g | 5% |
| Sugars | 37.4 g | N/A |
| Protein | 6.1 g | 12% |
Note: Nutritional information is an estimate and may vary based on specific ingredients and preparation methods.
Variations & Substitutions
- Citrus Zest: Add the zest of one lemon or orange to the vanilla batter for a burst of citrus flavor.
- Nutty Twist: Incorporate ½ cup of chopped nuts (walnuts, pecans, or almonds) into the vanilla batter for added texture and flavor.
- Chocolate Chip Swirl: Fold ½ cup of mini chocolate chips into the vanilla batter for a chocolate chip marble cake.
- Coffee Kick: Add 1-2 teaspoons of instant coffee powder to the cocoa mixture to enhance the chocolate flavor.
- Spice It Up: Add ½ teaspoon of ground cinnamon or nutmeg to the flour mixture for a warm, spiced flavor.
FAQs (Frequently Asked Questions)
Q: Can I use self-rising flour instead of cake flour?
A: No, cake flour has a lower protein content than self-rising flour, resulting in a more tender cake. Using self-rising flour will likely result in a denser, tougher cake.
Q: Can I use natural cocoa powder instead of Dutch-processed cocoa powder?
A: Yes, but the flavor and color of the chocolate swirl will be slightly different. Natural cocoa powder has a more acidic flavor and a lighter color.
Q: How do I prevent the cake from sinking in the middle?
A: Ensure your oven temperature is accurate and avoid opening the oven door frequently during baking. Overbaking can also cause the cake to dry out and sink.
Q: Can I make this cake ahead of time?
A: Yes, the cake can be made a day or two in advance and stored in an airtight container at room temperature or in the refrigerator. Glaze just before serving for the best results.
Q: My white chocolate glaze is too thick. What should I do?
A: Add a tiny bit more milk, a teaspoon at a time, until you reach your desired consistency. Be careful not to add too much, as it can make the glaze too thin.
Final Thoughts
This marble cake recipe is a timeless classic that’s sure to impress. With its tender crumb, beautiful swirls, and decadent white chocolate glaze, it’s a dessert that’s perfect for any occasion. Don’t be intimidated by the multiple steps; each one is straightforward and contributes to the final masterpiece. So, preheat your oven, gather your ingredients, and bake up a batch of this delightful marble cake. Share your creations and feedback, and maybe even pair it with a scoop of vanilla ice cream or a warm cup of coffee for the ultimate indulgence. Happy baking!