
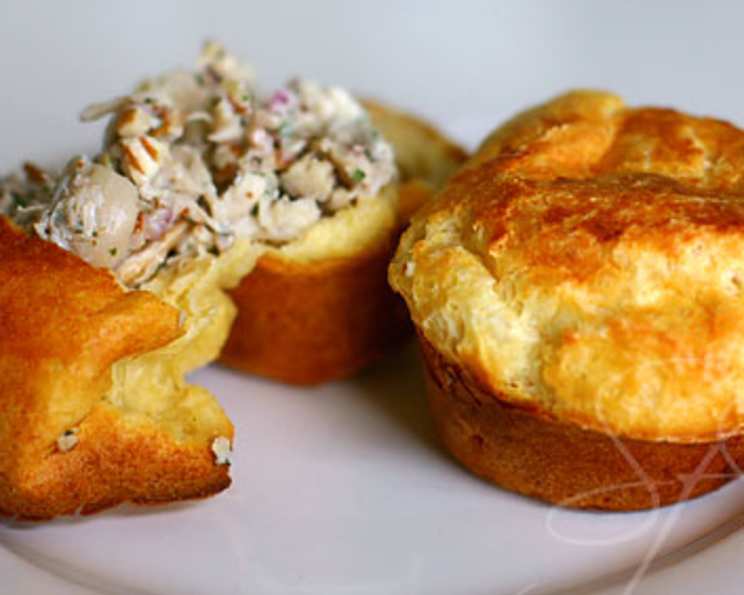
Martha Stewart’s Timeless Popovers: A Culinary Classic
My grandmother, bless her heart, had a knack for making even the simplest meals feel like a special occasion. I still remember the warmth that would fill her kitchen when she pulled a batch of golden-brown popovers from the oven. Their eggy aroma mingled with the scent of melting butter, creating a symphony of comfort that to this day, brings me right back to her cozy kitchen table. They were never just a side dish; they were a love language all their own, a testament to her caring nature.
Recipe Overview
- Prep Time: 10 minutes
- Cook Time: 35 minutes
- Total Time: 45 minutes
- Servings: 12
- Yield: 12 popovers
- Dietary Type: Vegetarian
Ingredients
- 2 tablespoons butter, melted
- 2 cups milk
- 2 cups flour
- 1 teaspoon salt
- 4 eggs, lightly beaten
Equipment Needed
- 12-count muffin tin
- Whisk
- Mixing bowl
Instructions
-
Begin by preheating your oven to 450°F (232°C). This high initial temperature is crucial for creating the signature “pop” in these delightful pastries.
-
In a large mixing bowl, whisk together the melted butter, milk, flour, and salt. Ensure all dry ingredients are fully incorporated, creating a smooth batter. This step is important, as lumps can hinder the popovers’ rise.
-
Gently whisk in the lightly beaten eggs, adding them gradually to the batter. This prevents the eggs from cooking prematurely. Incorporate them until just combined; avoid over-mixing. The batter should have a consistency similar to heavy cream – smooth and pourable.
-
Prepare your 12-count muffin tin by generously spraying each cup with nonstick cooking spray. This prevents the popovers from sticking and ensures easy removal after baking. You can also grease the muffin tin with butter or oil if preferred.
-
Fill each muffin cup approximately two-thirds full with the batter. Avoid overfilling, as the popovers will expand significantly during baking.
-
Place the filled muffin tin into the preheated oven and bake for 15 minutes at 450°F (232°C). During this initial high-heat period, the steam generated within the batter is what causes them to rise rapidly.
-
Without opening the oven door (this is absolutely crucial!), reduce the oven temperature to 350°F (177°C) and continue baking for an additional 15-20 minutes. This lower temperature allows the popovers to cook through completely and develop a beautiful golden-brown crust.
-
Check for doneness. The popovers are ready when they are tall, golden brown, and firm to the touch. A toothpick inserted into the center should come out clean.
-
Remove the popovers from the oven and let them cool slightly in the muffin tin for a few minutes before carefully transferring them to a wire rack to cool slightly more.
-
Serve immediately while they are still warm.
Expert Tips & Tricks
-
Don’t open the oven! I cannot stress this enough. Opening the oven during baking will cause the popovers to deflate and lose their signature height. Resist the urge to peek!
-
For extra-crispy popovers, try preheating the muffin tin in the oven while the oven preheats. Carefully pour the batter into the hot tin, taking care not to burn yourself.
-
If you find your popovers are browning too quickly, you can loosely tent a piece of foil over the muffin tin during the last few minutes of baking.
-
For a slightly savory twist, add a pinch of dried herbs like rosemary or thyme to the batter.
-
If you want to make the batter ahead of time, you can store it in the refrigerator for up to 24 hours. However, keep in mind that the popovers may not rise as high if the batter sits for too long.
-
To counteract any possible sticking, you can lightly dust the greased muffin tins with flour before adding the batter. This will create an extra layer of protection.
-
For best results, use room temperature eggs and milk. This will help the ingredients combine more easily and create a smoother batter.
Serving & Storage Suggestions
Popovers are best enjoyed warm, straight from the oven. Their crispy exterior and soft, airy interior make them an irresistible treat. Serve them with a pat of butter, your favorite jam, or a drizzle of honey. They also make a fantastic accompaniment to savory dishes like soups, stews, or roasted meats.
Leftover popovers can be stored in an airtight container at room temperature for up to 24 hours. However, they will lose some of their crispness. For longer storage, you can freeze them. Wrap each popover individually in plastic wrap and then place them in a freezer-safe bag. They can be stored in the freezer for up to 2 months.
To reheat frozen popovers, bake them in a preheated oven at 350°F (177°C) for 5-10 minutes, or until warmed through. You can also reheat them in a toaster oven or microwave, but they may not be as crispy.
Nutritional Information
| Nutrient | Amount per Serving | % Daily Value |
|---|---|---|
| Calories | 143 kcal | 7% |
| Total Fat | 5g | 7% |
| Saturated Fat | 3g | 14% |
| Cholesterol | 73mg | 24% |
| Sodium | 255mg | 11% |
| Total Carbohydrate | 18g | 7% |
| Dietary Fiber | 1g | 2% |
| Sugars | 1g | 1% |
| Protein | 6g | 12% |
Nutritional information is an estimate and can vary based on specific ingredients and serving sizes.
Variations & Substitutions
-
Gluten-Free Popovers: Substitute the all-purpose flour with a gluten-free flour blend. Be sure to use a blend that contains xanthan gum for binding.
-
Dairy-Free Popovers: Use a plant-based milk alternative like almond milk, soy milk, or oat milk in place of cow’s milk. Ensure the plant-based milk is unsweetened.
-
Savory Herb Popovers: Add 1-2 tablespoons of chopped fresh herbs like rosemary, thyme, or chives to the batter.
-
Cheese Popovers: Stir in 1/2 cup of shredded cheese, such as cheddar, Gruyere, or Parmesan, to the batter.
-
Sweet Popovers: Add 1-2 tablespoons of sugar and 1/2 teaspoon of vanilla extract to the batter. Serve with fruit and whipped cream.
-
Mini Popovers: Use a mini muffin tin instead of a standard muffin tin for smaller, bite-sized popovers. Reduce the baking time accordingly.
FAQs (Frequently Asked Questions)
Q: Why did my popovers not “pop”?
A: The most common reasons for popovers not rising are opening the oven door during baking, using a batter that is too thick, or not having the oven hot enough initially.
Q: Can I use a popover pan instead of a muffin tin?
A: Absolutely! A popover pan is specifically designed for making popovers and will result in even taller, more dramatic popovers.
Q: Can I make these ahead of time?
A: While popovers are best served immediately, you can make the batter ahead of time and store it in the refrigerator for up to 24 hours. Just be aware that they may not rise as much.
Q: How do I prevent the popovers from sticking to the muffin tin?
A: Generously spray the muffin tin with nonstick cooking spray or grease it with butter or oil. You can also lightly dust the greased tin with flour.
Q: Can I freeze leftover popovers?
A: Yes, you can freeze leftover popovers. Wrap each popover individually in plastic wrap and then place them in a freezer-safe bag. They can be stored in the freezer for up to 2 months. Reheat in a preheated oven at 350°F (177°C) for 5-10 minutes.
Final Thoughts
There you have it – Martha Stewart’s foolproof popovers, a classic recipe that’s sure to impress. Whether you’re serving them alongside a hearty bowl of soup, piling them high with fresh fruit and cream, or simply enjoying them warm with a pat of butter, these popovers are a delightful treat that’s easy to make and even easier to enjoy. So, go ahead, preheat that oven, whisk up a batch of batter, and experience the magic of freshly baked popovers. I encourage you to experiment with variations, share your creations, and let me know how they turn out!