
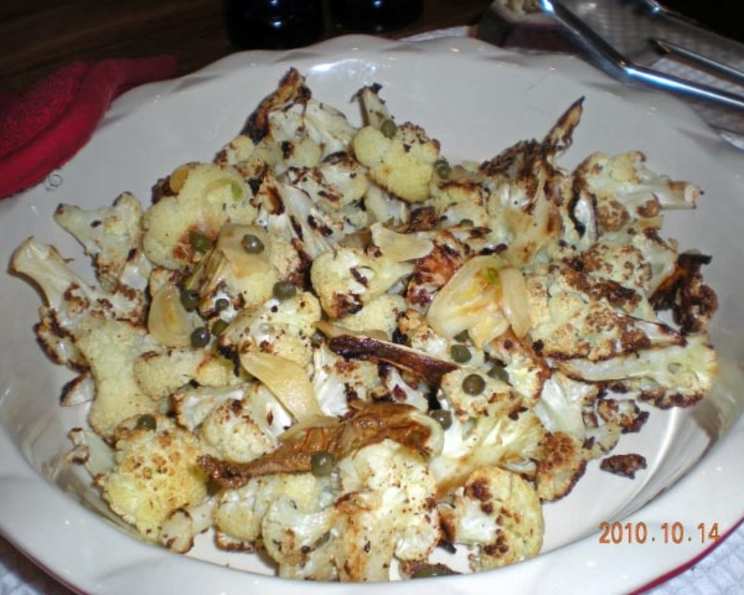
Martha Stewart’s Roasted Cauliflower: A Culinary Revelation
There’s a certain magic that happens when simple ingredients transform into something extraordinary, and this roasted cauliflower recipe holds that magic in spades. I remember the first time I made this dish. It was a particularly dreary autumn evening, and I was craving comfort food without the heaviness. I stumbled upon this recipe, and within minutes, the aroma of roasting cauliflower and garlic filled my kitchen, chasing away the gloom and promising a delightful meal.
Recipe Overview
- Prep Time: 10 minutes
- Cook Time: 25 minutes
- Total Time: 35 minutes
- Servings: 4
- Yield: 2 pounds
- Dietary Type: Vegetarian
Ingredients
- 1 head cauliflower, cut into small florets
- 1 tablespoon olive oil
- Salt and pepper (coarse)
- 1 tablespoon butter
- 2 garlic cloves, thinly sliced
- 1 teaspoon capers
- 1 teaspoon caper juice
Equipment Needed
- Roasting pan or rimmed baking sheet
- Small skillet
Instructions
-
Preheat your oven to a robust 450 degrees Fahrenheit. This high heat is essential for achieving that perfect golden-brown color and slightly crisp texture that makes this cauliflower so irresistible.
-
Prepare the cauliflower. Begin by trimming the cauliflower and then cutting it into small, bite-sized florets. The smaller the florets, the faster they will cook and the more surface area you’ll have for caramelization.
-
Spread the cauliflower florets in a single layer on a roasting pan or rimmed baking sheet. Avoid overcrowding the pan; this will steam the cauliflower instead of roasting it, preventing it from browning properly. If necessary, use two pans.
-
Drizzle with olive oil. Evenly coat the cauliflower with 1 tablespoon of olive oil. This will help the cauliflower to roast and develop a beautiful color.
-
Season generously. Sprinkle the cauliflower with coarse salt and ground pepper. Don’t be shy with the seasoning; it’s crucial for bringing out the natural flavors of the cauliflower.
-
Toss to combine. Use your hands or a spatula to toss the cauliflower, ensuring that each floret is evenly coated with oil and seasoning.
-
Roast the cauliflower. Place the roasting pan in the preheated oven and roast, tossing once or twice, until the cauliflower is golden brown and tender, 20 to 25 minutes. Keep a close eye on it, as ovens can vary, and you want to avoid burning.
-
Prepare the garlic-caper butter. While the cauliflower is roasting, melt 1 tablespoon of butter in a small skillet over medium heat.
-
Cook the garlic. Add the thinly sliced garlic cloves to the melted butter and cook, stirring often, until lightly browned, 2 to 3 minutes. Be careful not to burn the garlic, as it will become bitter.
-
Add the capers and caper juice. Remove the skillet from the heat and add 1 teaspoon of capers and 1 teaspoon of caper juice. The caper juice adds a subtle tanginess that complements the richness of the butter and garlic.
-
Dress the cauliflower. Once the cauliflower is roasted to perfection, remove it from the oven and pour the garlic-caper butter over it.
-
Toss to coat. Gently toss the cauliflower to ensure that each floret is evenly coated with the flavorful garlic-caper butter.
Expert Tips & Tricks
- Even Florets: Cut the cauliflower florets into roughly the same size for even cooking.
- Don’t Overcrowd: Give the florets space on the pan to roast, not steam. Use two pans if needed.
- High Heat is Key: 450°F (232°C) is the sweet spot for achieving that beautiful caramelized crust.
- Garlic Watch: Keep a close eye on the garlic while it’s cooking; burnt garlic will ruin the entire dish.
- Add a Squeeze of Lemon: For an extra burst of freshness, squeeze a lemon wedge over the roasted cauliflower just before serving.
- Spice it Up: Add a pinch of red pepper flakes to the garlic-caper butter for a touch of heat.
Serving & Storage Suggestions
Serve the roasted cauliflower immediately as a side dish alongside your favorite protein, such as grilled chicken, roasted fish, or a hearty vegetarian main course. It also makes a delicious addition to grain bowls or salads.
Leftovers can be stored in an airtight container in the refrigerator for up to 3 days. To reheat, spread the cauliflower on a baking sheet and bake at 350°F (175°C) until heated through, or microwave in short intervals, stirring occasionally.
Nutritional Information
| Nutrient | Amount per Serving | % Daily Value |
|---|---|---|
| Calories | 93.6 kcal | N/A |
| Calories from Fat | 57 kcal | 62% |
| Total Fat | 6.4 g | 9% |
| Saturated Fat | 2.3 g | 11% |
| Cholesterol | 7.6 mg | 2% |
| Sodium | 84.9 mg | 3% |
| Total Carbohydrate | 8.2 g | 2% |
| Dietary Fiber | 3.6 g | 14% |
| Sugars | 3.5 g | N/A |
| Protein | 3 g | 5% |
Note: Nutritional information is an estimate and may vary based on specific ingredients and portion sizes.
Variations & Substitutions
- Vegan Version: Substitute the butter with olive oil or a vegan butter alternative.
- Herb Infusion: Add fresh herbs like thyme, rosemary, or oregano to the roasting pan for an aromatic twist.
- Cheese Please: Sprinkle grated Parmesan cheese over the roasted cauliflower during the last few minutes of cooking for a cheesy delight.
- Nutty Crunch: Toss toasted pine nuts or slivered almonds with the cauliflower after roasting for added texture and flavor.
- Balsamic Glaze: Drizzle balsamic glaze over the roasted cauliflower just before serving for a sweet and tangy finish.
FAQs (Frequently Asked Questions)
Q: Can I use frozen cauliflower for this recipe?
A: While fresh cauliflower is preferred for its texture and flavor, frozen cauliflower can be used in a pinch. Be sure to thaw and drain it thoroughly before roasting to prevent it from becoming soggy.
Q: How do I prevent the cauliflower from burning?
A: Keep a close eye on the cauliflower while it’s roasting and toss it occasionally to ensure even browning. If it starts to brown too quickly, reduce the oven temperature slightly.
Q: Can I add other vegetables to the roasting pan?
A: Absolutely! Broccoli, Brussels sprouts, and carrots are all great additions to roasted cauliflower. Just be sure to cut them into similar sizes to ensure even cooking.
Q: What if I don’t have caper juice?
A: You can substitute the caper juice with a squeeze of lemon juice or a splash of white wine vinegar for a similar tangy flavor.
Q: Can I make this recipe ahead of time?
A: You can roast the cauliflower ahead of time and store it in the refrigerator. Reheat it in the oven or microwave before adding the garlic-caper butter. However, it’s best served fresh for the best texture and flavor.
Final Thoughts
This roasted cauliflower recipe is a testament to the power of simple ingredients and straightforward techniques. It’s a versatile dish that can be enjoyed as a side, a snack, or even a light meal. Don’t be afraid to experiment with different variations and substitutions to create your own signature version. So, go ahead and give it a try – I’m confident that you’ll be delighted by the deliciousness of this culinary revelation! And please, let me know how it turns out. Happy cooking!