
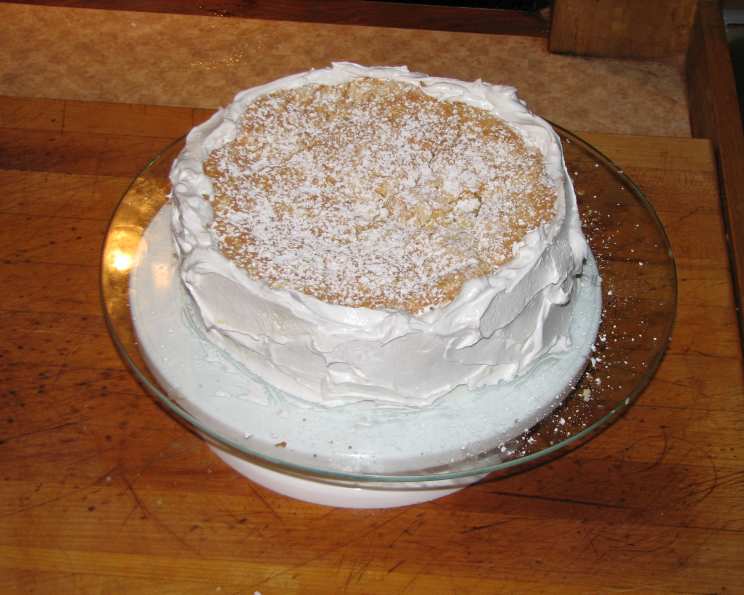
Martha Washington Creme Cake: A Slice of Southern Comfort
The memory is vivid: sunlight streaming through my grandmother’s kitchen window, illuminating the delicate dance of powdered sugar as she sifted it over a golden cake. It was always Martha Washington Creme Cake, a confection she made for every special occasion. The aroma of vanilla and warm butter would fill the air, a promise of the creamy, melt-in-your-mouth experience to come. More than just a cake, it was a symbol of love, family, and the simple joys of life.
Recipe Overview
- Prep Time: 30 minutes
- Cook Time: 30 minutes
- Total Time: 1 hour
- Servings: 10
- Yield: 1 cake
- Dietary Type: Not Gluten-Free
Ingredients
For the Cake:
- 3 eggs, separated
- 1 1/2 cups sugar
- 6 tablespoons cold water
- 1 cup all-purpose flour
- 1/2 cup cake flour
- 1 1/2 teaspoons baking powder
- 3/4 teaspoon salt
For the Filling:
- 2 cups whole milk
- 1 cup sugar
- 4 tablespoons cornstarch
- 4 egg yolks
- 1 tablespoon butter
- 1 teaspoon vanilla
Equipment Needed
- 2 9-inch cake pans
- Mixer (hand or stand)
- Whisk
- Sifter
- Saucepan
- Toothpick
- Waxed paper or parchment paper
Instructions
-
Begin by preheating your oven to 350°F (175°C). This ensures even baking and prevents the cake from sinking in the middle.
-
In a mixing bowl, beat the 3 egg yolks, sugar, and cold water until the mixture is light and creamy. This step incorporates air and creates a tender crumb. The mixture should be pale yellow and significantly thickened.
-
In a separate clean bowl, beat the 3 egg whites until soft peaks form. Soft peaks are achieved when the whites hold their shape but the tips gently fold over when the beater is lifted. Be careful not to overwhip them, as this will result in a dry cake.
-
In another bowl, sift together the all-purpose flour, cake flour, baking powder, and salt. Whisk the dry ingredients together thoroughly to ensure even distribution of the baking powder and salt, which are crucial for leavening and flavor.
-
Gently fold the egg whites and the flour mixture into the egg yolk mixture, alternating between the two. Begin and end with the flour mixture. This technique ensures that the batter remains light and airy. Do not overmix; the batter should have some streaks of flour remaining. Overmixing develops gluten, resulting in a tough cake.
-
Grease and flour two 9-inch cake pans. For extra insurance against sticking, line the bottoms of the pans with waxed paper or parchment paper, then grease the paper and dust the bottoms and sides with flour. This will help the cakes release cleanly from the pans.
-
Pour the batter evenly into the prepared cake pans.
-
Bake in the preheated oven for approximately 30 minutes, or until a toothpick inserted into the center comes out clean. Baking times may vary depending on your oven, so start checking for doneness around 25 minutes.
-
Cool the cakes in the pans for 10 minutes before inverting them onto a wire rack to cool completely.
-
To make slicing easier, you can place the cake layers in the freezer for a short time. This firms them up and reduces crumbling.
-
To remove the frozen cake layers from the pans, briefly expose the bottom of the pan to a medium heat burner. Carefully slide a butter knife around the edges to loosen the cake. It should release within seconds.
-
Slice each cake layer in half horizontally, creating four thin layers.
-
While the cakes are cooling, prepare the filling. In a separate bowl, cream the egg yolks.
-
In a saucepan, mix the cornstarch with a small amount of the milk to form a smooth slurry. This prevents lumps from forming when the mixture is heated.
-
Add the remaining milk, the creamed egg yolks, and the sugar to the saucepan.
-
Cook over medium heat, stirring constantly, until the mixture comes to a boil and thickens. This process requires patience and constant stirring to prevent scorching.
-
Remove the saucepan from the heat and stir in the butter and vanilla. The butter adds richness and the vanilla enhances the flavor of the filling.
-
Cool the filling completely before assembling the cake.
-
To assemble the cake, spread a generous layer of the cooled filling between each cake layer, leaving the top of the cake bare. This allows the filling to be the star of the show.
-
The cake can be served as is with a dusting of powdered sugar, or you can use the leftover egg whites to prepare a 7-minute frosting to cover the sides of the cake.
Expert Tips & Tricks
- For an extra moist cake, brush each layer with a simple syrup (equal parts sugar and water, simmered until the sugar dissolves) before adding the filling.
- If you don’t have cake flour, you can make your own by substituting 2 tablespoons of all-purpose flour with 2 tablespoons of cornstarch for every cup of flour needed.
- To prevent the filling from forming a skin as it cools, press a piece of plastic wrap directly onto the surface.
- Don’t be afraid to experiment with different extracts in the filling, such as almond or lemon, for a unique twist.
- If the filling seems too thin, you can whisk in a teaspoon of cornstarch mixed with a tablespoon of cold milk. Cook for another minute until thickened.
Serving & Storage Suggestions
Martha Washington Creme Cake is best served slightly chilled or at room temperature. A light dusting of powdered sugar just before serving adds an elegant touch. Leftover cake should be stored in an airtight container in the refrigerator for up to 3 days. The cake can also be frozen for longer storage; wrap individual slices tightly in plastic wrap and then in foil. Thaw in the refrigerator before serving. While freezing is possible, the texture of the filling may change slightly.
Nutritional Information
| Nutrient | Amount per Serving | % Daily Value |
|---|---|---|
| Calories | 359 kcal | 18% |
| Total Fat | 16 g | 21% |
| Saturated Fat | 3 g | 15% |
| Cholesterol | 147 mg | 49% |
| Sodium | 281 mg | 12% |
| Carbohydrate | 71 g | 24% |
| Fiber | 1 g | 4% |
| Sugar | 53 g | – |
| Protein | 6 g | 12% |
Note: Nutritional information is an estimate and can vary based on specific ingredients and portion sizes.
Variations & Substitutions
- For a gluten-free version, substitute the all-purpose and cake flour with a gluten-free all-purpose blend. Be sure to add a binder like xanthan gum to improve the texture.
- Consider adding a layer of fresh berries between the cake layers for a seasonal twist. Strawberries, raspberries, or blueberries work beautifully.
- For a richer flavor, use brown butter in the filling. Simply melt the butter in a saucepan and cook until it turns a nutty brown color.
- If you’re short on time, you can use a high-quality vanilla pudding mix as a substitute for the homemade filling.
FAQs (Frequently Asked Questions)
Q: Why is it important to alternate adding the egg whites and flour mixture to the batter?
A: Alternating additions and gently folding helps maintain the air incorporated into the egg whites, resulting in a light and tender cake.
Q: Can I use margarine instead of butter in the filling?
A: While margarine can be used, butter provides a richer flavor and smoother texture in the filling.
Q: How do I prevent the cake layers from sticking to the pan?
A: Thoroughly grease and flour the pans, and line the bottoms with parchment paper. This creates a barrier that prevents the cake from sticking.
Q: What is the best way to cool the cake layers?
A: Allow the cakes to cool in the pans for 10 minutes before inverting them onto a wire rack to cool completely. This prevents them from collapsing or becoming soggy.
Q: Can I make the filling ahead of time?
A: Yes, the filling can be made a day in advance and stored in an airtight container in the refrigerator. Allow it to come to room temperature before assembling the cake.
Final Thoughts
Martha Washington Creme Cake is more than just a dessert; it’s a taste of history, a comforting classic that has been passed down through generations. Its delicate layers, creamy filling, and simple elegance make it a perfect centerpiece for any celebration. So, gather your ingredients, preheat your oven, and embark on a culinary journey to create this timeless treasure. I encourage you to try this recipe and discover the magic of Martha Washington Creme Cake for yourself. I hope you enjoy it as much as my family has for generations. Don’t hesitate to experiment with the flavors and make it your own!