
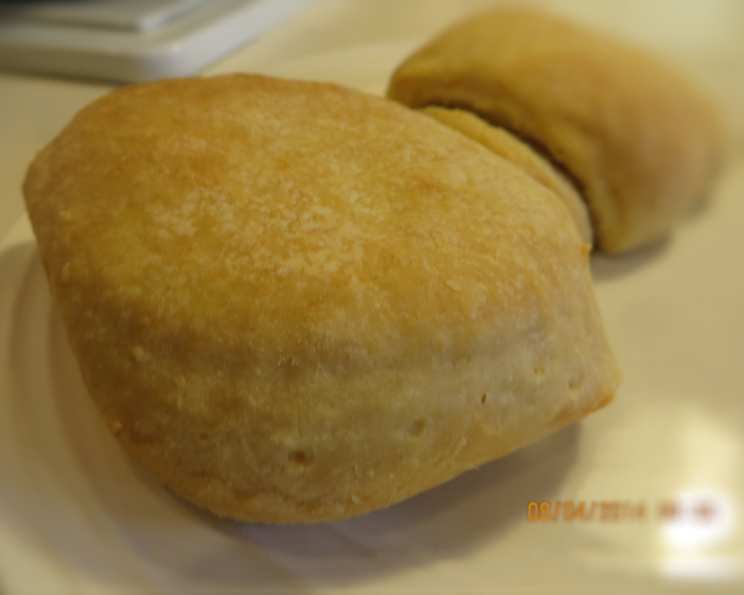
Mary Rogers’s Sourdough Biscuits: A Taste of Time
I remember watching my grandmother meticulously tending to her sourdough starter, a bubbling jar of potential that sat perpetually on her kitchen counter. It was more than just an ingredient; it was a family heirloom, passed down through generations, each feeding a continuation of history and tradition. The aroma alone – that slightly tangy, yeasty scent – instantly transported me to her cozy kitchen, where the warmth of the oven mingled with the love she poured into every dish. Though she’s no longer with us, I feel her presence every time I bake with sourdough, especially when I make these biscuits, a recipe that feels just as timeless as her love.
Recipe Overview
- Prep Time: 20 minutes (plus overnight fermentation)
- Cook Time: 30-35 minutes
- Total Time: Approximately 12-14 hours (including fermentation)
- Servings: Approximately 12 biscuits
- Yield: 1 batch
- Dietary Type: Not specified, but can be adapted (see variations)
Ingredients
- 1/2 cup active sourdough starter
- 1 cup milk
- 2 1/2 cups all-purpose flour
- 1/3 cup lard or 1/3 cup shortening
- 1 tablespoon sugar
- 3/4 teaspoon salt
- 2 teaspoons baking powder
- 1/2 teaspoon baking soda
- 1/4 teaspoon cream of tartar
Equipment Needed
- Large mixing bowl
- Measuring cups and spoons
- Fork or pastry blender
- Biscuit cutter (or knife)
- 9×13 inch baking pan
Instructions
- The evening before you plan to bake, prepare the sourdough sponge. In a large mixing bowl, combine the 1/2 cup active sourdough starter, 1 cup milk, and 1 cup of the flour. Mix well until a smooth batter forms.
- Cover the bowl loosely and let it sit at room temperature overnight (approximately 8-12 hours). The mixture will ferment and become light and bubbly. Alternatively, if you want to bake the biscuits for lunch, you can mix the sponge in the morning and place it in a warm spot to rise for a shorter period. However, overnight fermentation generally yields the best flavor and texture.
- When ready to mix the biscuits, preheat your oven to 375°F (190°C).
- In a separate bowl, sift together the remaining 1 1/2 cups of flour, sugar, salt, baking powder, and cream of tartar. This ensures even distribution of the leavening agents and prevents lumps.
- Cut in the lard (or shortening) using your fingers or a pastry blender until the mixture resembles coarse crumbs. The cold fat creates pockets of steam during baking, resulting in flaky biscuits.
- In a small bowl, dissolve the baking soda in a tablespoon or two of warm water. Add this to the sourdough sponge. The baking soda reacts with the acidity of the sourdough, providing extra lift.
- Add the flour mixture to the sponge. Gently mix until just combined. Do not overmix, as this will develop the gluten and result in tough biscuits. The dough should be soft and slightly sticky.
- Turn the dough out onto a lightly floured surface. Knead it lightly a few times to bring it together into a cohesive mass.
- Roll the dough out to a thickness of about 1/2 inch (or slightly thicker, if you prefer taller biscuits).
- Use a biscuit cutter (or a sharp knife) to cut out the biscuits. For softer-sided biscuits, place them close together in a greased 9×13 inch baking pan. Turning the biscuits to grease the tops helps them brown evenly.
- Cover the pan loosely and let the biscuits rise in a warm place for about 45 minutes. This final proofing allows the biscuits to become even lighter and fluffier.
- Bake in the preheated 375°F (190°C) oven for 30 to 35 minutes, or until golden brown. The baking time may vary depending on your oven, so keep a close eye on them.
- Remove the biscuits from the oven and let them cool slightly before serving.
Expert Tips & Tricks
- Don’t kill the yeast: Be careful that your milk for the starter is not too hot, or it will kill the starter.
- Temperature is key: The temperature of your ingredients, especially the fat, plays a crucial role. Cold lard or shortening is essential for creating those desirable flaky layers.
- Gentle handling: Overmixing is the enemy of tender biscuits. Handle the dough gently and only mix until the ingredients are just combined.
- High-quality starter: Using a vigorous and active sourdough starter is crucial for proper rise and flavor. If your starter seems sluggish, feed it a few times before using it in the recipe.
- Experiment with flour: You can experiment with different types of flour, such as whole wheat or spelt, to add more flavor and nutrition to the biscuits.
- Buttermilk Variation: For a tangier flavor, substitute buttermilk for the milk in the sponge.
- Make-ahead option: You can prepare the biscuit dough ahead of time and store it in the refrigerator for up to 24 hours. However, the biscuits may not rise as much if they are refrigerated for too long.
- Freezing for Later: Baked biscuits freeze well. Cool completely, then wrap individually in plastic wrap and place in a freezer bag. Reheat in a low oven until warmed through.
Serving & Storage Suggestions
These sourdough biscuits are delicious served warm with butter, jam, honey, or your favorite toppings. They are also a fantastic accompaniment to soups, stews, and casseroles. Leftover biscuits can be stored in an airtight container at room temperature for up to 2 days or in the refrigerator for up to 5 days. To reheat, wrap the biscuits in foil and warm them in a low oven until heated through. You can also split them and toast them in a toaster for a crispy treat. As Mary Rogers mentions, they’re fantastic toasted in a sandwich toaster!
Nutritional Information
| Nutrient | Amount per Serving | % Daily Value |
|---|---|---|
| Calories | 491 kcal | N/A |
| Total Fat | 20.1 g | 30% |
| Saturated Fat | 8.2 g | 41% |
| Cholesterol | 24.8 mg | 8% |
| Sodium | 806.5 mg | 33% |
| Total Carbohydrate | 66.3 g | 22% |
| Dietary Fiber | 2.1 g | 8% |
| Sugars | 3.4 g | N/A |
| Protein | 10.1 g | 20% |
Nutritional information is an estimate and may vary based on specific ingredients and preparation methods.
Variations & Substitutions
- Gluten-Free: Use a gluten-free flour blend suitable for baking and add a binder such as xanthan gum to help with the structure.
- Dairy-Free: Substitute the milk with a non-dairy alternative like almond milk, soy milk, or oat milk. Use a dairy-free shortening or coconut oil in place of lard.
- Vegan: In addition to the dairy-free substitutions, ensure the sugar used is vegan-friendly (some refined sugars are processed with bone char).
- Herbaceous: Add fresh herbs like rosemary, thyme, or chives to the flour mixture for a flavorful twist.
- Cheesy: Incorporate shredded cheddar, parmesan, or other cheese into the dough for a savory biscuit.
- Sweet: Add a touch of cinnamon or nutmeg to the dry ingredients and brush the baked biscuits with melted butter and sprinkle with sugar.
FAQs (Frequently Asked Questions)
Q: My sourdough starter isn’t very active. Can I still use it?
A: It’s best to use a vigorous, active starter for optimal results. Feed your starter a few times before baking to increase its activity.
Q: Can I use butter instead of lard or shortening?
A: Yes, you can substitute cold butter for the lard or shortening. However, the texture of the biscuits may be slightly different.
Q: How do I know when the biscuits are done?
A: The biscuits are done when they are golden brown on top and the internal temperature reaches 200-210°F (93-99°C).
Q: My biscuits are too dense. What did I do wrong?
A: Overmixing the dough is a common cause of dense biscuits. Be sure to handle the dough gently and only mix until the ingredients are just combined.
Q: Can I make these biscuits without baking powder and cream of tartar?
A: While you can omit them, the baking powder and cream of tartar help to ensure a light and fluffy texture. If omitted, the biscuits may be denser.
Final Thoughts
These Sourdough Biscuits, inspired by Mary Rogers’s classic recipe, are more than just a delicious treat; they are a connection to the past, a celebration of simple ingredients, and a testament to the magic of sourdough. Don’t be intimidated by the fermentation process – it’s surprisingly easy and incredibly rewarding. Gather your ingredients, embrace the rhythm of the kitchen, and prepare to be amazed by the warm, tangy, and utterly irresistible flavor of these homemade biscuits. Serve them with a dollop of homemade jam and a cup of freshly brewed coffee for a truly comforting and unforgettable experience. Share your creations and feedback – I would love to hear about your variations!