
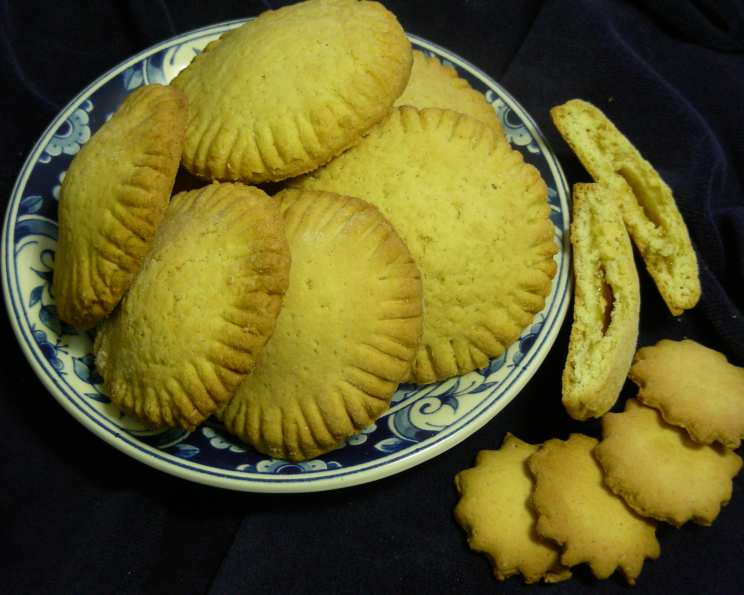
Mary’s Filled Sugar Cookies: A Taste of Nostalgia
The scent of baking cookies always takes me back to my grandmother’s kitchen. Sunlight streamed through the window, illuminating the flour dusting the counter as she hummed a cheerful tune. While her repertoire was vast, her filled sugar cookies were legendary. Each bite was a perfect balance of buttery sweetness and the bright tang of homemade fruit preserves. They weren’t just cookies; they were edible hugs, and this recipe brings those memories flooding back with every batch.
Recipe Overview
- Prep Time: 30 minutes
- Cook Time: 12-15 minutes
- Total Time: Several Hours (including chilling time)
- Servings: 36-42 cookies
- Yield: 3-4 dozen cookies
- Dietary Type: Not specified
Ingredients
- 1/2 cup shortening
- 3/4 teaspoon salt
- 1 teaspoon vanilla
- 1 cup sugar
- 1 egg, beaten
- 3 cups flour, sifted
- 3 teaspoons baking powder
- 1/4 cup milk
- Your favorite jam or jelly (apricot, strawberry, and raspberry are recommended)
Equipment Needed
- Mixing bowls
- Measuring cups and spoons
- Sifter
- Cookie sheets
- Rolling pin
- Cookie cutters (round recommended)
- Fork
Instructions
-
Begin by creaming together the shortening, sugar, and beaten egg in a large mixing bowl until the mixture is light and fluffy. This step is crucial for creating a tender cookie, so don’t rush it. A stand mixer or electric hand mixer will make this process easier, but a sturdy whisk and some elbow grease will work just as well.
-
In a separate bowl, sift together the flour, baking powder, and salt. Sifting ensures that the dry ingredients are evenly distributed and helps to create a lighter texture in the final cookie.
-
Gradually mix the dry ingredients into the creamed mixture, alternating with the milk. Begin by adding about a third of the dry ingredients, then half of the milk, another third of the dry ingredients, the remaining milk, and finally the last of the dry ingredients. This method helps prevent the dough from becoming overworked.
-
Once all the ingredients are combined, wrap the dough tightly in plastic wrap and chill it overnight. This is a crucial step! Chilling the dough allows the gluten to relax, making it easier to roll out and preventing the cookies from spreading too much during baking. If you’re short on time, chilling for at least 2-3 hours is recommended, but overnight is best.
-
The next day, preheat your oven to 350 degrees Fahrenheit (175 degrees Celsius). Ensure that your oven rack is positioned in the center of the oven for even baking.
-
Lightly grease your cookie sheets. You can use shortening, butter, or cooking spray. Alternatively, line the cookie sheets with parchment paper for easy cleanup.
-
On a lightly floured surface, roll out the chilled dough to about 1/8 inch thickness. Use cookie cutters to cut out circles; you’ll need two circles for each filled cookie – one for the top and one for the bottom. You can use other shapes if you prefer, but circles are the classic choice.
-
Place the bottom circles on the prepared cookie sheets.
-
Add one or more teaspoons of your favorite jam or jelly to the center of each bottom circle. Don’t overfill the cookies, or the jam will ooze out during baking. Apricot, strawberry, and raspberry are highly recommended!
-
Moisten the outside edge of each bottom circle with a little water, using a dampened finger. This helps the top circle adhere properly.
-
Place the top circles over the bottom circles, carefully aligning the edges.
-
Seal the edges by pressing down firmly with your fingers or a fork. Using a fork will create a decorative crimped edge similar to a pie crust.
-
Alternatively, you can make half-moon shaped cookies. Put the jam on one side of the circle and fold the other side over to form a half-moon shape. Seal the edges by pressing down with a fork.
-
Bake in the preheated oven for 12-15 minutes, or until the bottom edge of the cookies starts to brown. Keep a close eye on them, as baking times can vary depending on your oven.
-
Remove the cookies from the oven and let them cool on the cookie sheets for a few minutes before transferring them to a wire rack to cool completely.
Expert Tips & Tricks
- For a richer flavor, try using browned butter instead of shortening. Brown the butter in a saucepan until it has a nutty aroma, then let it cool and solidify before using it in the recipe.
- If your dough is too sticky to roll out, add a little more flour, one tablespoon at a time, until it reaches the desired consistency.
- To prevent the jam from leaking during baking, make sure the edges of the cookies are well-sealed.
- For a festive touch, brush the tops of the cookies with milk or an egg wash before baking and sprinkle with granulated sugar.
- If your jam is too thick, microwave it for a few seconds to make it easier to spread.
Serving & Storage Suggestions
Mary’s Filled Sugar Cookies are best enjoyed slightly cooled, allowing the jam to set and the flavors to meld. They are perfect with a cup of tea, coffee, or a glass of cold milk. Store the cookies in an airtight container at room temperature for up to 3 days, or in the refrigerator for up to a week. For longer storage, freeze the cookies in a freezer-safe container for up to 3 months. Thaw at room temperature before serving.
Nutritional Information
(Estimated per cookie, without jam specifics)
| Nutrient | Amount per Serving | % Daily Value |
|---|---|---|
| Calories | 75 kcal | 4% |
| Total Fat | 3g | 4% |
| Saturated Fat | 1g | 5% |
| Cholesterol | 5mg | 2% |
| Sodium | 70mg | 3% |
| Total Carbohydrate | 11g | 4% |
| Dietary Fiber | 0g | 0% |
| Sugars | 4g | 8% |
| Protein | 1g | 2% |
Variations & Substitutions
- Gluten-Free: Substitute the all-purpose flour with a gluten-free flour blend. You may need to add a little xanthan gum to help bind the dough.
- Dairy-Free: Use a dairy-free milk alternative like almond milk or soy milk.
- Different Fillings: Experiment with different fillings such as Nutella, peanut butter, or lemon curd.
- Spice It Up: Add a pinch of cinnamon, nutmeg, or cardamom to the dough for a warm and spicy flavor.
- Citrus Zest: Add lemon or orange zest to the dough for a bright and refreshing twist.
FAQs (Frequently Asked Questions)
Q: Why is it important to chill the dough?
A: Chilling the dough allows the gluten to relax, making it easier to roll out and preventing the cookies from spreading too much during baking.
Q: Can I use a different type of shortening?
A: Yes, you can use butter or margarine instead of shortening, but the texture and flavor of the cookies may be slightly different.
Q: Can I freeze the cookies?
A: Yes, you can freeze the cookies for up to 3 months. Thaw them at room temperature before serving.
Q: What if my jam leaks during baking?
A: Make sure the edges of the cookies are well-sealed and don’t overfill the cookies with jam.
Q: How do I know when the cookies are done?
A: The cookies are done when the bottom edges are starting to brown. Be careful not to overbake them, or they will be dry.
Final Thoughts
These filled sugar cookies are more than just a sweet treat; they’re a taste of tradition and a reminder of cherished memories. I encourage you to try this recipe and create your own memories with your loved ones. Don’t be afraid to experiment with different fillings and variations to make them your own. And be sure to share your creations with me – I’d love to see what you come up with! Perhaps you could pair them with a steaming mug of spiced cider during the fall, or a refreshing glass of lemonade in the summer. Happy baking!