
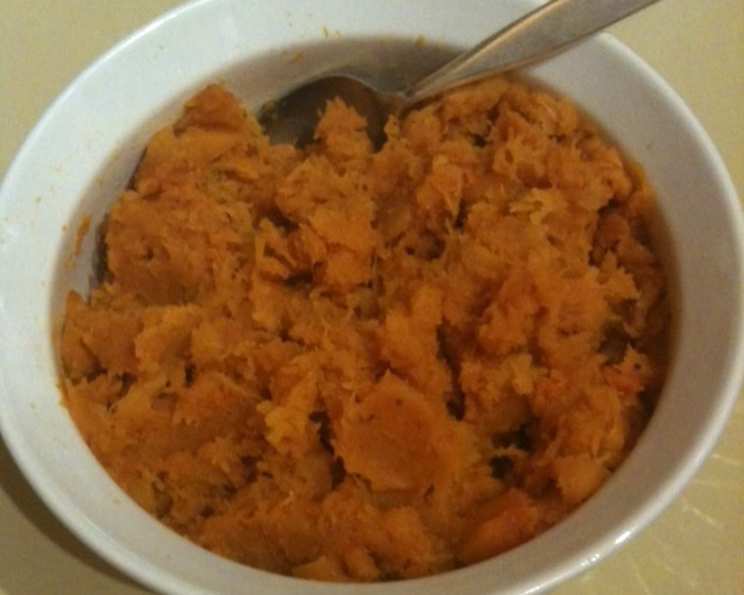
The Velvet Embrace of Mashed Butternut Squash
The first time I tasted mashed butternut squash, it wasn’t at a fancy restaurant or a holiday feast. It was in my grandmother’s cozy kitchen, the air thick with the aroma of cinnamon and roasting vegetables. I was a picky eater then, wary of anything that wasn’t chicken nuggets. But the vibrant orange hue and the promise of sweetness lured me in. One bite, and I was converted. It was like sunshine captured in a bowl, a comforting blend of earthy and sweet that has stayed with me ever since. Now, every autumn, I recreate that memory, bringing a little bit of Grandma’s warmth to my own table.
Recipe Overview
- Prep Time: 20 minutes
- Cook Time: 30 minutes
- Total Time: 50 minutes
- Servings: 6
- Yield: 6 servings
- Dietary Type: Vegetarian
Ingredients
- 2 medium butternut squash (4 to 5 lbs. total)
- 6 tablespoons unsalted butter, melted
- 1/4 cup packed brown sugar
- 1 teaspoon kosher salt
- 1/2 teaspoon fresh ground black pepper
- 1/4 cup half-and-half or 1/4 cup evaporated milk
Equipment Needed
- Baking Sheet
- Large Mixing Bowl
- Electric Mixer
- Vegetable Peeler
- Sharp Knife
Instructions
-
Preheat your oven to 400 degrees Fahrenheit. Ensure your oven rack is positioned in the center for even cooking.
-
Prepare the butternut squash. Begin by cutting off and discarding both ends of each squash. This will create a stable base for peeling.
-
Peel the squash using a vegetable peeler. Be careful, as the skin can be tough. Alternatively, you can microwave the whole squash for 2-3 minutes to soften the skin slightly, making it easier to peel.
-
Cut the peeled squash in half lengthwise. Use a spoon to scoop out and discard the seeds and any stringy fibers from the center of each half.
-
Cut the squash halves into 3/4 inch cubes. Consistency in size ensures even cooking.
-
Place the cubed squash onto a baking sheet. A rimmed baking sheet is recommended to prevent any melted butter from dripping into your oven.
-
In a small bowl, melt the unsalted butter. Pour the melted butter over the squash cubes.
-
Sprinkle the packed brown sugar, kosher salt, and fresh ground black pepper over the squash and butter.
-
Toss all the ingredients together thoroughly to ensure that each squash cube is coated with the butter, brown sugar, salt, and pepper. Spread the squash in a single layer on the baking sheet. Avoid overcrowding the pan, as this will steam the squash instead of roasting it. If necessary, use two baking sheets.
-
Roast the squash in the preheated oven for 30 minutes, or until the squash is very tender. To test for doneness, pierce a cube with a fork. It should slide in easily with little to no resistance.
-
While roasting, turn the squash once, about halfway through the cooking time (after 15 minutes), to ensure even cooking. Keep a close eye on the squash to prevent it from browning too much. The goal is to caramelize, not burn.
-
Once the squash is tender, transfer it along with any pan juices to a large mixing bowl. The pan juices are full of flavor and will contribute to the overall richness of the mashed squash.
-
Using an electric mixer, mix the squash until smooth. Start on a low speed to avoid splattering, then increase to medium speed. It should have the consistency of mashed potatoes.
-
Gradually add the half-and-half (or evaporated milk) while mixing until you reach the desired consistency. Add more liquid if needed, a tablespoon at a time, until you achieve a smooth, creamy texture.
-
Season to taste with additional salt and pepper, if needed. Remember, the salt enhances the sweetness of the squash.
-
Serve the mashed butternut squash hot.
Expert Tips & Tricks
-
Roasting for Richness: Roasting the squash brings out its natural sweetness and adds a depth of flavor that you simply can’t achieve with boiling or steaming.
-
Brown Sugar Boost: The brown sugar not only adds sweetness but also helps to caramelize the squash during roasting, creating those delicious, slightly crispy edges.
-
Don’t Overcrowd the Pan: Giving the squash cubes enough space on the baking sheet allows them to roast properly, resulting in a more flavorful and less mushy final product.
-
Spice it Up: For an extra layer of flavor, try adding a pinch of ground cinnamon, nutmeg, or ginger to the squash before roasting.
-
Make-Ahead Magic: You can roast the squash ahead of time and store it in the refrigerator for up to 3 days. Simply reheat it in the oven or microwave before mashing.
-
Silky Smooth Secrets: For the ultimate creamy texture, consider using a food processor or immersion blender instead of an electric mixer. Just be careful not to over-process, as this can make the squash gummy.
-
If you don’t have brown sugar on hand, you can substitute with granulated sugar, or maple syrup.
Serving & Storage Suggestions
Serve the mashed butternut squash hot as a side dish alongside roasted chicken, pork, or turkey. It’s also a fantastic addition to vegetarian meals. Garnish with a sprinkle of fresh herbs, such as sage or thyme, for an elegant touch.
Leftover mashed butternut squash can be stored in an airtight container in the refrigerator for up to 3-4 days. To reheat, microwave it in short intervals, stirring in between, or warm it gently in a saucepan over low heat. You can also freeze mashed butternut squash for longer storage. Thaw it in the refrigerator overnight before reheating.
Nutritional Information
| Nutrient | Amount per Serving | % Daily Value |
|---|---|---|
| Calories | 320.5 kcal | N/A |
| Calories from Fat | N/A | N/A |
| Total Fat | 13.1 g | 20% |
| Saturated Fat | 8.1 g | 40% |
| Cholesterol | 34.3 mg | 11% |
| Sodium | 314.1 mg | 13% |
| Total Carbohydrate | 53.8 g | 17% |
| Dietary Fiber | 7.6 g | 30% |
| Sugars | 17.2 g | N/A |
| Protein | 4.2 g | 8% |
Note: Nutritional information is an estimate and may vary based on specific ingredients and preparation methods.
Variations & Substitutions
-
Vegan Delight: Substitute the butter with vegan butter or olive oil and use non-dairy milk, such as almond milk or soy milk, instead of half-and-half or evaporated milk.
-
Spice It Up: Add a pinch of cayenne pepper or a dash of hot sauce for a spicy kick.
-
Herb Infusion: Infuse the butter with fresh herbs, such as sage or rosemary, before melting it.
-
Sweet and Savory: Add a drizzle of maple syrup or a sprinkle of toasted pecans for a touch of sweetness and crunch.
-
Other Squash Varieties: While this recipe is specifically for butternut squash, you can also use other winter squash varieties, such as acorn squash or kabocha squash, with similar results.
FAQs (Frequently Asked Questions)
Q: Can I use frozen butternut squash for this recipe?
A: Yes, you can use frozen butternut squash, but be sure to thaw it completely and pat it dry before roasting to remove excess moisture.
Q: How do I know when the butternut squash is done roasting?
A: The butternut squash is done roasting when it’s very tender and easily pierced with a fork. It should also have slightly caramelized edges.
Q: Can I make this recipe ahead of time?
A: Yes, you can roast the squash ahead of time and store it in the refrigerator for up to 3 days. Simply reheat it before mashing.
Q: Can I freeze mashed butternut squash?
A: Yes, you can freeze mashed butternut squash for longer storage. Thaw it in the refrigerator overnight before reheating.
Q: What can I do if my mashed butternut squash is too thick?
A: If your mashed butternut squash is too thick, simply add a little more half-and-half, evaporated milk, or even a splash of water, until you reach the desired consistency.
Final Thoughts
This recipe for Mashed Butternut Squash isn’t just about cooking; it’s about creating a memory, a moment of warmth and comfort shared around the table. The vibrant color and sweet, earthy flavor are a celebration of autumn’s bounty. I encourage you to try this recipe and experience the simple joy of transforming humble ingredients into a dish that nourishes both body and soul. Don’t be afraid to experiment with variations and make it your own. And please, share your feedback – I’d love to hear how it turns out! Pair it with a crisp white wine for a truly delightful culinary experience. Happy cooking!