
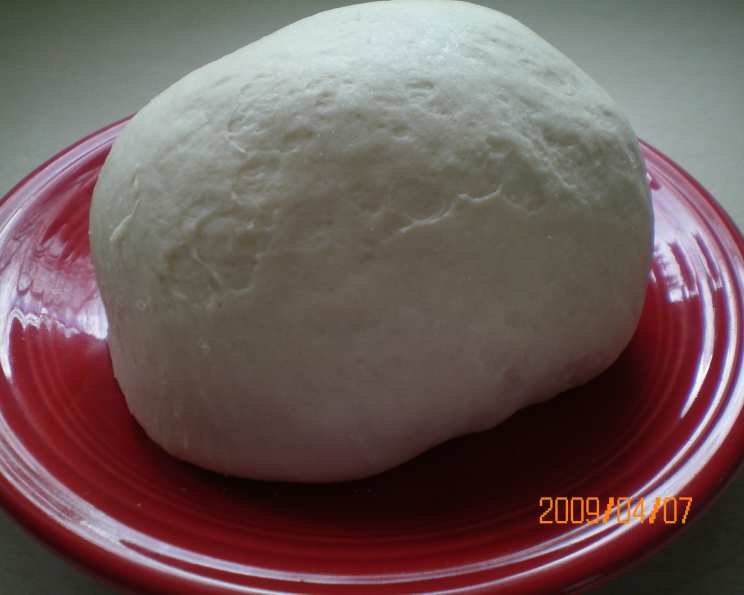
Master Dough for Bread: Your Gateway to Baking Bliss
The aroma of freshly baked bread is, without a doubt, one of the most comforting and evocative scents in the world. I remember as a child, the sheer joy of walking into my grandmother’s kitchen on a Sunday morning, the air thick with the warm, yeasty fragrance of her homemade loaves. She had a magical touch, transforming simple ingredients into golden, crusty bread that we devoured with gusto. It wasn’t just the taste; it was the feeling of love and care that permeated every slice. This master dough recipe reminds me of those cherished memories, and I’m thrilled to share it with you so you can create your own baking traditions.
Recipe Overview:
- Prep Time: 15 minutes
- Cook Time: Varies (depending on the bread type)
- Total Time: Varies (plus 2 hours rise time)
- Servings: Varies (makes one 20-ounce ball of dough)
- Yield: Approximately 1 loaf of bread, pizza crust, or a batch of rolls
- Dietary Type: Vegetarian
Ingredients:
- 1 (1/4 ounce) package active dry yeast
- 3/4 cup warm water (105 – 110 degrees F.)
- 1 teaspoon sugar
- 1/4 cup corn oil
- 2 1/2 cups all-purpose flour
- 2 teaspoons salt
- 1 teaspoon olive oil
Equipment Needed:
- Mixing Bowl
- Measuring Cups and Spoons
- Stand mixer (optional)
- Plastic Wrap
- Kitchen Towel
- Deep bowl for rising
Instructions:
-
In a mixing bowl, dissolve the yeast with the warm water and sugar. Let it sit for 5-10 minutes to allow the yeast to activate. This process, called proofing, ensures your yeast is alive and ready to leaven the dough. You’ll know it’s ready when it gets foamy. If the yeast doesn’t foam, it may be old or the water was too hot, which can kill the yeast. Start again with fresh yeast!
-
Add the corn oil to the yeast mixture and blend.
-
Add the flour and salt to the liquid ingredients.
-
Mix thoroughly. If using a stand mixer, mix for 4 minutes at medium speed until the dough is smooth and pliable. The dough should pull away from the sides of the bowl. If kneading by hand, knead on a lightly floured surface for 7 to 8 minutes. A good dough will be elastic and spring back when you poke it.
-
Turn the dough out of the bowl and knead by hand for two additional minutes. This final kneading step helps develop the gluten further, resulting in a better texture in the final product.
-
Add the olive oil to a deep bowl.
-
Place the dough ball into the bowl and turn it twice to coat it with the oil. This prevents the dough from drying out as it rises.
-
Cover the bowl with plastic wrap and a kitchen towel. The plastic wrap helps retain moisture, while the towel provides a dark, warm environment for the dough to rise.
-
Let the dough rise for two hours. Find a warm spot in your kitchen for the dough to rise. A slightly warm oven (turned off!) or a sunny windowsill are good options.
-
Do not punch it down after the first rise. This is a crucial step! Punching down the dough releases the gases that have formed, and we want to retain those for a light and airy texture.
-
Spread and push the dough ball across the bottom of your desired pan, shaping it according to your recipe. This master dough can be used for various creations, such as pizza crust, loaves of bread, or dinner rolls.
-
At this stage, the dough can be put in the refrigerator and allowed to rise slowly overnight. A slow, cold rise develops deeper flavor in the dough. Take the dough out of the refrigerator at least an hour before you are ready to use it to allow it to warm up slightly.
-
Baking: The baking time and temperature will vary depending on what you are making. For a basic loaf of bread, preheat the oven to 375°F (190°C) and bake for 25-30 minutes, or until golden brown and the internal temperature reaches 200-210°F (93-99°C). For pizza, bake at a higher temperature, around 450°F (232°C), for 12-15 minutes. Dinner rolls will take less time, about 15-20 minutes at 375°F (190°C).
Expert Tips & Tricks:
- Temperature is key: Ensure your water is between 105-110°F (40-43°C) to activate the yeast properly. Too hot and you’ll kill the yeast; too cold and it won’t activate. A kitchen thermometer is a worthwhile investment for baking.
- Don’t over-knead: Over-kneading can result in tough bread. Stop kneading when the dough is smooth and elastic.
- Cold Fermentation: For a richer, more complex flavor, let the dough rise in the refrigerator overnight.
- Add herbs and spices: Incorporate herbs like rosemary, thyme, or oregano into the dough for added flavor. Spices like garlic powder or onion powder can also enhance the taste.
- Shiny Crust: For a shiny crust, brush the loaf with an egg wash (1 egg beaten with 1 tablespoon of water) before baking.
- Scoring: Score the top of the loaf with a sharp knife or lame before baking to control expansion and prevent cracking.
Serving & Storage Suggestions:
Serve your freshly baked bread warm with butter, olive oil, or your favorite spreads. It’s also delicious as a side to soups, salads, and pasta dishes.
- Room Temperature: Store baked bread in a breadbox or airtight container at room temperature for up to 2-3 days.
- Refrigerator: For longer storage, wrap the bread tightly in plastic wrap and store it in the refrigerator for up to a week.
- Freezer: To freeze bread, slice it first (if desired), wrap it tightly in plastic wrap, and then place it in a freezer bag. Frozen bread can last for up to 2-3 months.
- Reheating: Reheat bread by wrapping it in foil and baking it in a preheated oven at 350°F (175°C) for 10-15 minutes, or until warmed through. You can also toast slices of bread as needed.
Nutritional Information:
(Approximate values, will vary based on loaf size and ingredients used)
| Nutrient | Amount per Serving (1/6 of dough) | % Daily Value |
|---|---|---|
| Calories | 280.5 kcal | N/A |
| Calories from Fat | 93 g | 33% |
| Total Fat | 10.4 g | 15% |
| Saturated Fat | 1.4 g | 6% |
| Cholesterol | 0 mg | 0% |
| Sodium | 777.3 mg | 32% |
| Total Carbohydrate | 40.6 g | 13% |
| Dietary Fiber | 1.5 g | 6% |
| Sugars | 0.8 g | 3% |
| Protein | 5.5 g | 11% |
Variations & Substitutions:
- Whole Wheat Bread: Substitute half of the all-purpose flour with whole wheat flour for a healthier, nuttier loaf.
- Herb Bread: Add 1-2 tablespoons of chopped fresh herbs, such as rosemary, thyme, or oregano, to the dough during the mixing process.
- Garlic Bread: Mix 2-3 cloves of minced garlic and 2 tablespoons of melted butter into the dough before the first rise.
- Sweet Dough: Add 2-3 tablespoons of sugar and 1 teaspoon of vanilla extract to the dough for a sweeter bread, perfect for rolls or cinnamon buns.
- Gluten-Free: Substitute the all-purpose flour with a gluten-free all-purpose flour blend. Note that the texture and rising time may vary.
FAQs (Frequently Asked Questions):
Q: Can I use bread flour instead of all-purpose flour?
A: Yes, you can use bread flour for a chewier texture. Bread flour has a higher protein content, which results in more gluten development.
Q: Can I make this dough in a bread machine?
A: Yes, you can adapt this recipe for a bread machine. Follow your machine’s instructions for adding the ingredients and selecting the dough cycle.
Q: How do I know if my dough has risen enough?
A: The dough should have doubled in size and feel light and airy. You can also do the poke test: gently poke the dough with your finger. If the indentation slowly springs back, it’s ready to bake.
Q: What if my dough doesn’t rise?
A: Ensure your yeast is fresh and that the water is at the correct temperature. Also, check that your rising environment is warm enough. If the dough still doesn’t rise, it may be necessary to start over with fresh yeast.
Q: Can I freeze the unbaked dough?
A: Yes, you can freeze the unbaked dough after the first rise. Wrap it tightly in plastic wrap and then in a freezer bag. Thaw the dough in the refrigerator overnight before shaping and baking.
Final Thoughts:
Baking bread from scratch may seem intimidating at first, but this master dough recipe simplifies the process, making it accessible to bakers of all skill levels. The satisfaction of creating a beautiful, aromatic loaf of bread is truly rewarding. Don’t be afraid to experiment with different variations and add your own personal touch. Share your creations with family and friends, and enjoy the warmth and comfort that only homemade bread can provide. Happy baking!