
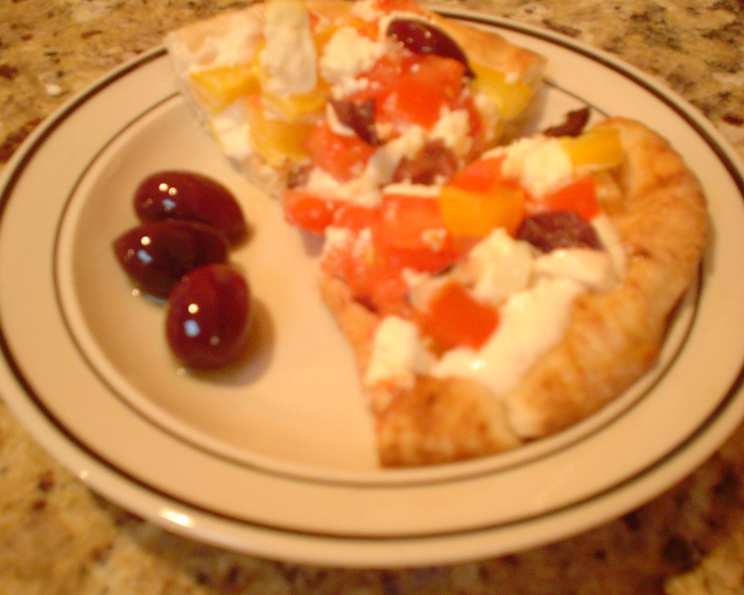
Mediterranean Pita Triangles: A Taste of Sunshine
The scent of warm pita, mingled with the bright aromas of tomatoes, olives, and creamy feta, instantly transports me back to a tiny taverna perched on a cliffside in Santorini. I remember sharing a plate of similar triangles with friends, the Aegean Sea sparkling below us, as we savored the simple perfection of fresh, local ingredients. The sun-drenched flavors of the Mediterranean have always held a special place in my heart, and this recipe for pita triangles is a delicious and easy way to bring that taste of sunshine to your own table.
Recipe Overview
- Prep Time: 10 minutes
- Cook Time: 8 minutes
- Total Time: 18 minutes
- Servings: 2 whole pitas / 12-16 triangles
- Yield: 12-16 triangles
- Dietary Type: Vegetarian
Ingredients
- 2 pita bread rounds, 7-inch size
- 4 tablespoons plain yogurt
- 1 tablespoon tahini
- 1 teaspoon lemon juice
- 1 tablespoon water
- 1 garlic clove, minced
- 1/2 yellow bell pepper
- 4 tablespoons tomatoes, diced
- 6 kalamata olives, thinly sliced
- 2 tablespoons feta cheese, crumbled
Equipment Needed
- Baking sheet
- Small bowl
- Knife
- Cutting board
Instructions
- Preheat your oven to 425 degrees F (220 degrees C). Make sure your baking sheet is ready.
- Place the whole pita breads directly onto the baking sheet. You do not need to grease the sheet.
- In a small bowl, mix together the yogurt, tahini, lemon juice, water, and minced garlic. Stir until the mixture is smooth and well combined. This will be your flavorful base.
- Spread half of the yogurt mixture evenly onto each pita bread, covering the surface completely. This layer will help the toppings adhere and add a creamy tang.
- Cut the yellow bell pepper lengthwise into thin strips, about 1/8 inch wide. Then, cut each strip in half. Arrange these pepper pieces decoratively on top of the yogurt-covered pitas. The goal is to distribute the peppers evenly and create an appealing presentation.
- Top each pita with half of the diced tomatoes, sliced olives, and crumbled feta cheese. Distribute the toppings evenly, making sure each bite will have a burst of flavor.
- Bake in the preheated oven for approximately 8 minutes, or until the pita bread begins to crisp up and the feta cheese is starting to melt and turn golden brown. Keep a close eye on them to prevent burning.
- Remove the pitas from the oven. Carefully cut each pita into 6-8 triangles using a sharp knife or pizza cutter.
- Serve the Mediterranean Pita Triangles warm. Alternatively, you can leave the pitas whole and serve them as individual pizzas.
Expert Tips & Tricks
- For extra flavor, consider adding a pinch of dried oregano or basil to the yogurt mixture.
- If you don’t have kalamata olives, black olives or green olives can be used as a substitute, though the flavor profile will be slightly different.
- Don’t overload the pitas with toppings! Too many toppings can make the pita soggy and difficult to eat. A light and even layer is key.
- To prevent the pita from becoming too hard during baking, brush the edges with a little olive oil before placing them in the oven.
- For a spicier kick, add a pinch of red pepper flakes to the yogurt mixture or sprinkle them on top of the finished triangles.
- If you are short on time, you can prep the yogurt sauce and chop the vegetables ahead of time. Store them separately in the refrigerator until you are ready to assemble the pitas.
- If your oven tends to bake unevenly, rotate the baking sheet halfway through the cooking time to ensure even browning.
- If you want a slightly charred and smoky flavor, broil the pita triangles for the last minute or two of cooking. Watch them carefully to prevent burning.
Serving & Storage Suggestions
These Mediterranean Pita Triangles are best served warm, straight from the oven. They make a fantastic appetizer for parties, a light lunch, or a flavorful snack. You can serve them with a side of hummus or a simple green salad for a more complete meal.
Leftovers can be stored in an airtight container in the refrigerator for up to 2 days. To reheat, you can either microwave them for a short period (about 30 seconds), or bake them in a preheated oven at 350 degrees F (175 degrees C) for a few minutes until heated through and crispy. Microwaving may make them a little softer, while baking will help them retain their crispness. I don’t recommend freezing them as it will alter the texture.
Nutritional Information
| Nutrient | Amount per Serving (approx. 2 triangles) | % Daily Value |
|---|---|---|
| Calories | 150 kcal | 8% |
| Total Fat | 7g | 11% |
| Saturated Fat | 3g | 15% |
| Cholesterol | 5mg | 2% |
| Sodium | 250mg | 11% |
| Total Carbohydrate | 15g | 5% |
| Dietary Fiber | 2g | 8% |
| Sugars | 3g | |
| Protein | 5g | 10% |
Variations & Substitutions
- Vegan: Substitute the yogurt with a plant-based yogurt alternative like soy or coconut yogurt. Use a vegan feta cheese.
- Gluten-Free: Use gluten-free pita bread.
- Protein Boost: Add cooked chicken, chickpeas, or falafel to the toppings for a more substantial meal.
- Vegetable Medley: Swap the yellow bell pepper for other vegetables like zucchini, red onion, or eggplant.
- Cheese Variations: Experiment with different types of cheese, such as mozzarella, provolone, or goat cheese.
- Herb Infusion: Add fresh herbs like parsley, mint, or dill to the toppings for a burst of freshness.
- Spicy Twist: Add a drizzle of hot sauce or a sprinkle of chili flakes to the finished triangles.
FAQs (Frequently Asked Questions):
Q: Can I use pre-minced garlic instead of fresh garlic?
A: Yes, you can use pre-minced garlic, but fresh garlic will provide a more intense and flavorful taste. Use about 1/2 teaspoon of pre-minced garlic as a substitute for 1 clove of fresh garlic.
Q: Can I make these pita triangles ahead of time?
A: It’s best to bake and serve these triangles fresh. You can prep the yogurt mixture and chop the vegetables ahead of time, but assemble and bake just before serving for the best texture.
Q: What if I don’t have tahini?
A: Tahini adds a distinct nutty flavor, but you can omit it if you don’t have any on hand. The yogurt mixture will still be flavorful with the lemon juice and garlic.
Q: How do I prevent the pita bread from getting soggy?
A: Be sure not to overload the pitas with too many toppings. Also, ensure the yogurt mixture is not too watery.
Q: Can I grill these pita triangles instead of baking them?
A: Yes, you can grill them! Place the assembled triangles on a preheated grill over medium heat and cook for a few minutes per side, until the pita is lightly charred and the cheese is melted.
Final Thoughts
I hope this recipe inspires you to create your own little slice of Mediterranean sunshine! These pita triangles are incredibly versatile and easy to customize to your liking. Don’t be afraid to experiment with different toppings and flavor combinations. I encourage you to try this recipe and share your creations with friends and family. And please, let me know what you think! I’d love to hear about your favorite variations and flavor combinations. Pair these triangles with a crisp glass of white wine and let the flavors transport you to a sun-drenched taverna by the sea.