
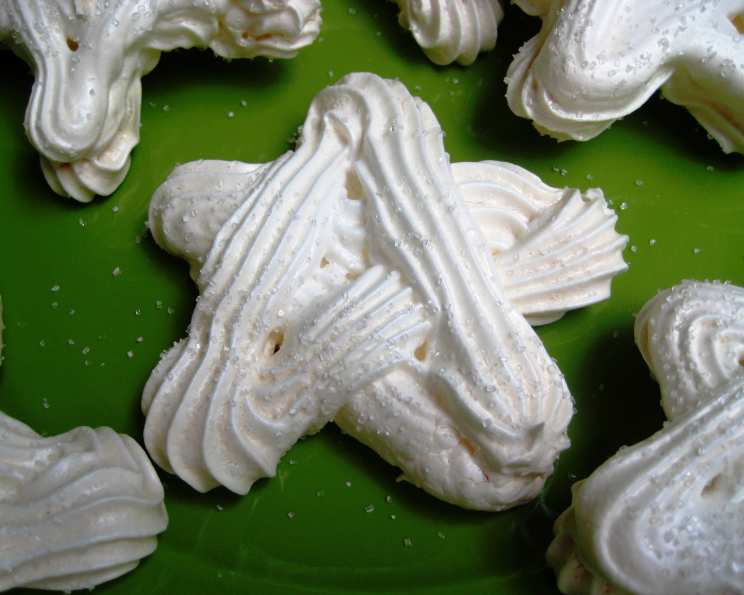
Meringue Snowflakes: A Winter’s Sweet Dream
I remember being a child, pressing my nose against the frosty windowpane, watching snowflakes dance and twirl in the winter air. Their intricate designs always filled me with wonder, and somehow, these delicate Meringue Snowflakes capture that same magical feeling. These cookies, with their light-as-air texture and sweet, melt-in-your-mouth flavor, are like edible winter dreams – perfect for adding a touch of sparkle to any holiday gathering or gifting to loved ones. The slight crackle as you take a bite, the pure, sugary sweetness…it’s pure nostalgia in edible form.
Recipe Overview
- Prep Time: 35 minutes
- Cook Time: 10 minutes
- Drying Time: 1 hour
- Total Time: 1 hour 45 minutes
- Yields: 12 snowflakes
- Dietary Type: Gluten-Free
Ingredients
- 2 egg whites
- 1/4 teaspoon cream of tartar
- 1 dash salt
- 1/2 cup superfine sugar
- Decorator sugar (white or light blue)
Equipment Needed
- Medium bowl
- Electric mixer
- Two large baking sheets
- Parchment paper or foil
- Decorating bag
- 3/8-inch round tip
- Wire racks
Instructions
- Place the egg whites in a medium bowl. Let them stand at room temperature for 30 minutes. This helps them whip up to a greater volume.
- Preheat your oven to 300 degrees F (150 degrees C). It’s crucial to have an accurate oven temperature for achieving the perfect meringue texture.
- Line two large baking sheets with parchment paper or foil. The paper or foil will prevent the meringues from sticking.
- Draw six 3 1/2-inch circles on each sheet of paper or foil. These circles will act as a guide for piping your snowflakes. If you are feeling confident you can skip this step!
- Set the prepared baking sheets aside.
- Add the cream of tartar and salt to the egg whites. These ingredients help stabilize the egg whites and create a firmer meringue.
- Beat with an electric mixer on medium speed until soft peaks form (the tips will curl over when you lift the beaters).
- Gradually add the 1/2 cup superfine sugar, 1 tablespoon at a time, beating on high speed until stiff peaks form (the tips will stand straight) and the sugar is nearly dissolved. This is a critical step. Adding the sugar gradually and beating well ensures a smooth, glossy meringue. Feel the meringue between your fingers; if it feels gritty, continue beating until the sugar is fully dissolved.
- Transfer the meringue to a decorating bag fitted with a 3/8-inch round tip.
- Pipe snowflake shapes on top of the circles on the parchment paper or foil. Get creative! You can pipe simple star shapes or more intricate designs. Search for inspiration online if you are new to piping.
- Sprinkle with decorator sugar (white or light blue) to add a touch of sparkle.
- Bake all of the meringues at the same time on separate oven racks for 10 minutes. This initial baking sets the meringues.
- Turn off the oven; let the meringues dry in the oven with the door closed for 1 hour. This is the key to achieving that crisp, dry meringue texture. Do not open the oven door during this time, as the sudden temperature change can cause the meringues to crack.
- Lift the meringues off the paper or foil carefully.
- Transfer to wire racks; cool completely. The meringues will continue to harden as they cool.
Expert Tips & Tricks
- Egg White Perfection: Ensure your mixing bowl and beaters are completely clean and free of any grease or oil. Even a tiny bit of fat can prevent the egg whites from whipping up properly. A quick wipe with lemon juice or vinegar can help.
- Superfine Sugar is Key: Don’t substitute granulated sugar for superfine sugar. Superfine sugar dissolves more easily, resulting in a smoother meringue. If you can’t find superfine sugar, you can make your own by processing granulated sugar in a food processor until finely ground.
- Preventing Cracks: Avoid opening the oven door during the drying process. If you live in a humid climate, you may need to extend the drying time.
- Flavor Infusions: Add a drop or two of extract (vanilla, almond, peppermint) to the meringue for a subtle flavor boost. Be careful not to add too much liquid, as it can affect the meringue’s consistency.
- Coloring the Meringue: For colored snowflakes, use gel food coloring rather than liquid food coloring, as gel colors are more concentrated and won’t add excess liquid.
Serving & Storage Suggestions
These Meringue Snowflakes make a beautiful and delicious addition to any dessert platter or holiday gathering. Serve them alongside a cup of hot chocolate or coffee for a truly comforting treat.
- Storage: Store the meringues in an airtight container at room temperature. They will last for several days, but are best consumed within 2-3 days for optimal crispness.
- Avoid Humidity: Meringues are susceptible to humidity, so avoid storing them in the refrigerator or in a humid environment. The refrigerator will cause them to become sticky and lose their crispness.
Nutritional Information
| Nutrient | Amount per Serving | % Daily Value |
|---|---|---|
| Calories | 35.3 kcal | N/A |
| Calories from Fat | 0 kcal | N/A |
| Total Fat | 0 g | 0% |
| Saturated Fat | 0 g | 0% |
| Cholesterol | 0 mg | 0% |
| Sodium | 22.1 mg | 0% |
| Total Carbohydrate | 8.4 g | 2% |
| Dietary Fiber | 0 g | 0% |
| Sugars | 8.4 g | 33% |
| Protein | 0.6 g | 1% |
Note: Nutritional information is an estimate and may vary based on specific ingredients and portion sizes.
Variations & Substitutions
- Citrus Burst: Add a teaspoon of lemon, lime, or orange zest to the meringue mixture for a refreshing citrus flavor.
- Chocolate Swirl: Gently swirl melted dark chocolate into the meringue before piping for a decadent touch.
- Peppermint Perfection: Crush peppermint candies and sprinkle them over the piped snowflakes before baking for a festive holiday flavor. Add a drop of peppermint extract to the meringue as well.
- Espresso Kick: Incorporate a teaspoon of instant espresso powder into the meringue for a subtle coffee flavor.
FAQs (Frequently Asked Questions)
Q: Why are my meringues sticky?
A: Sticky meringues are usually caused by humidity or underbaking. Ensure you store them in an airtight container and dry them completely in the oven.
Q: My meringues cracked during baking. What went wrong?
A: Cracking can occur if the oven temperature is too high or if the meringues are exposed to a sudden temperature change. Make sure your oven temperature is accurate and avoid opening the oven door during the drying process.
Q: Can I use regular granulated sugar instead of superfine sugar?
A: While you can use granulated sugar, superfine sugar is recommended for a smoother meringue. If using granulated sugar, make sure to beat the meringue until the sugar is completely dissolved.
Q: How long will these meringues last?
A: When stored properly in an airtight container at room temperature, meringues will last for several days, but are best consumed within 2-3 days for optimal crispness.
Q: Can I make these ahead of time?
A: Yes, you can make these meringues a day or two in advance. Store them in an airtight container at room temperature to maintain their crispness.
Final Thoughts
Now that you have the secrets to creating these delightful Meringue Snowflakes, I encourage you to try your hand at piping these edible winter wonders. Don’t be afraid to get creative with your designs and flavors. These little treats are perfect for sharing with loved ones, adding a touch of magic to your holiday celebrations, or simply enjoying as a sweet and delicate indulgence. So, gather your ingredients, preheat your oven, and let the snowflake-making begin! I’d love to hear how they turned out for you – share your creations and any personal twists you added! Happy baking!