
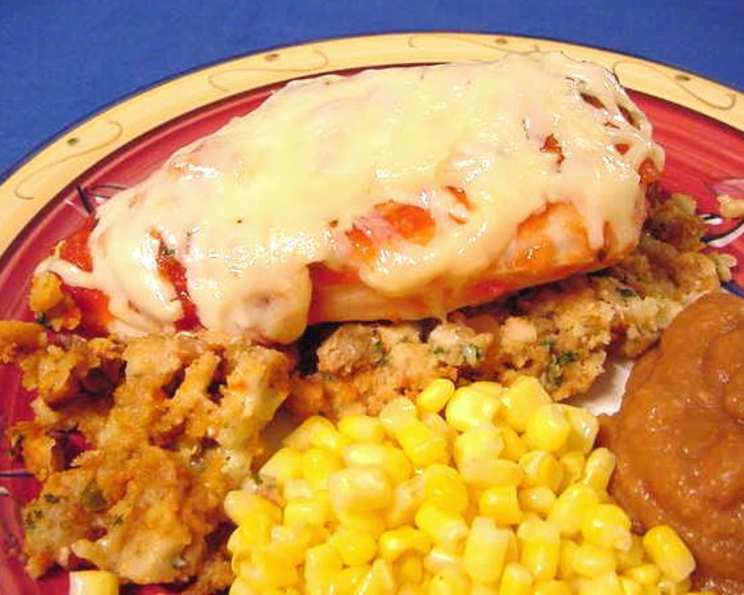
Mexican Chicken Casserole: A Taste of Home
I remember vividly the first time I tasted anything resembling this Mexican Chicken Casserole. It wasn’t in a fancy restaurant or a bustling market, but in the cozy kitchen of my college roommate, Maria. Her family recipe, though not exactly the same, carried that same warm, comforting essence. The aroma of salsa and seasoned chicken, baking together in the oven, filled our tiny apartment, promising a delicious escape from late-night study sessions. It became a staple, a shared experience, and a reminder of the simple joys of home-cooked food.
Recipe Overview
- Prep Time: 10 minutes
- Cook Time: 35 minutes
- Total Time: 45 minutes
- Servings: 6
- Yield: 1 casserole
- Dietary Type: Can be Gluten-Free (check stuffing mix)
Ingredients
- 1 1⁄4 cups hot water
- 3⁄4 cup salsa
- 1 tablespoon lowfat margarine (optional)
- 1 (6 ounce) package stove top chicken flavor stuffing mix
- 6 boneless skinless chicken breast halves
- 1⁄2 cup reduced-fat monterey jack cheese, shredded
Equipment Needed
- 2-quart baking pan
- Aluminum foil
Instructions
-
Preheat your oven to 350 degrees Fahrenheit (175 degrees Celsius). This ensures the casserole cooks evenly.
-
In a 2-quart baking pan, stir together the hot water, 1/4 cup of the salsa, margarine (if using), and the vegetable/seasoning packet from the stuffing mix. Make sure everything is well combined. The hot water will help dissolve the seasoning and create a flavorful base.
-
Next, stir in the stuffing crumbs to moisten them evenly with the liquid mixture. Ensure all the crumbs are saturated for the best texture.
-
Arrange the chicken breast halves over the stuffing mixture in a single layer. Be sure they are relatively evenly spaced to ensure even cooking.
-
Pour the remaining salsa over the chicken breasts, coating them well. The salsa will keep the chicken moist and add a burst of flavor.
-
Loosely cover the baking pan with aluminum foil. This will trap the moisture and prevent the chicken from drying out during baking.
-
Bake in the preheated oven for 35 minutes.
-
Remove the foil and sprinkle the shredded Monterey Jack cheese evenly over the casserole.
-
Bake for a further few minutes, or until the cheese is melted and bubbly. Watch it carefully to prevent burning.
-
Let stand for a few minutes before serving.
Expert Tips & Tricks
-
Pounding the chicken breasts to an even thickness before cooking helps them cook more evenly and quickly. Simply place the chicken between two sheets of plastic wrap and gently pound with a meat mallet or rolling pin.
-
If you want a crispier topping, you can broil the casserole for the last minute or two, but keep a close eye on it to prevent burning.
-
For an extra layer of flavor, consider adding a can of drained and rinsed black beans or corn to the stuffing mixture.
-
Don’t skip covering the dish with foil initially. This crucial step keeps the chicken incredibly moist.
-
Spice level adjustment: Feel free to use a spicier salsa if you prefer a kick.
Serving & Storage Suggestions
Serve the Mexican Chicken Casserole hot, directly from the baking dish. It pairs perfectly with a side of sour cream, guacamole, or a simple green salad. For a complete meal, add a scoop of rice or a side of refried beans.
Leftovers can be stored in an airtight container in the refrigerator for up to 3 days. To reheat, simply microwave individual portions or bake the entire casserole in a preheated oven at 350°F (175°C) until heated through. Be sure to cover with foil if reheating in the oven to prevent excessive browning. The casserole is not recommended for freezing, as the stuffing can become mushy upon thawing.
Nutritional Information
| Nutrient | Amount per Serving | % Daily Value |
|---|---|---|
| Calories | 262.9 kcal | N/A |
| Calories from Fat | 30 g | 11% |
| Total Fat | 3.3 g | 5% |
| Saturated Fat | 1 g | 5% |
| Cholesterol | 71.5 mg | 23% |
| Sodium | 763.9 mg | 31% |
| Total Carbohydrate | 22.9 g | 7% |
| Dietary Fiber | 1.2 g | 4% |
| Sugars | 3.9 g | N/A |
| Protein | 33.6 g | 67% |
Note: Nutritional information is an estimate and may vary based on specific ingredients and portion sizes.
Variations & Substitutions
- Gluten-Free: Use a gluten-free stuffing mix to make this casserole suitable for those with gluten sensitivities.
- Vegetarian Option: Substitute the chicken with black beans or crumbled tofu for a vegetarian version.
- Cheese Variety: Experiment with different cheeses like cheddar, pepper jack, or a Mexican cheese blend for a different flavor profile.
- Salsa Swap: Use your favorite salsa variety, from mild to hot, to customize the heat level.
- Creamy Version: For a creamier sauce, stir in a dollop of sour cream or Greek yogurt after baking.
FAQs (Frequently Asked Questions)
Q: Can I prepare this casserole ahead of time?
A: Yes, you can assemble the casserole up to the point of baking and store it covered in the refrigerator for up to 24 hours. Add about 10 minutes to the baking time if baking directly from the refrigerator.
Q: Can I use frozen chicken breasts?
A: Yes, but make sure the chicken is fully thawed before assembling the casserole to ensure even cooking.
Q: Can I add vegetables to this casserole?
A: Absolutely! Diced bell peppers, onions, or corn would be great additions. Add them when you stir in the stuffing crumbs.
Q: What can I use if I don’t have Monterey Jack cheese?
A: Cheddar cheese, Colby Jack, or a Mexican cheese blend would all be suitable substitutes.
Q: Is it necessary to use low-fat margarine?
A: No, you can use regular margarine or butter, or even omit it altogether. It adds a little richness but is not essential.
Final Thoughts
This Mexican Chicken Casserole is more than just a recipe; it’s a comforting hug in a dish. Its simplicity and deliciousness make it a perfect weeknight meal, and its versatility allows for endless customization. I encourage you to try it, make it your own, and share it with those you love. Don’t hesitate to adjust the flavors to your liking and let me know how it turns out! Perhaps you’ll even create your own cherished memories around this dish, just as I did.