
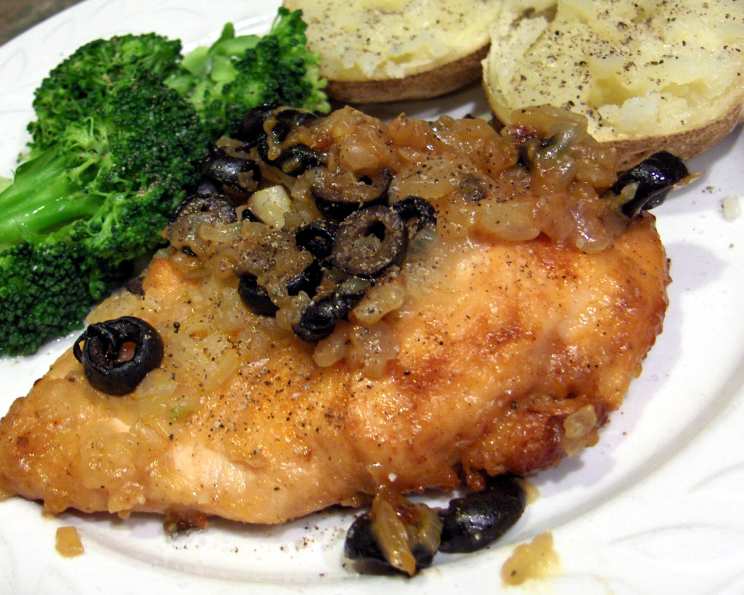
Fiesta in a Pan: My Mexican Chicken Story
My first taste of what I now call “Mexican Chicken” wasn’t in a restaurant, or even from a cookbook. It came from a potluck during my college days. It was bubbling hot, served in a communal casserole dish, and the aroma alone transported me to a sun-drenched plaza. The chicken was tender, coated in a subtly spicy blend, and the onions, soft and caramelized, added a touch of sweetness. It was comfort food elevated, and I knew I had to find the recipe. It was a long search, and many versions were tried, but finally, I arrived at the perfect combination of flavors. This version is simple, satisfying, and always a crowd-pleaser – a dish that continues to bring back memories of good friends and even better food.
Recipe Overview
- Prep Time: 20 minutes
- Cook Time: 1 hour 50 minutes
- Total Time: 2 hours 10 minutes
- Servings: 6-8
- Dietary Type: Gluten-Free (if using gluten-free flour)
Ingredients
- Chicken pieces (about 2 pounds, any type, such as frozen chicken breasts or thighs)
- 1 cup flour (all-purpose or gluten-free blend)
- 4 teaspoons chili powder
- ½ teaspoon oregano
- ¼ teaspoon salt
- ¼ teaspoon pepper
- ½ cup melted margarine or ½ cup melted butter (use unsalted butter for better control of the sodium level)
- ½ cup chopped onion (yellow or white)
- ½ cup chopped olives (optional, black or green, pitted)
- ½ cup water
Equipment Needed
- Large plastic bag
- Greased baking dish (9×13 inch recommended)
- Aluminum foil
- Measuring cups and spoons
Instructions
-
Begin by preheating your oven to 400 degrees F (200 degrees C). This ensures that the chicken cooks evenly and the flour coating crisps up nicely.
-
In the large plastic bag, combine the dry ingredients: flour, chili powder, oregano, salt, and pepper. Seal the bag and shake well to mix everything thoroughly. This creates a seasoned coating that infuses the chicken with flavor as it bakes.
-
Add the chicken pieces to the bag, seal it tightly, and shake vigorously until each piece is fully coated with the flour mixture. This ensures that the chicken is evenly seasoned and develops a delicious crust in the oven. For best results, ensure that the chicken pieces aren’t too wet when added to the bag. Patting them dry with paper towels can help.
-
Place the coated chicken in a greased baking dish. A 9×13 inch dish works well, but any similar sized baking dish will do. Make sure the chicken pieces are arranged in a single layer for even cooking.
-
Drizzle or pour the melted margarine/butter evenly over the chicken. If using a liquid spray butter, ensure all pieces are coated. The fat helps to crisp the coating and adds richness to the dish.
-
Cover the baking dish tightly with aluminum foil. This traps moisture and helps the chicken cook through without drying out.
-
Bake in the preheated oven for 1 hour. This allows the chicken to cook thoroughly.
-
After the first hour, carefully remove the foil. Scatter the chopped onions and olives (if using) over the chicken. The onions will caramelize and add a subtle sweetness, while the olives provide a salty, briny counterpoint.
-
Pour the water into the baking dish. The water helps to create a slightly saucy consistency and prevents the chicken from drying out during the final stage of baking.
-
Re-cover the baking dish with foil and return it to the oven. Bake for an additional 50 minutes. This final baking period allows the flavors to meld together and the chicken to become even more tender.
-
After 50 minutes, remove from the oven and let rest for about 10 minutes before serving. This allows the juices to redistribute, resulting in a more flavorful and moist chicken.
Expert Tips & Tricks
- Spice Level: Adjust the amount of chili powder to suit your taste. For a milder flavor, use less chili powder; for a spicier kick, add a pinch of cayenne pepper.
- Chicken Variation: This recipe works well with various cuts of chicken. Thighs tend to be more forgiving and stay moist, while breasts can be slightly drier if overcooked. Adjust cooking time accordingly. Bone-in, skin-on chicken will add more flavor and richness, but require a longer cooking time.
- Make-Ahead: You can prepare the chicken up to step 4 ahead of time. Cover the baking dish and refrigerate for up to 24 hours. Add the remaining ingredients just before baking.
- Browning: For extra browning, remove the foil during the last 15 minutes of baking. This will help the chicken and onions caramelize even further.
Serving & Storage Suggestions
Serve the Mexican Chicken hot, straight from the oven. It pairs beautifully with classic Mexican sides like Mexican rice, refried beans, and a dollop of sour cream or guacamole. Garnish with fresh cilantro for a burst of freshness.
Leftovers can be stored in an airtight container in the refrigerator for up to 3-4 days. To reheat, microwave until heated through, or bake in a preheated oven at 350°F (175°C) until warmed. For longer storage, freeze the cooked chicken in a freezer-safe container for up to 2-3 months. Thaw in the refrigerator overnight before reheating.
Nutritional Information
| Nutrient | Amount per Serving (estimated) | % Daily Value |
|---|---|---|
| Calories | 320 kcal | 16% |
| Total Fat | 18g | 28% |
| Saturated Fat | 5g | 25% |
| Cholesterol | 85mg | 28% |
| Sodium | 450mg | 19% |
| Total Carbohydrate | 15g | 5% |
| Dietary Fiber | 2g | 7% |
| Sugars | 3g | – |
| Protein | 25g | 50% |
Note: Nutritional information is an estimate and can vary based on specific ingredients and portion sizes.
Variations & Substitutions
- Vegetarian Option: Substitute the chicken with firm tofu or black beans for a vegetarian version. Adjust cooking time accordingly.
- Spicier Version: Add a pinch of cayenne pepper to the flour mixture, or include some chopped jalapeños with the onions.
- Healthier Option: Use olive oil instead of margarine or butter. You can also use boneless, skinless chicken breasts to reduce the fat content.
- Olive Alternatives: If you’re not a fan of olives, you can omit them entirely or substitute them with other vegetables like bell peppers or corn.
- Creamy Sauce: Stir in a can of cream of chicken or mushroom soup with the water for a creamier sauce.
- Gluten-Free: Be sure to use a gluten-free flour blend to make this recipe suitable for those with gluten sensitivities.
FAQs (Frequently Asked Questions)
Q: Can I use bone-in chicken for this recipe?
A: Yes, bone-in chicken works well but will require a longer cooking time. Increase the initial covered baking time to 1 hour and 15 minutes before adding the other ingredients.
Q: What can I substitute for the margarine or butter?
A: Olive oil is a great healthy substitute. You can also use a combination of butter and oil for a balanced flavor.
Q: Can I add other vegetables to this dish?
A: Absolutely! Bell peppers, corn, or diced tomatoes would be delicious additions. Add them along with the onions and olives.
Q: How do I know when the chicken is fully cooked?
A: The internal temperature of the chicken should reach 165°F (74°C). Use a meat thermometer to check the thickest part of the chicken.
Q: Is it necessary to cover the dish with foil during baking?
A: Covering the dish with foil helps to trap moisture and prevent the chicken from drying out. However, you can remove the foil during the last 15 minutes of baking for extra browning.
Final Thoughts
This Mexican Chicken is more than just a recipe; it’s an invitation to create memories in your own kitchen. Gather your friends and family, turn on some music, and let the aroma of chili powder and oregano fill your home. Don’t be afraid to experiment with the variations, make it your own, and most importantly, enjoy the process. I encourage you to try this recipe and share your thoughts and experiences. Maybe serve it with a pitcher of margaritas or a refreshing Agua Fresca!