
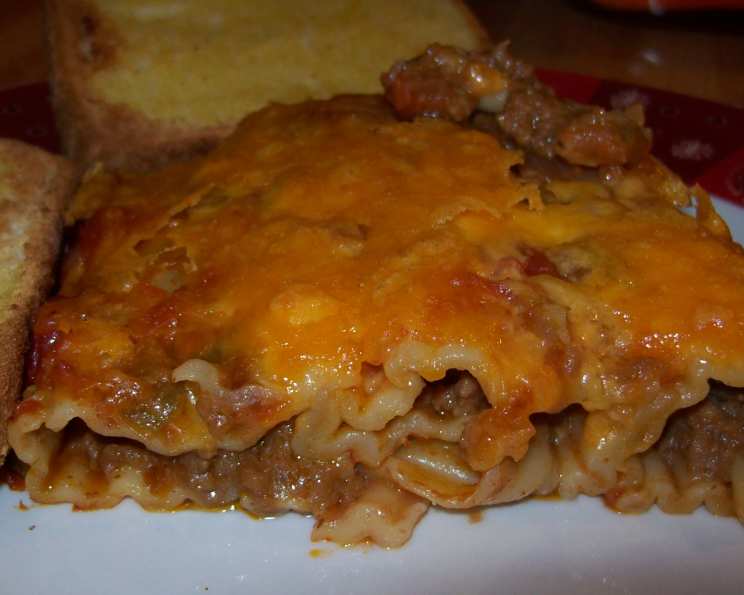
Mexican Manicotti: A Fiesta in Every Bite
I remember the first time I tasted anything remotely similar to this Mexican Manicotti. It was at a neighborhood potluck, and amidst the usual casseroles and potato salads, a dish resembling lasagna caught my eye. But the aroma! It wasn’t Italian; it was something warmer, spicier, deeply comforting. One bite of those creamy, cheesy, chili-infused layers, and I was hooked. This recipe is my take on that memory – a guaranteed crowd-pleaser that even the pickiest eaters will devour.
Recipe Overview
- Prep Time: 30 minutes
- Cook Time: 1 hour 10 minutes
- Total Time: 1 hour 40 minutes
- Servings: 6-8
- Dietary Type: Can be vegetarian or adapted for gluten-free.
Ingredients
- 1 lb lean ground beef (optional)
- 1 (16 ounce) can refried beans
- 2 ½ teaspoons chili powder
- 1 ½ teaspoons dried oregano
- 1 (8 ounce) package manicotti shells
- 2 ½ cups water
- 1 (16 ounce) jar picante sauce
- 2 cups sour cream
- 1 cup shredded Mexican blend cheese or cheddar cheese
- ¼ cup sliced green onion
- Sliced ripe black olives (optional)
Equipment Needed
- Large mixing bowl
- Greased 13x9x2 inch baking dish
- Measuring cups and spoons
- Spoon
Instructions
-
If using ground beef, brown it in a skillet over medium heat. Drain off any excess grease. Alternatively, omit the beef for a delicious vegetarian version.
-
In a large bowl, combine the browned ground beef (if using), refried beans, chili powder, and dried oregano. Mix thoroughly until well combined. This mixture forms the hearty and flavorful base of our manicotti.
-
Using a spoon, carefully fill each uncooked manicotti shell with the beef and bean mixture. Be generous with the filling, packing it in gently.
-
Arrange the filled manicotti shells in a greased 13x9x2 inch baking dish. Position them snugly next to each other to prevent them from drying out during baking.
-
In a separate bowl or measuring cup, combine the water and picante sauce. Stir well to create a flavorful liquid to cook the pasta.
-
Pour the water and picante sauce mixture evenly over the manicotti shells in the baking dish. Ensure that the shells are partially submerged in the sauce. This will help them cook through and absorb the delicious flavors.
-
Cover the baking dish tightly with aluminum foil. This will trap the steam and help the manicotti cook evenly.
-
Refrigerate the covered dish overnight. This step allows the flavors to meld together and the manicotti shells to soften slightly, resulting in a more tender final product. If you are short on time you can bake it right away, but the overnight refrigeration really makes a difference.
-
Remove the baking dish from the refrigerator 30 minutes before baking. This will allow the dish to come to room temperature slightly, preventing it from cracking when it goes into the hot oven.
-
Preheat your oven to 350°F (175°C).
-
Cover the baking dish again with the aluminum foil.
-
Bake at 350°F (175°C) for 1 hour. The foil helps to retain moisture and ensures that the manicotti shells cook through completely.
-
After 1 hour, carefully remove the aluminum foil from the baking dish.
-
Spoon the sour cream evenly over the top of the cooked manicotti shells. Spread it gently to create a creamy layer.
-
Sprinkle the shredded Mexican blend cheese or cheddar cheese over the sour cream.
-
Sprinkle the sliced green onion and sliced ripe black olives (if using) over the cheese. These add a pop of freshness and visual appeal.
-
Bake for an additional 5 to 10 minutes, or until the cheese is melted and bubbly. Keep a close eye on it to prevent the cheese from burning.
-
Remove the baking dish from the oven and let it rest for a few minutes before serving. This allows the flavors to settle and the manicotti to hold its shape better.
Expert Tips & Tricks
- Spice Level: Adjust the amount of chili powder and the type of picante sauce to control the level of heat. For a milder dish, use a mild picante sauce and reduce the chili powder. For a spicier dish, use a hot picante sauce and add a pinch of cayenne pepper.
- Make-Ahead Magic: This dish is perfect for making ahead of time. Assemble it completely and refrigerate it for up to 24 hours before baking. Add an extra 15 minutes to the baking time if baking straight from the fridge.
- Creamy Dreamy: For an extra creamy texture, substitute the sour cream with Mexican crema or a mixture of sour cream and cream cheese.
- Vegetarian Boost: To enhance the vegetarian version, add sautéed vegetables such as bell peppers, onions, and zucchini to the bean mixture. Corn is also a nice addition.
- Shell Game: If you have trouble filling the manicotti shells, try using a piping bag or a resealable plastic bag with a corner snipped off.
- Stuck Shells: If the manicotti shells stick together in the package, gently separate them by running them under warm water.
Serving & Storage Suggestions
Serve the Mexican Manicotti hot, straight from the oven. Garnish with extra green onions, olives, or a dollop of sour cream. It pairs beautifully with a simple side salad, Mexican rice, or cornbread.
Leftovers can be stored in an airtight container in the refrigerator for up to 3 days. To reheat, cover the dish with foil and bake at 350°F (175°C) until heated through, or microwave individual portions. You can also freeze the baked manicotti for up to 2 months. Thaw it overnight in the refrigerator before reheating.
Nutritional Information
| Nutrient | Amount per Serving | % Daily Value |
|---|---|---|
| Calories | 474 kcal | N/A |
| Calories from Fat | 212 kcal | N/A |
| Total Fat | 23.6 g | 36% |
| Saturated Fat | 14.1 g | 70% |
| Cholesterol | 56.5 mg | 18% |
| Sodium | 880.4 mg | 36% |
| Total Carbohydrate | 49.8 g | 16% |
| Dietary Fiber | 7.1 g | 28% |
| Sugars | 3.8 g | N/A |
| Protein | 17.6 g | 35% |
Nutritional information is an estimate and may vary based on specific ingredients and portion sizes.
Variations & Substitutions
- Gluten-Free: Use gluten-free manicotti shells.
- Dairy-Free: Substitute the sour cream with a plant-based sour cream alternative and use dairy-free cheese.
- Spicy Sausage: Replace the ground beef with chorizo or spicy Italian sausage for a bolder flavor.
- Chicken Manicotti: Use shredded cooked chicken instead of ground beef for a lighter option.
- Different Cheese Blend: Try using a blend of Monterey Jack, Pepper Jack, and cheddar cheese for a more complex flavor profile.
FAQs (Frequently Asked Questions)
Q: Can I use ricotta cheese in this recipe?
A: While traditional manicotti uses ricotta, this recipe is designed for a bean-based filling. Ricotta can be added, but it will change the flavor profile significantly.
Q: Can I use fresh manicotti shells?
A: This recipe is specifically for dried, uncooked manicotti shells. Fresh shells may require adjustments to the baking time.
Q: What if my manicotti shells are cracking during baking?
A: Ensure the shells are adequately covered with sauce and that the baking dish is tightly covered with foil. This helps retain moisture and prevent cracking.
Q: Can I add vegetables to the meat mixture?
A: Absolutely! Diced onions, bell peppers, corn, or zucchini would be delicious additions to the filling. Sauté them before mixing with the beef and beans.
Q: Is it necessary to refrigerate the dish overnight?
A: Refrigerating overnight allows the flavors to meld and the shells to soften, but it’s not strictly necessary. If you’re short on time, you can bake it immediately, but the results may not be quite as flavorful or tender.
Final Thoughts
So, there you have it – Mexican Manicotti, a dish that’s as comforting as it is flavorful. It’s a guaranteed crowd-pleaser, perfect for potlucks, family dinners, or any occasion that calls for a hearty, delicious meal. Don’t be afraid to get creative with the variations and substitutions, and most importantly, enjoy the process! I would love to hear your feedback and any personal twists you add to the recipe. Now, go ahead and create your own fiesta in a baking dish!