
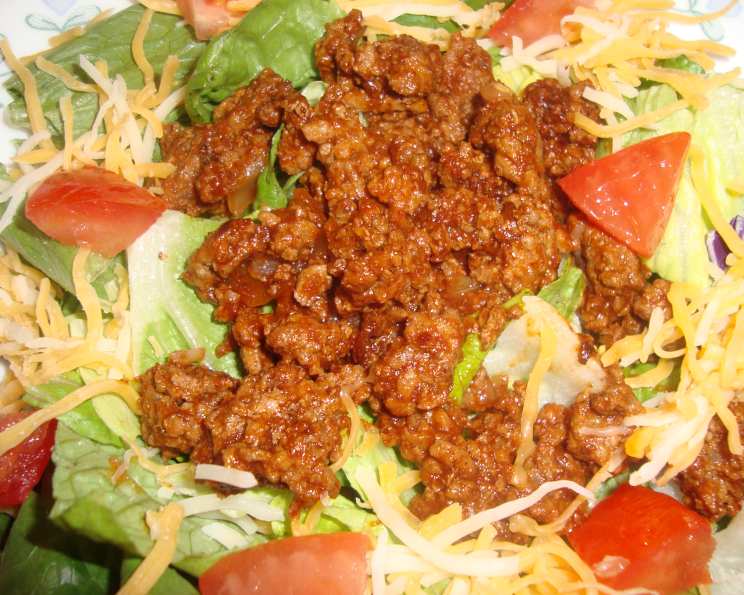
The Ultimate Versatile Mexican Meat Filling
The aroma always takes me back. As a kid, my grandma’s kitchen was a whirlwind of spices and simmering sauces. I’d perch on a stool, watching her expertly brown ground beef, the foundation for what seemed like a hundred different dishes. The scent of chili powder and cumin clinging to the air was a constant invitation, a promise of the delicious Mexican-inspired feast to come. She used this simple meat filling for everything, from crispy tacos piled high with toppings, to comforting burritos smothered in cheese, to spicy nachos perfect for game night. It was her secret weapon, and now, I’m thrilled to share it with you.
Recipe Overview
- Prep Time: 15 minutes
- Cook Time: 10 minutes
- Total Time: 25 minutes
- Yields: About 2 cups
- Dietary Type: Varies based on use. Can be made gluten-free and dairy-free depending on application.
Ingredients
- 1 lb lean ground beef or 1 lb 85% lean ground beef
- 1 medium onion, chopped
- 2 cloves garlic, minced
- ⅛ teaspoon cayenne
- 2 tablespoons chili powder
- ½ teaspoon ground cumin
- ¾ teaspoon kosher salt
- 1 cup tomato sauce
Equipment Needed
- Large skillet
- Spoon or spatula for stirring
Instructions
- In a large skillet, place the ground beef, chopped onion, minced garlic, and cayenne. Cook over medium heat.
- Stir the mixture frequently until the ground beef is no longer pink. This should take approximately 5 minutes. Break up the beef with your spoon or spatula as it cooks.
- Add the chili powder, ground cumin, and kosher salt to the skillet.
- Continue to cook, stirring constantly, for about 1 minute to allow the spices to bloom and release their flavors.
- Pour in the tomato sauce and thoroughly combine it with the meat mixture.
- Cook the mixture, stirring often, until it has thickened. This typically takes around 5 minutes. You’ll know it’s ready when most of the excess liquid has evaporated, and the sauce clings to the beef.
Expert Tips & Tricks
- Browning is key: Don’t overcrowd the skillet when browning the ground beef. If necessary, cook it in batches to ensure proper browning, which adds depth of flavor.
- Spice Level: Adjust the amount of cayenne to your liking. If you prefer a milder flavor, omit it altogether. For more heat, add a pinch of red pepper flakes along with the cayenne.
- Blooming the Spices: Cooking the spices for that brief minute after adding them to the beef makes a huge difference. It releases their essential oils and intensifies their flavor.
- Lean vs. Regular Ground Beef: Either lean or 85% lean ground beef works well in this recipe. If using regular ground beef with a higher fat content, drain off any excess grease after browning.
- Make-Ahead Tip: This meat filling can be made ahead of time and stored in the refrigerator for up to 3 days or frozen for longer storage. This is an excellent way to meal prep for busy weeknights.
- Thickening Issues: If your meat filling isn’t thickening as much as you’d like, simmer it for a few extra minutes, uncovered, to allow more liquid to evaporate. You can also add a tablespoon of cornstarch mixed with a tablespoon of water to the sauce to thicken it up quickly.
Serving & Storage Suggestions
This Mexican meat filling is incredibly versatile! Serve it in:
- Tacos: Pile it high in hard or soft taco shells with your favorite toppings like shredded lettuce, diced tomatoes, shredded cheese, sour cream, and salsa.
- Taco Salad: Layer it over a bed of shredded lettuce with crushed tortilla chips, beans, corn, and a zesty dressing.
- Nachos: Spread tortilla chips on a baking sheet, top with the meat filling and shredded cheese, and bake until the cheese is melted and bubbly. Add jalapeños, olives, and sour cream for extra flavor.
- Burritos: Wrap it in large flour tortillas with rice, beans, cheese, and your favorite burrito fillings.
- Quesadillas: Spread it between two tortillas with cheese and cook until the cheese is melted and the tortillas are golden brown.
- Enchiladas: Roll the meat filling in corn tortillas with cheese and cover in enchilada sauce before baking.
Storage:
- Refrigerator: Store leftovers in an airtight container in the refrigerator for up to 3 days.
- Freezer: For longer storage, freeze the meat filling in freezer-safe bags or containers for up to 3 months. To prevent freezer burn, press out as much air as possible before sealing.
- Reheating: Reheat the meat filling in a skillet over medium heat, stirring occasionally, until heated through. You can also microwave it in a microwave-safe dish. If the filling seems dry, add a splash of water or tomato sauce while reheating.
Nutritional Information
Please note that the following values are estimates and can vary based on specific ingredients and serving size.
| Nutrient | Amount per Serving (Estimated) | % Daily Value (Based on 2000 Calorie Diet) |
|---|---|---|
| Calories | 350 kcal | 18% |
| Total Fat | 20g | 31% |
| Saturated Fat | 8g | 40% |
| Cholesterol | 90mg | 30% |
| Sodium | 750mg | 31% |
| Total Carbohydrate | 15g | 5% |
| Dietary Fiber | 4g | 16% |
| Sugars | 6g | |
| Protein | 30g | 60% |
Variations & Substitutions
- Ground Turkey or Chicken: Substitute ground turkey or chicken for ground beef for a leaner option.
- Vegetarian/Vegan: Use crumbled plant-based ground meat substitute for a vegetarian or vegan version. Be sure to adjust cooking times as needed.
- Spicier: Add chopped jalapeños or a dash of hot sauce for extra heat.
- Smoked Paprika: Add a teaspoon of smoked paprika along with the other spices for a smoky flavor.
- Bell Peppers: Dice a bell pepper (any color) and add it to the skillet along with the onion for added flavor and nutrients.
- Corn: Add a can of drained corn to the meat filling for a touch of sweetness and texture.
- Beans: Stir in a can of drained and rinsed black beans or pinto beans for added fiber and protein.
- Diced Tomatoes: Replace half of the tomato sauce with a can of diced tomatoes for a chunkier texture.
FAQs (Frequently Asked Questions)
Q: Can I make this in a slow cooker?
A: Yes, you can adapt this recipe for a slow cooker. Brown the ground beef, onion, and garlic in a skillet first, then transfer to the slow cooker with the remaining ingredients. Cook on low for 4-6 hours or on high for 2-3 hours.
Q: How can I make this recipe gluten-free?
A: This recipe is naturally gluten-free, as long as you ensure that your chili powder doesn’t contain any gluten-based fillers. When using the filling in dishes like tacos or burritos, use gluten-free tortillas.
Q: Can I use fresh tomatoes instead of tomato sauce?
A: Yes, you can use fresh tomatoes. You’ll need about 2 cups of diced fresh tomatoes. Simmer the mixture for a longer period to allow the tomatoes to break down and thicken.
Q: How do I prevent the meat filling from being too greasy?
A: Use lean ground beef and drain off any excess grease after browning. If you’re still concerned about grease, you can rinse the cooked ground beef in a colander with hot water to remove even more fat.
Q: Can I add other vegetables to this recipe?
A: Absolutely! Feel free to add any vegetables you enjoy, such as diced bell peppers, zucchini, or carrots. Add them to the skillet along with the onion and garlic.
Final Thoughts
Now it’s your turn to create your own memories in the kitchen with this incredibly versatile Mexican meat filling. Whether you’re craving tacos, nachos, or a comforting burrito, this recipe is a guaranteed crowd-pleaser. Don’t be afraid to experiment with different spices, vegetables, and toppings to make it your own. Share your creations with family and friends, and let the delicious aroma of chili powder and cumin fill your home. And most importantly, let me know how it turns out! I’d love to hear about your personal twist on this classic dish. Pair it with a refreshing margarita or a cold Mexican beer for the ultimate fiesta experience.