
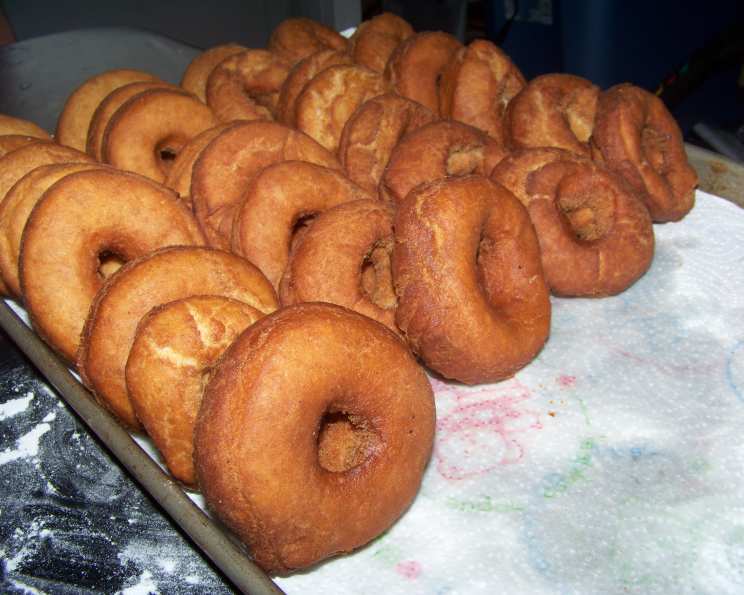
Michael’s Great-Grandmother’s Fry Cakes: A Taste of History
There’s a certain magic in recipes passed down through generations, a connection to the past that transcends mere ingredients and instructions. I’ll never forget the first time my husband, Michael, proudly presented me with a batch of these fry cakes. The scent alone – a comforting blend of warm spice and sweet dough – instantly transported me to a simpler time, a feeling intensified by the story behind them. These aren’t just any fry cakes; they’re a tangible link to his great-grandmother, a woman he never met but whose legacy lives on through this delicious treat. They’re a testament to the power of food to connect us to our heritage and to each other.
Recipe Overview
- Prep Time: 20 minutes
- Cook Time: 13 minutes
- Total Time: 33 minutes
- Yields: 30 Fry Cakes
- Serves: 30
- Dietary Type: Not specified
Ingredients
- 1 cup granulated sugar
- 3 tablespoons Crisco
- 1 teaspoon baking powder
- 1 teaspoon baking soda
- 3 1/2 cups flour
- 2 eggs
- 1 teaspoon ground cinnamon
- 1/2 teaspoon nutmeg
- 1 cup buttermilk (real buttermilk liquid – essential for the right texture)
- 1 pinch salt
- Crisco, for frying
Equipment Needed
- Large bowl
- Small bowl
- Floured surface
- Doughnut cutter (or other desired shape cutter)
- Large pot or deep fryer
- Thermometer
- Slotted spoon or spider
- Paper towels
Instructions
- Begin by ensuring the oil temperature in your pot or deep fryer reaches 375 degrees F. Maintaining this temperature is crucial for perfectly cooked fry cakes.
- In a small bowl, add the baking soda to the buttermilk. Allow this mixture to sit while you prepare the remaining ingredients. This step activates the baking soda and contributes to the light, airy texture of the fry cakes.
- In a large bowl, thoroughly mix together the granulated sugar, Crisco, and eggs. This is your wet ingredient base, so ensure it’s well combined.
- In a separate small bowl, combine the flour, baking powder, ground cinnamon, nutmeg, and salt. This dry ingredient mix will be gradually incorporated into the wet ingredients.
- Alternately mix the flour mixture and the buttermilk into the egg mixture. Begin by adding a portion of the flour mixture, followed by a portion of the buttermilk, and repeat until both are fully incorporated. The goal is to create a cohesive dough. If the mixture seems too wet, add a little more flour, a tablespoon at a time, until it holds together.
- Turn the dough out onto a lightly floured surface. Gently knead the dough until it springs back when pushed. Be careful not to over-knead, as this can result in tough fry cakes.
- Roll out the dough to your desired thickness, typically about 1/4 to 1/2 inch.
- Use a doughnut cutter (or any other shape cutter) to cut out the fry cakes. Reroll scraps as needed to minimize waste.
- Carefully drop the cut fry cakes into the hot Crisco, which should be maintained at 375 degrees F. Do not overcrowd the pot; fry in batches to ensure even cooking.
- Allow the fry cakes to cook for approximately 1 1/2 minutes on the first side, or until they rise to the surface and are golden brown.
- Turn the fry cakes and cook for another 1 1/2 minutes on the other side, until golden brown and cooked through.
- Use a slotted spoon or spider to remove the fry cakes from the hot oil and place them on paper towels to drain any excess grease.
Expert Tips & Tricks
- Buttermilk is Key: Don’t skimp on the real buttermilk! The acidity interacts with the baking soda, creating a tender crumb. Powdered buttermilk simply doesn’t deliver the same results.
- Temperature Control: The oil temperature is paramount. Too low, and the fry cakes will be greasy; too high, and they’ll burn on the outside before cooking through. Use a thermometer to monitor the temperature accurately.
- Don’t Overcrowd: Frying too many fry cakes at once lowers the oil temperature and results in uneven cooking. Fry in batches, ensuring the oil remains at 375 degrees F.
- Kneading with Care: Avoid over-kneading the dough, as this will develop the gluten too much, resulting in tough fry cakes. Knead just until the dough comes together and springs back slightly when pressed.
- Crisco Quality: Using a high-quality Crisco shortening will help prevent the fry cakes from absorbing too much oil. Fresh oil is also essential for the best flavor.
Serving & Storage Suggestions
Serve these fry cakes warm, dusted with powdered sugar or drizzled with a simple glaze made from powdered sugar and milk. They’re also delicious plain, enjoyed with a cup of coffee or tea.
Leftover fry cakes can be stored in an airtight container at room temperature for up to 2 days. For longer storage, refrigerate them for up to 4 days or freeze them for up to 2 months. To reheat, simply warm them in a 350°F oven for a few minutes, or microwave briefly until heated through. Frozen fry cakes can be thawed at room temperature before reheating.
Nutritional Information
| Nutrient | Amount per Serving | % Daily Value |
|---|---|---|
| Calories | 98.8 kcal | N/A |
| Calories from Fat | 16 g | 17% |
| Total Fat | 1.8 g | 2% |
| Saturated Fat | 0.6 g | 2% |
| Cholesterol | 14.4 mg | 4% |
| Sodium | 72.8 mg | 3% |
| Total Carbohydrate | 18.3 g | 6% |
| Dietary Fiber | 0.4 g | 1% |
| Sugars | 7.1 g | N/A |
| Protein | 2.2 g | 4% |
Note: Nutritional information is an estimate and may vary based on specific ingredients and preparation methods.
Variations & Substitutions
- Spice It Up: Add a pinch of ground cardamom, ginger, or cloves to the flour mixture for a more complex flavor profile.
- Citrus Zest: Incorporate the zest of an orange or lemon into the dough for a bright, citrusy twist.
- Glaze Options: Experiment with different glazes, such as chocolate, maple, or vanilla.
- Shape Variations: Use different cutters to create fun and festive shapes, especially for holidays.
- Filling Surprise: Before frying, cut a slit in the side of each fry cake and fill with a dollop of jam, pastry cream, or chocolate spread for an extra indulgent treat.
FAQs (Frequently Asked Questions)
Q: Why is real buttermilk so important in this recipe?
A: Real buttermilk’s acidity reacts with the baking soda, creating a light, airy texture that powdered buttermilk can’t replicate. It also adds a subtle tang that enhances the flavor.
Q: How do I know when the oil is at the correct temperature?
A: Use a thermometer to monitor the oil temperature. It should be consistently at 375 degrees F. If you don’t have a thermometer, you can test the oil by dropping a small piece of dough into it. If it browns quickly and evenly, the oil is ready.
Q: Can I bake these fry cakes instead of frying them?
A: While the texture will be different, you can bake them at 375 degrees F for about 12-15 minutes, or until golden brown. They won’t be as crispy as fried fry cakes, but it’s a healthier alternative.
Q: What can I do if my dough is too sticky to handle?
A: Add a little more flour, one tablespoon at a time, until the dough becomes easier to work with. Be careful not to add too much flour, as this can make the fry cakes tough.
Q: How do I prevent my fry cakes from becoming greasy?
A: Maintain the correct oil temperature (375 degrees F) and avoid overcrowding the pot. Also, make sure to drain the fry cakes thoroughly on paper towels after frying.
Final Thoughts
These fry cakes are more than just a delicious treat; they’re a connection to the past, a taste of heritage, and a reminder of the importance of family. Don’t be intimidated by the frying process; with a little practice and attention to detail, you’ll be whipping up batches of these golden goodies in no time. I encourage you to try this recipe, share it with your loved ones, and maybe even start your own family tradition. Pair them with a strong cup of coffee on a chilly morning or serve them as a sweet ending to a comforting meal. Enjoy!