
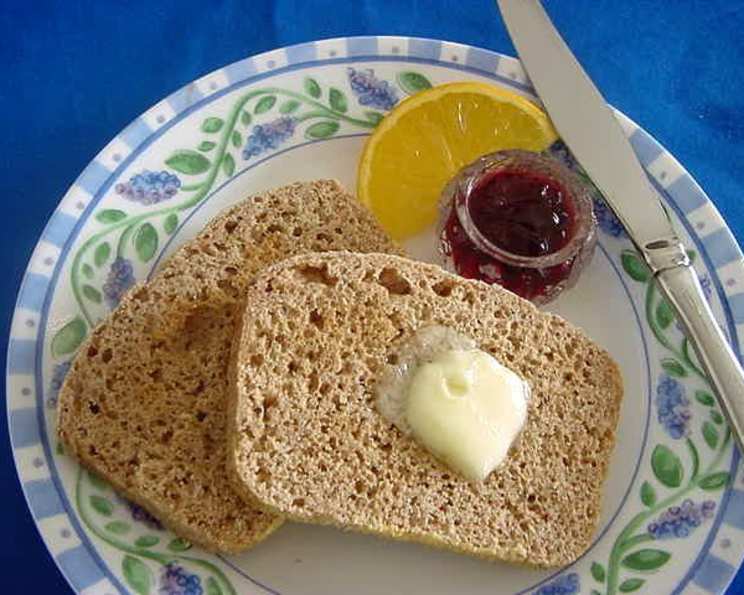
Microwave English Muffin Bread: A Kitchen Miracle
I remember being a young culinary student, constantly experimenting in my tiny apartment kitchen. One sweltering summer, the thought of turning on the oven for bread was simply unbearable. That’s when I stumbled upon the idea of microwave bread, a revelation that allowed me to enjoy fresh, homemade goodness without turning my apartment into a sauna. This Microwave English Muffin Bread brings back those memories – a testament to ingenuity and delicious simplicity. It’s a method that delivers a surprisingly authentic taste and texture, perfect for a quick breakfast or sandwich, especially on those days when convenience reigns supreme.
Recipe Overview
- Prep Time: 15 minutes
- Cook Time: 6.5 minutes per loaf
- Rise Time: 35-45 minutes
- Total Time: 56.5 – 66.5 minutes
- Yields: 2 loaves
- Dietary Type: Vegetarian
Ingredients
- 5 cups unsifted flour
- 2 tablespoons dry yeast
- 1 tablespoon sugar
- 2 teaspoons salt
- ¼ teaspoon baking soda
- 2 cups milk
- ½ cup water
- Cornmeal for dusting
Equipment Needed
- Large mixing bowl
- Two 8-inch glass loaf pans
- Microwave oven
- Large rectangle pan (for rising)
- Foil for wrapping
Instructions
-
In a large bowl, combine 3 cups of the unsifted flour, the dry yeast, sugar, salt, and baking soda. Make sure to whisk the dry ingredients well to evenly distribute the yeast and baking soda.
-
In a separate microwave-safe container or on the stovetop, heat the milk and water until it is warm to the touch, but not boiling. Aim for a temperature between 110-115°F (43-46°C), which is ideal for activating the yeast. If the mixture is too hot, it can kill the yeast, preventing the bread from rising properly.
-
Add the warm milk and water mixture to the bowl with the flour mixture. Mix well, using a wooden spoon or a dough whisk, until a smooth batter forms.
-
Stir in the remaining 2 cups of flour. The dough will be somewhat sticky, which is perfectly fine. Do not overmix; just ensure that the flour is fully incorporated.
-
Grease two 8-inch glass loaf pans thoroughly with cooking spray or butter. Generously sprinkle the bottom and sides of each pan with cornmeal. This prevents the bread from sticking and adds a delightful, slightly gritty texture to the crust, reminiscent of traditional English muffins.
-
Divide the batter evenly between the two prepared loaf pans, ensuring each pan is filled approximately halfway.
-
Place the loaf pans in a large rectangular pan. Fill the pan with warm water. This creates a humid environment that encourages the dough to rise.
-
Place the large pan, containing both the water bath and loaf pans, in a slightly warm oven (approximately 200°F or 93°C). This gentle warmth provides an ideal environment for proofing, which is key to a light and airy bread. You can achieve this by turning on the oven for a few minutes, then turning it off, leaving the door slightly ajar, or simply setting it to the lowest temperature setting.
-
Let the dough rise for 35-45 minutes, or until the dough has risen to the top of the pans. The rising time may vary depending on the ambient temperature, so keep a close eye on it. The goal is for the dough to nearly double in size.
-
Microwave one loaf pan at a time on High power for 6 ½ minutes. The glass pan is important because it will conduct heat well in the microwave, leading to even cooking. If the top appears too pale, you can microwave it for an additional 30 seconds, but be careful not to overcook, which can result in a tough texture.
-
Remove the cooked loaf from the microwave and let it cool in the pan for 5 minutes. This allows the bread to set slightly and prevents it from collapsing when you try to remove it.
-
Gently remove the bread from the pan and allow it to cool completely on a wire rack.
-
Slice the bread and serve. For optimal storage, wrap the bread tightly in foil and store it in the freezer. This will preserve its freshness and prevent it from drying out.
Expert Tips & Tricks
- For a richer flavor, try using brown sugar instead of white sugar.
- If you want a chewier texture, use bread flour instead of all-purpose flour.
- Adding a tablespoon of melted butter to the dough can enhance the flavor and texture.
- Consider adding herbs or spices like rosemary, thyme, or garlic powder to the dough for a savory twist.
- If you don’t have glass loaf pans, you can use microwave-safe ceramic loaf pans. Avoid metal pans, as they are not suitable for microwave cooking.
- To prevent the bread from becoming soggy, place a paper towel under the loaf pan while it is microwaving.
Serving & Storage Suggestions
This Microwave English Muffin Bread is fantastic served toasted with butter and jam, used in sandwiches, or as a base for eggs Benedict. Its slightly coarse texture makes it perfect for soaking up sauces and dips. To store, wrap tightly in foil and freeze for up to 2 months. When ready to use, thaw completely and toast for the best texture. It will keep for about 2-3 days at room temperature, but freezing is recommended for longer storage. You can also slice it before freezing, so you can easily grab a slice or two whenever you need it.
Nutritional Information
| Nutrient | Amount per Serving | % Daily Value |
|---|---|---|
| Calories | 676.65 kcal | N/A |
| Calories from Fat | N/A | N/A |
| Total Fat | 6.25 g | 9.5% |
| Saturated Fat | 3.05 g | 15.25% |
| Cholesterol | 17.1 mg | 5.5% |
| Sodium | 1307.9 mg | 54.5% |
| Total Carbohydrate | 130.35 g | 43.0% |
| Dietary Fiber | 5.45 g | 21.5% |
| Sugars | 3.55 g | N/A |
| Protein | 22.45 g | 44.5% |
Note: Nutritional information is an estimate and may vary based on specific ingredients and preparation methods.
Variations & Substitutions
- Dairy-Free: Substitute the milk with almond milk, soy milk, or oat milk. Ensure the non-dairy milk is also warmed before adding to the yeast mixture.
- Whole Wheat: Replace up to half of the all-purpose flour with whole wheat flour for a nuttier flavor and added fiber. You may need to add a little more liquid, as whole wheat flour tends to absorb more moisture.
- Sweet Bread: Add 1/4 cup of raisins, dried cranberries, or chopped nuts for a sweeter bread.
- Savory Bread: Incorporate 1/4 cup of shredded cheese, chopped olives, or sun-dried tomatoes for a savory twist.
- Gluten-Free: While I haven’t personally tested this recipe with gluten-free flour, you can experiment with a blend of gluten-free all-purpose flour and xanthan gum to mimic the texture of wheat flour. The rising time may be affected, so keep a close eye on it.
FAQs (Frequently Asked Questions)
Q: Can I use active dry yeast instead of instant yeast?
A: Yes, you can. However, you will need to proof the active dry yeast in the warm milk and water mixture for about 5-10 minutes before adding it to the other ingredients.
Q: Why is my bread dense and not rising properly?
A: This could be due to several reasons. Make sure your yeast is fresh and active, and that the milk and water mixture is not too hot (which can kill the yeast) or too cold (which won’t activate it). Also, ensure that you are not overmixing the dough, which can develop the gluten too much and result in a tough bread.
Q: Can I bake this bread in a regular oven instead of a microwave?
A: While this recipe is specifically designed for the microwave, you could try baking it in a preheated oven at 350°F (175°C) for about 25-30 minutes, or until a wooden skewer inserted into the center comes out clean.
Q: How can I make the bread crustier?
A: Microwaving doesn’t produce a very crusty loaf. However, you can slice the bread and toast it to achieve a crispier texture.
Q: Can I halve this recipe?
A: Yes, you can easily halve the recipe to make just one loaf. Simply divide all the ingredients by two and use one 8-inch glass loaf pan.
Final Thoughts
This Microwave English Muffin Bread is a true testament to the fact that delicious, homemade bread doesn’t always require hours of kneading and a hot oven. It’s a perfect solution for busy weeknights, unexpected guests, or simply when you’re craving a warm slice of bread without the fuss. I encourage you to give this recipe a try, experiment with different flavor variations, and share your creations with friends and family. Let me know how it turns out, and happy baking (or should I say, microwaving)!