
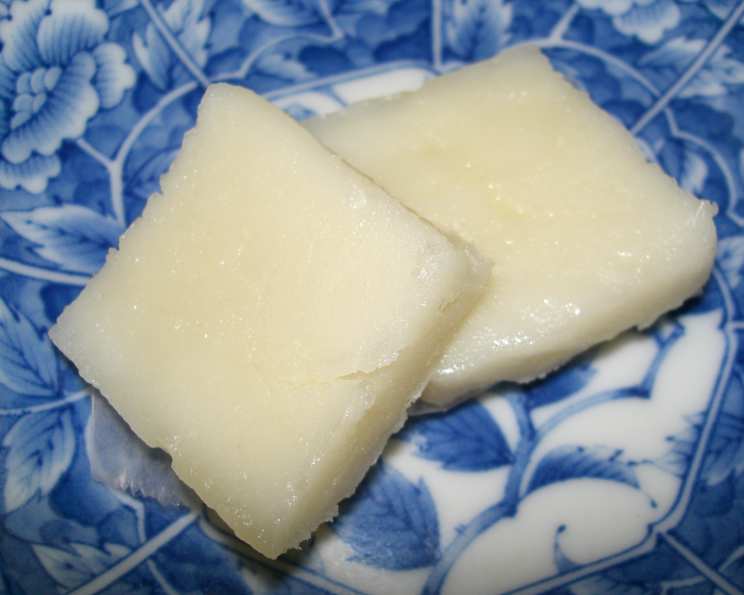
Microwave Mochi: A Taste of Childhood Simplicity
I can still picture it: tiny hands, dusted with a fine layer of kinako, carefully rolling wobbly squares of mochi on a sheet of plastic wrap. My daughter, Lily, was all of five years old, and her culinary creations were… adventurous, to say the least. She once decided that green food coloring was essential to every dish, resulting in a batch of shockingly verdant mochi that would make any traditionalist shudder. While her artistic choices may have been questionable, the joy on her face as she shared her microwave-made mochi was absolutely priceless. This simple recipe isn’t just about making mochi; it’s about creating those sweet, messy memories in the heart of your own kitchen.
Recipe Overview
- Prep Time: 5 minutes
- Cook Time: 5 minutes
- Total Time: 10 minutes
- Servings: 12
- Yield: About 12 pieces
- Dietary Type: Vegetarian, Gluten-Free (check kinako label)
Ingredients
- 1 cup water
- 1 cup sugar
- 1 cup mochiko sweet rice flour (rice flour)
- ½ teaspoon vanilla
- 2 drops red food coloring or 2 drops green food coloring (optional)
- Soybean flour (kinako), for coating
- Vegetable oil, to grease pan
Equipment Needed
- Microwave-safe pan (e.g., 8×8 inch square dish)
- Electric mixer
- Plastic wrap
- Plastic knife
Instructions
- In a microwave-safe bowl, combine the water, sugar, mochiko sweet rice flour, vanilla, and food coloring (if using).
- Using an electric mixer, mix the ingredients together until you have a smooth batter. Avoid overmixing; just ensure everything is well combined.
- Lightly grease your microwave-safe pan with vegetable oil. You can use a non-stick vegetable oil spray or simply brush the oil on.
- Pour the mochi batter into the prepared pan, spreading it evenly.
- Cover the pan tightly with plastic wrap. Ensure the plastic wrap is microwave-safe.
- Microwave on high for 5 minutes. If your microwave doesn’t have a rotating turntable, rotate the pan halfway through (after 2 ½ minutes) to ensure even cooking.
- Carefully remove the plastic wrap, being cautious of the hot steam escaping away from you.
- Allow the mochi to cool completely in the pan. Cooling is essential for easier handling and a better texture.
- Once cooled, use a plastic knife to cut the mochi into 12 equal-sized pieces. A plastic knife is recommended to prevent sticking.
- Place some kinako (soybean flour) on a sheet of plastic wrap.
- One piece at a time, gently roll each mochi square in the kinako until it is fully coated. This prevents sticking and adds a delicious nutty flavor.
- Serve and enjoy!
Expert Tips & Tricks
- Mochiko Choice: Using high-quality mochiko is key. Different brands can yield slightly different textures, so experiment to find your favorite.
- Microwave Wattage: Microwave cooking times can vary significantly depending on the wattage of your microwave. If the mochi is still too soft after 5 minutes, continue microwaving in 30-second intervals until it reaches the desired firmness. Conversely, if it seems to be cooking too quickly, reduce the power level of your microwave.
- Preventing Sticking: Make sure your pan is well-greased to prevent the mochi from sticking. You can also line the pan with parchment paper, leaving an overhang to easily lift the mochi out after cooking.
- Flavor Infusions: Experiment with different flavorings! A dash of almond extract, a teaspoon of matcha powder, or a hint of citrus zest can add exciting new dimensions to your mochi.
- Coloring Options: Gel food coloring generally provides more vibrant colors than liquid food coloring. However, use it sparingly, as too much can affect the texture of the mochi.
- Kinako Alternative: If you don’t have access to kinako, you can use toasted cornstarch as a substitute, though the flavor will be different.
Serving & Storage Suggestions
Microwave Mochi is best enjoyed fresh, as its texture tends to change over time. Serve it at room temperature or slightly chilled. Arrange the mochi on a plate, garnished with extra kinako for a visually appealing presentation.
- Room Temperature: If you plan to eat the mochi within a few hours, store it in an airtight container at room temperature.
- Refrigerator: For longer storage (up to 2 days), store the mochi in an airtight container in the refrigerator. Be aware that it may become slightly firmer.
- Freezer: For extended storage (up to 1 month), wrap each piece of mochi individually in plastic wrap and then place them in a freezer-safe bag or container. Thaw at room temperature before serving.
- Reheating: While not ideal, you can soften refrigerated or thawed mochi by microwaving it for a few seconds. Be careful not to overheat, as it can become rubbery.
Nutritional Information
Note: Estimated values may vary based on specific ingredients and serving size.
| Nutrient | Amount per Serving | % Daily Value |
|---|---|---|
| Calories | 85 kcal | 4% |
| Total Fat | 0.2 g | 0% |
| Saturated Fat | 0.1 g | 0% |
| Cholesterol | 0 mg | 0% |
| Sodium | 1 mg | 0% |
| Total Carbohydrate | 21 g | 7% |
| Dietary Fiber | 0 g | 0% |
| Sugars | 13 g | 26% |
| Protein | 0.5 g | 1% |
Variations & Substitutions
- Chocolate Mochi: Add 2 tablespoons of cocoa powder to the dry ingredients for a chocolatey twist. You can also drizzle melted chocolate over the finished mochi.
- Matcha Mochi: Add 1-2 teaspoons of matcha powder to the dry ingredients for a vibrant green color and earthy flavor.
- Ube Mochi: Incorporate 1-2 tablespoons of ube extract or powder to the batter for a beautiful purple hue and sweet, nutty taste.
- Coconut Mochi: Substitute half of the water with coconut milk for a richer, more tropical flavor.
- Fruit-Filled Mochi: After cutting the mochi into squares, flatten each piece slightly and fill it with a small piece of fresh fruit, such as strawberries or mangoes. Fold the mochi around the fruit and pinch the edges to seal.
FAQs (Frequently Asked Questions)
Q: Can I use regular rice flour instead of mochiko?
A: No, mochiko sweet rice flour is essential for achieving the chewy texture of mochi. Regular rice flour will result in a grainy, less elastic product.
Q: Why is my mochi sticky?
A: Mochi is naturally sticky. Coating it generously with kinako helps to prevent it from sticking to your hands and other surfaces. Make sure you cool it completely before cutting.
Q: How do I know when the mochi is done cooking?
A: The mochi is done when the center is firm to the touch. It should not be overly soft or jiggly. If it’s still too soft, microwave it for a few additional seconds at a time.
Q: Can I make this recipe without food coloring?
A: Absolutely! The food coloring is purely for aesthetic purposes and does not affect the taste or texture of the mochi.
Q: My mochi turned out rubbery. What did I do wrong?
A: Overcooking the mochi can cause it to become rubbery. Be careful not to microwave it for too long, and always follow the recommended cooking times as a starting point, adjusting based on your microwave’s wattage.
Final Thoughts
This Microwave Mochi recipe is a testament to the fact that delicious treats don’t always require hours in the kitchen. It’s a simple, satisfying, and surprisingly versatile recipe that’s perfect for a quick dessert or a fun family activity. So, gather your ingredients, grab your favorite food coloring (or not!), and prepare to create your own sweet memories. I encourage you to experiment with different flavor combinations and share your creations with friends and family. And don’t forget to let me know what you think – I’m always eager to hear about your culinary adventures! Pair it with a cup of green tea for a delightful and authentic experience.